Have you ever wondered what your feline friend gets up to when you're not around? Do you dream of capturing those hilarious mid-night escapades or the stealthy hunts in the garden? For years, cat owners have longed for a safe and reliable way to film their pets' adventures from their perspective, and now, with a little ingenuity and this guide, it's entirely possible! Forget expensive, bulky pet cameras; we'll show you how to craft a DIY cat camera collar that's both affordable and effective.
This ultimate guide will walk you through building your own miniature, lightweight, and secure camera collar, ensuring your cat's comfort and safety are paramount. We'll cover choosing the right camera, selecting appropriate materials for the collar, and assembling the device step-by-step. Ready to unlock the secrets of your cat's daily life? Let's dive into the detailed, illustrated instructions below.
Preparation and Safety Guidelines
- Breakaway cat collar
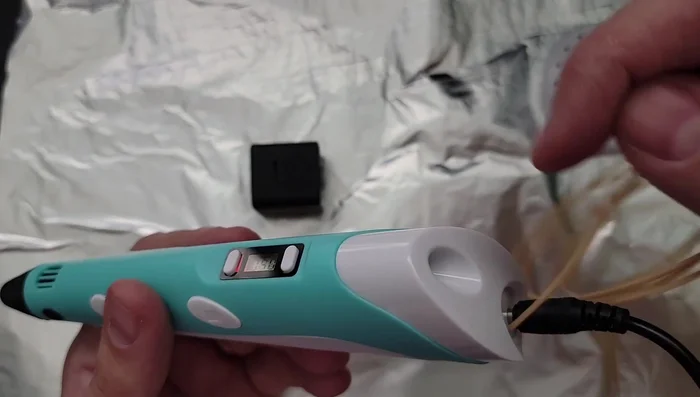
- SQ23 or SQ11 mini camera
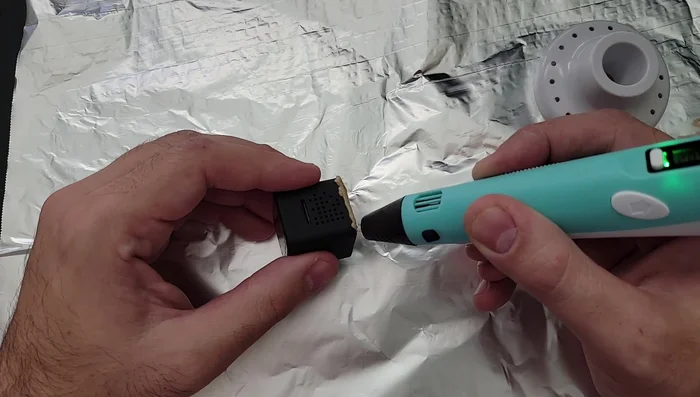
- 3D doodle pen
- Aluminum foil
- Paper towel
- Scissors (optional)
- Always prioritize your cat's safety. Choose lightweight materials and ensure the collar is easily breakable to prevent strangulation. Never leave your cat unattended while wearing the camera collar.
- Test the camera and collar thoroughly before attaching it to your cat. Ensure it's comfortable and doesn't impede their movement or ability to eat, drink, or groom.
- Monitor your cat closely while they are wearing the camera. Remove the collar if you observe any signs of stress, discomfort, or injury.
Step-by-Step Instructions
Prepare Workspace
- Cover your desk with aluminum foil and have a paper towel handy to wipe away excess plastic.

Prepare Workspace Create Camera Cage
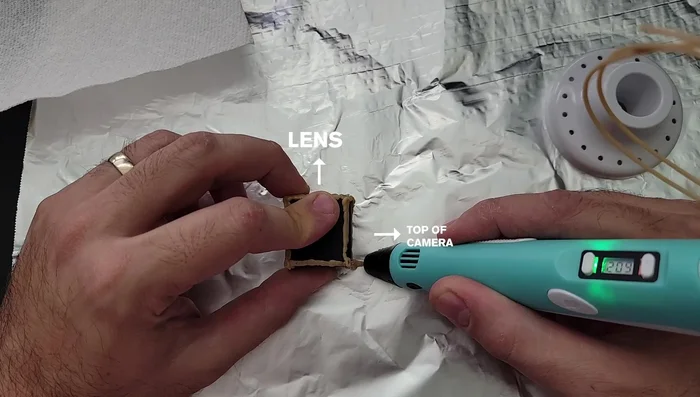
- Use the 3D doodle pen to draw a cube-shaped frame around the camera's edges. Ensure no buttons or indicator lights are covered. If you make a mistake, let the plastic cool, break it off, and try again.
Create Camera Cage Orient Camera
- Decide if you want a horizontal (16:9) or vertical (9:16) aspect ratio. For vertical, rotate the camera 90 degrees so the USB charging port is on top.
Orient Camera Build Vertical Supports
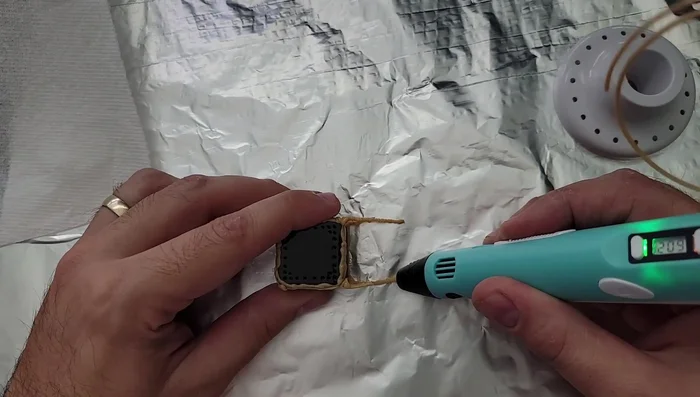
- Draw two short lines (one cm and two cm) from the back and front right corners of the camera cage, respectively, onto the aluminum foil. Repeat on the other side. Smooth any sharp edges with the pen tip.
Build Vertical Supports Connect Supports
- Draw horizontal lines to connect the front and back supports. Add a cross support in the front and back for extra stability. Let each section cool before proceeding.
Connect Supports Attach Collar
- Slip the tall front support through the collar's size adjustment area, ensuring the collar can close in a loop away from the camera.
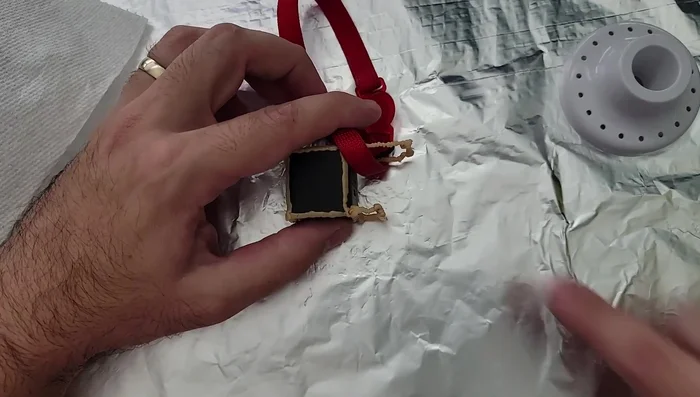
Attach Collar Finish Frame
- Draw two final lines connecting the front and back supports. Let the plastic cool completely.
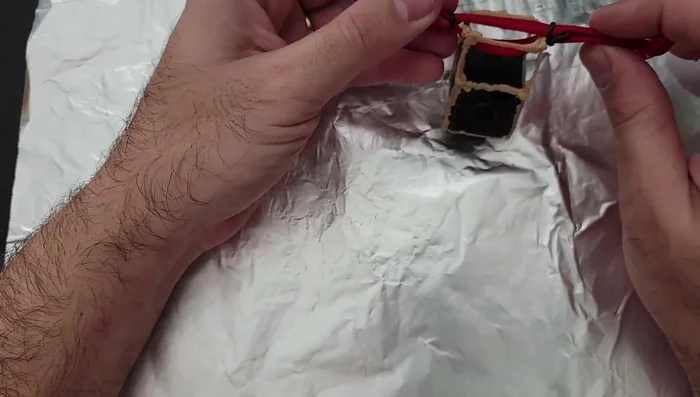
Finish Frame Add Securing Ties (Optional)
- Use twist ties to reduce camera movement during the cat's activities.
Add Securing Ties (Optional)

Read more: DIY Cat Leash: Easy-to-Make Cat Harness for Safe Outdoor Adventures
Tips
- Practice with the 3D doodle pen before starting the project to get comfortable with its speed and temperature.
- Use a breakaway collar for safety. If the collar gets caught, it will break away, preventing injury to the cat.
- Don't cover any of the camera's buttons or indicator lights when creating the frame.
- Smooth sharp edges on the plastic with the pen tip to avoid scratching your cat.
- Angle the camera downward to avoid capturing mostly chin fur.