Spoil your feline friend with a luxurious, custom-made cat wall perch and hammock! Cats love high vantage points, offering them a safe haven to survey their kingdom and enjoy a snooze in the sun. This DIY project allows you to create a stylish and functional addition to your home, tailored perfectly to your cat's preferences and your décor. Forget expensive, mass-produced cat furniture – you can build a beautiful and comfortable perch and hammock in just two hours, using readily available materials and simple tools.
This project requires minimal woodworking skills and is perfect for beginners. We'll guide you through each step, from selecting the right wood and fabric to safely installing your creation on the wall. Ready to create a purrfect resting spot for your furry friend? Let's dive into the step-by-step instructions!
Preparation and Safety Guidelines
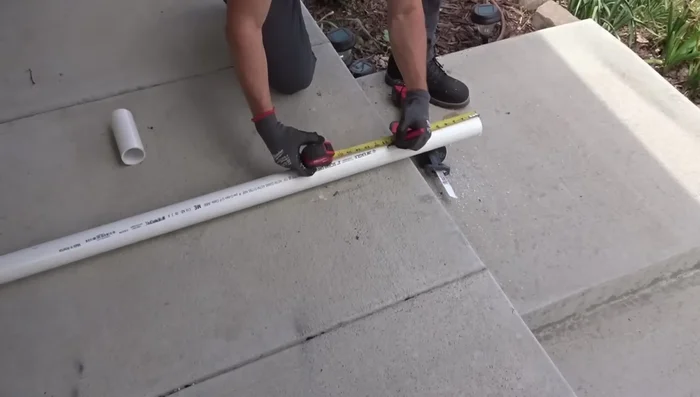
- PVC pipe (2 inches)
- PVC caps
- Hacksaw or power saw
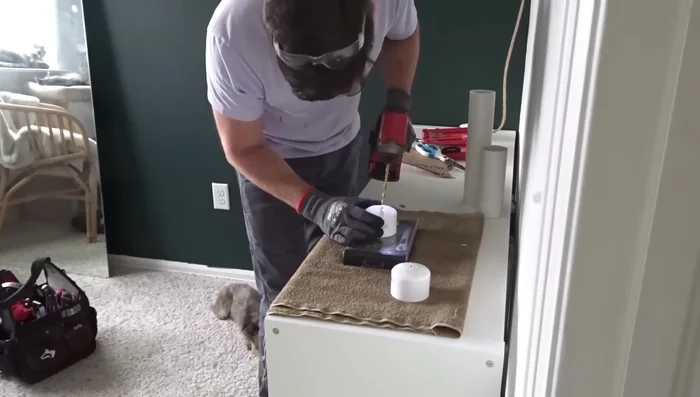
- Drill
- Lag screws
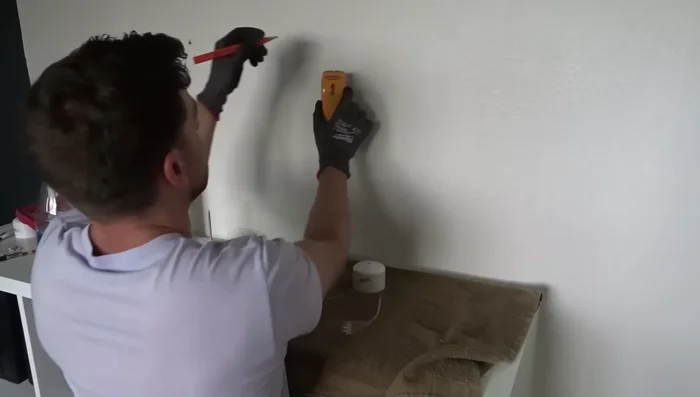
- Stud finder
- Rope
- Cardboard
- Hot glue gun
- Cloth (for hammock)
- Screws
- Ensure all screws and hardware are securely fastened to prevent the perch from collapsing or detaching from the wall. Regularly check for loosening.
- Use strong, weight-bearing materials appropriate for your cat's size and weight. Avoid materials that could easily break or splinter.
- Place the perch at a height and location accessible to your cat, but away from windows and other potential hazards. Consider your cat's personality and preferences for choosing a location.
Step-by-Step Instructions
Prepare the PVC Pipes and Caps
- Cut PVC pipe into desired lengths (e.g., 6 inches and 12 inches).
- Drill a hole in the center of the PVC caps.

Prepare the PVC Pipes and Caps Secure the Wall Mounts
- Find a wall stud using a stud finder and drill a pilot hole.
- Secure a lag screw through a PVC cap into the stud.
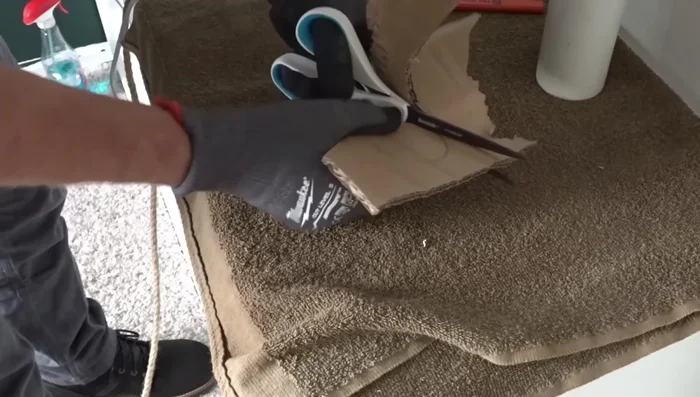
Secure the Wall Mounts Prepare the Cardboard Base
- Cut a piece of cardboard with the same diameter as the PVC pipe. Make a slightly off-center hole in the cardboard.
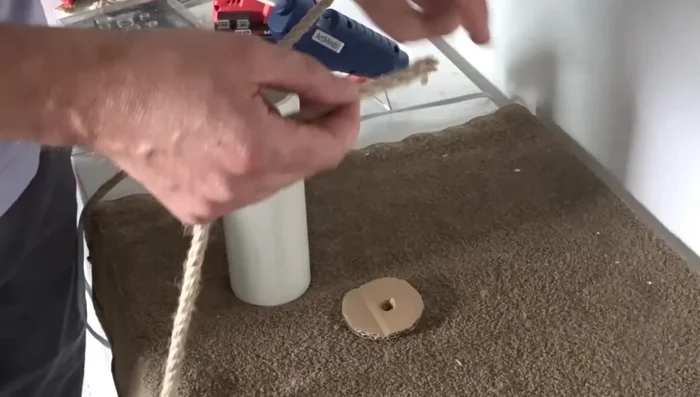
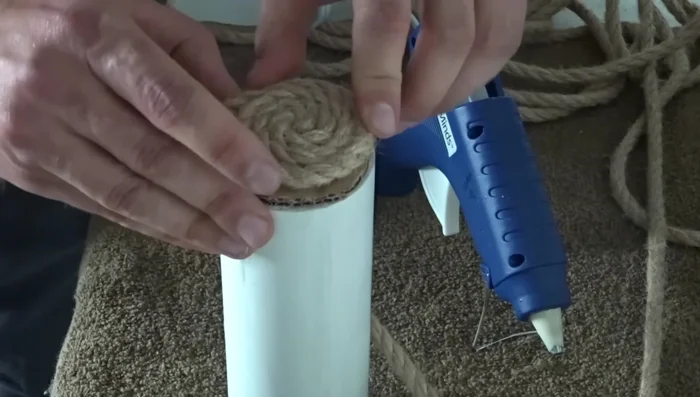
Prepare the Cardboard Base Attach Rope to Cardboard and PVC Pipe
- Apply hot glue to the edge of the rope and thread it through the cardboard hole. Let it dry.
- Apply hot glue to the perimeter of the PVC pipe and attach the cardboard.
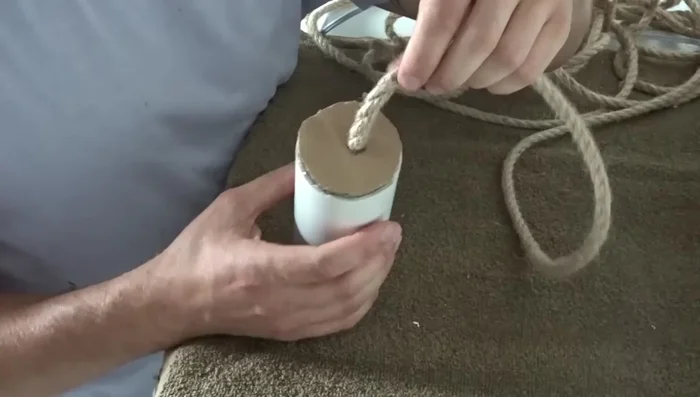
Attach Rope to Cardboard and PVC Pipe Wrap and Secure the Rope to the PVC Pipe
- Twist the rope tightly onto the PVC pipe, applying hot glue every half circle to secure it. Ensure you twist it the correct way to prevent unraveling.
- Once you reach the outer layer, apply a bead of glue all the way around to secure the rope.
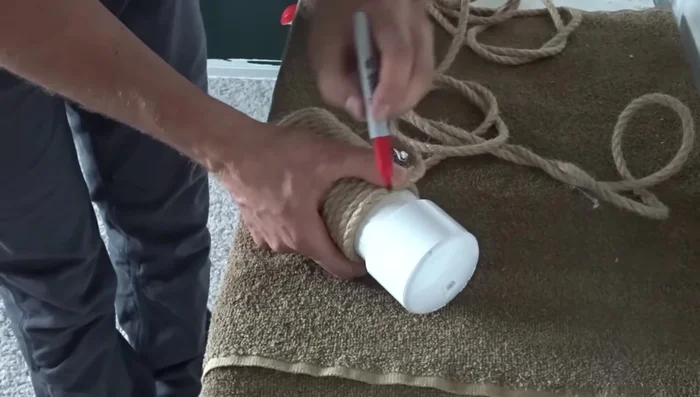
Wrap and Secure the Rope to the PVC Pipe Finish the Rope and Prepare for the Cap
- Use a spare cap as a template to determine how far to run the rope. Cut the rope at a slight angle to reduce fraying and secure the end with hot glue.
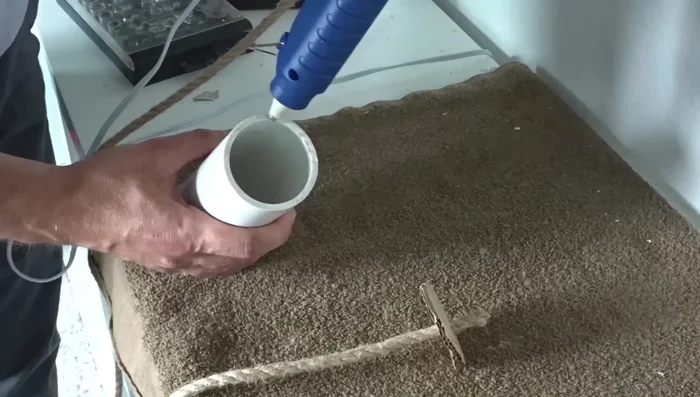
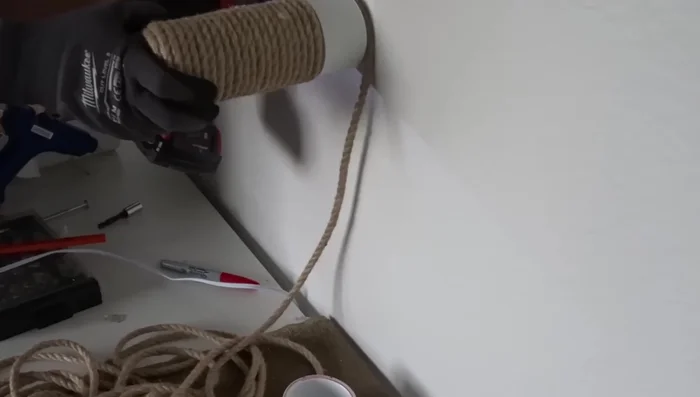
Finish the Rope and Prepare for the Cap Attach the Cap and Pipe
- Insert the PVC pipe into the cap. Drill pilot holes into the sides of both and secure with screws. The screws will be hidden by the rope.
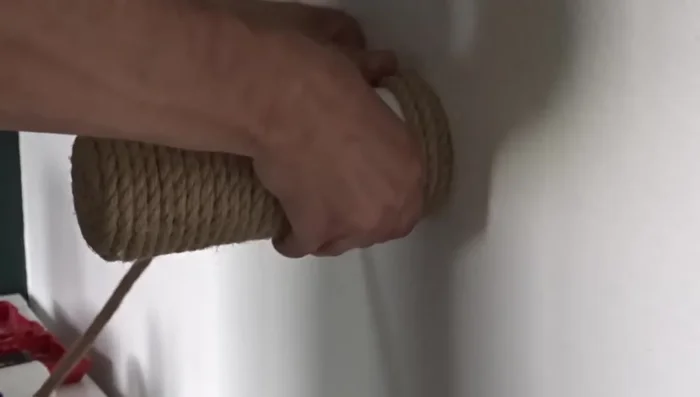
Attach the Cap and Pipe Finish the Cap and Rope
- Wrap the rope around the cap, keeping it tight. Cut the edge and use hot glue to secure it to the PVC cap.
Finish the Cap and Rope Create Additional Perches
- Repeat the process for additional perches.
Create Additional Perches Attach Hammocks
- Sew cloth hammocks and attach them to the perches.
Read more: DIY Cuddly Cat & Dog Bed: A Super-Warm, Easy Tutorial
Tips
- Use a hacksaw if you don't have power tools.
- Drill into a wall stud for extra security.
- Twist the rope tightly and apply glue frequently to prevent unraveling.
- Cut the rope at a slight angle to reduce fraying.