Cats are notoriously curious creatures, always on the hunt for the next exciting thing. While store-bought toys can offer fleeting amusement, the truly captivating playthings are often the ones that engage a cat's natural instincts – hunting, pouncing, and exploring. This inherent desire for interactive play inspired us to create a smart cat toy, harnessing the power of Arduino to build a stimulating and endlessly adaptable enrichment device for your feline friend. We'll be utilizing readily available components and simple coding to craft a toy that will keep your cat entertained for hours.
Forget predictable, battery-operated toys! This guide will walk you through the construction of a truly engaging smart cat toy, powered by the versatile Arduino microcontroller. Get ready to embark on a fun, rewarding project that will not only entertain your cat but also provide a fascinating introduction to the world of electronics and programming. Let’s dive into the step-by-step instructions and build your own captivating feline playmate!
Safety Guidelines
- Always supervise your cat when using the smart toy. Never leave them unattended with it, especially if it involves moving parts or potential hazards.
- Ensure all wiring is properly insulated and inaccessible to your cat to prevent electric shock or ingestion of small parts.
- Use non-toxic materials for construction and avoid using anything your cat could chew and ingest. Choose materials appropriate for use near pets.
Methods: Arduino Smart Cat Toy using Pan-Tilt Kit
Tools Needed
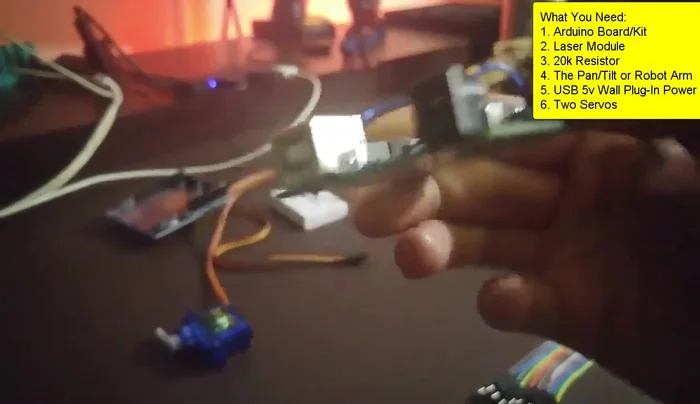
- Arduino Uno
- Servos (pan-tilt kit)
- Wires
- Breadboard (optional)
- Resistor (for laser)
- 5V power supply
- Laser
Step-by-Step Instructions
Gather Components
- Arduino Uno, servos (from a pan-tilt kit), wires, breadboard (optional), resistor, 5V power supply, and laser.

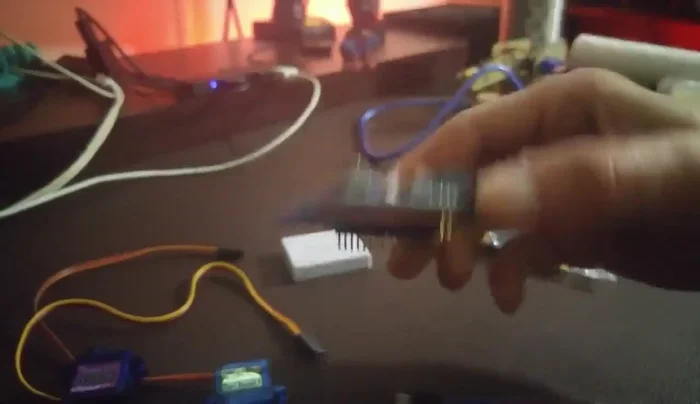
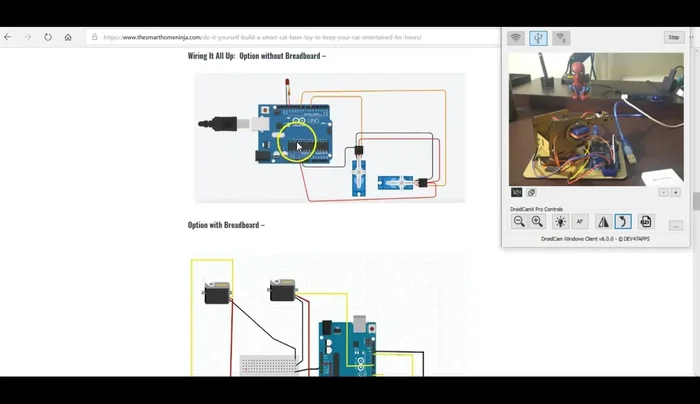
Gather Components Wire the Circuit
- If using a breadboard, connect the components as shown in the schematic diagram provided in the video description. Otherwise, directly connect the components to the Arduino.
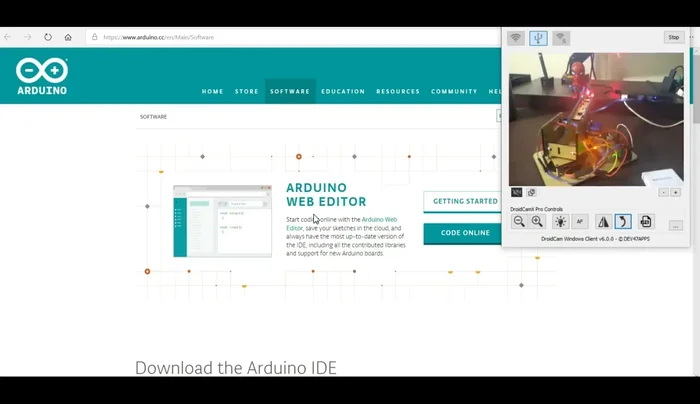
Wire the Circuit Install Software
- Download the Arduino IDE and the necessary drivers.
Install Software Copy and Paste Code
- Copy the Arduino code from the video description or the provided link.
Copy and Paste Code Upload Code to Arduino
- Paste the code into the Arduino IDE and upload it to the Arduino board.
Upload Code to Arduino Adjust Code Settings (Optional)
- Adjust the min/max X and Y values (range of motion), and min/max freeze (delay between movements) in the code if necessary to fit your setup.
Adjust Code Settings (Optional)


Tips
- Use a resistor with the laser to prevent it from producing too much power.
- A pan-tilt accessory significantly reduces build time compared to using a robot arm.
- Check for loose wires or weak breadboard connections if the toy doesn't move properly.
Read more: DIY Braided Tug Toys for Squirrels: Easy Step-by-Step Guide