Does your dog deserve a fun, enriching toy that's also incredibly simple to make? Then look no further than the DIY snuffle ball! These engaging toys are perfect for keeping your canine companion mentally stimulated and physically active, preventing boredom and destructive behaviors. Unlike commercially-made options, snuffle balls allow you to control the materials used, ensuring they're safe and durable for your furry friend, and the best part? They’re surprisingly quick and easy to create, even for beginners. Forget spending a fortune on store-bought toys; this tutorial offers a cost-effective and rewarding experience for both you and your dog.
This super speedy method for crafting a snuffle ball will have your dog happily sniffing and foraging in minutes. We'll guide you through each step using readily available materials, minimizing prep time and maximizing fun. Ready to get started and create the perfect enrichment toy for your beloved pet? Let's dive into the simple, step-by-step instructions below!
Preparation and Safety Guidelines
- Vinyl placemats (dollar store)
- Leather punching tool
- Zip ties
- Rotary sander or nail file/emery board
- Always supervise your dog while they play with the snuffle ball. Remove the toy if it becomes damaged or if your dog starts to ingest pieces.
- Use only durable, dog-safe materials. Avoid fabrics, stuffing, or embellishments that could be toxic if ingested.
- Ensure the snuffle ball is the appropriate size for your dog to prevent choking hazards. Larger dogs need larger snuffle balls.
Step-by-Step Instructions
Prepare Templates
- Use vinyl placemats and cut or fold them into half circles. The number of circles needed is four times the desired size of the snuffle ball (e.g., 32 circles for an 8-inch ball).

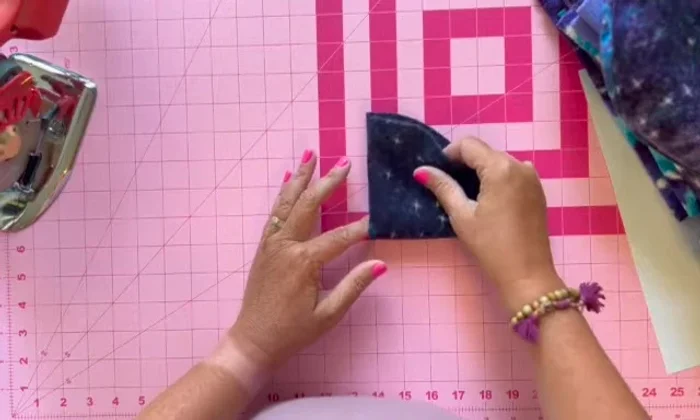
Prepare Templates Fold Circles
- Fold each circle into quarters.
Fold Circles Punch Holes
- Use a leather punching tool to create a hole near the top of each folded quarter.
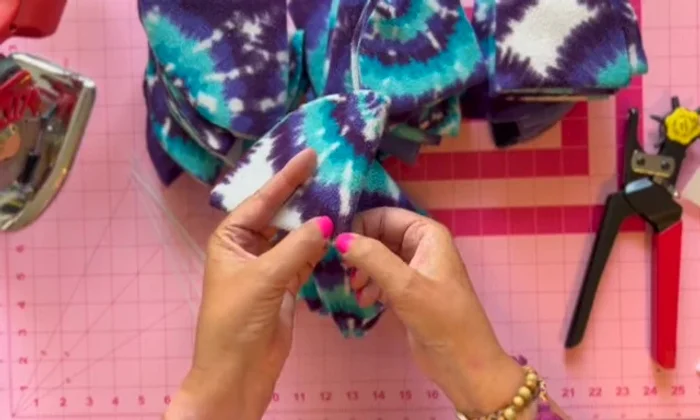
Punch Holes Assemble Layers
- String the circles onto a zip tie, loosely closing each one. Alternate the direction of the flaps for better engagement for dogs.
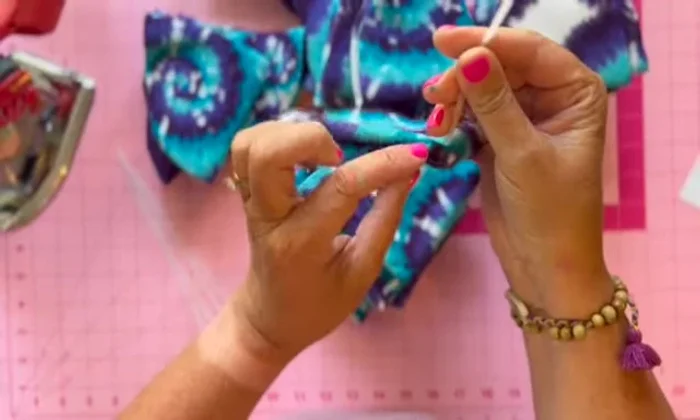
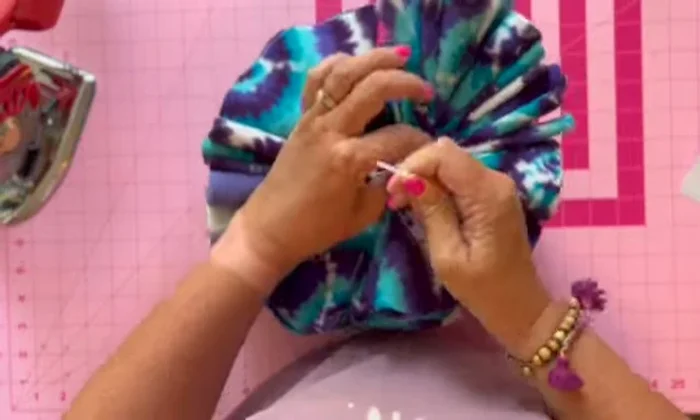
Assemble Layers Connect Layers
- Use another zip tie to connect all the loosely closed layers together.
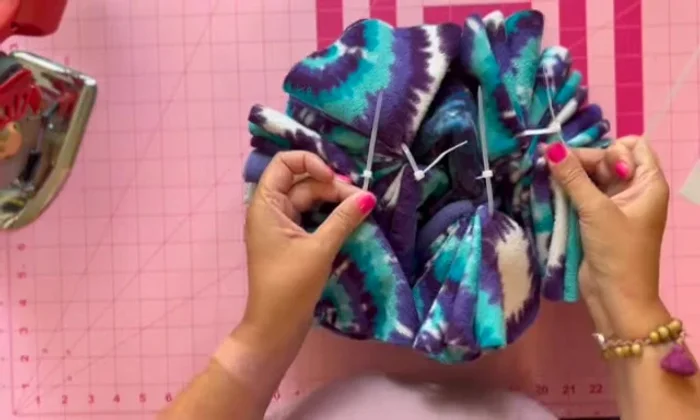
Connect Layers Secure, Trim & Smooth
- Tightly close and trim the zip ties, ensuring the edges are smooth to prevent injuries for the dog. Use a rotary sander, nail file or emery board to smooth out the cut edges.
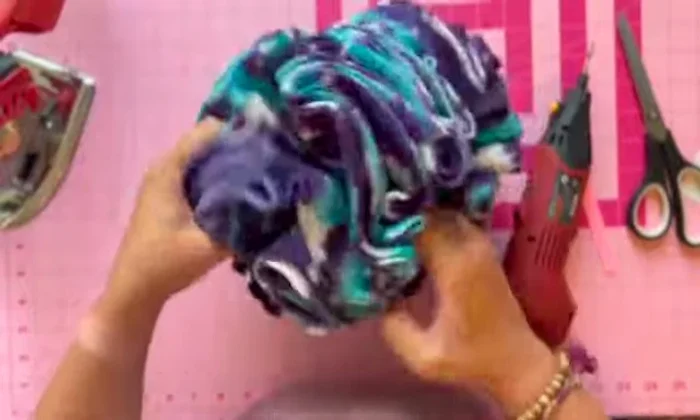
Secure, Trim & Smooth Final Shaping
- Tighten the zip tie holding all the layers together to achieve the round snuffle ball shape.
Final Shaping

Read more: No-Sew Sock Cat Tutorial: Adorable DIY Project
Tips
- Use a variety of circle sizes to create snuffle balls for different sized animals (4, 6, 8 inches).
- Make the snuffle ball more interesting for your dog by alternating the direction of the flaps.
- Smooth out all the cut edges to prevent injuries to your dog.
- Donate your completed snuffle balls to local animal shelters or rescues.