Is your feline friend in need of a fun, stimulating, and entirely adorable new toy? Look no further than this charming crochet catnip pumpkin! This delightful project is perfect for crafters of all skill levels, from beginners eager to try a new pattern to experienced crocheters looking for a quick and satisfying make. Combining the irresistible allure of catnip with the cozy texture of hand-crocheted yarn, this pumpkin toy is guaranteed to be a hit with your kitty. It's also a fantastic way to use up leftover yarn and unleash your creativity.
This guide will walk you through creating your own whimsical crochet catnip pumpkin, step by step. We'll cover everything from gathering the necessary materials to finishing touches, ensuring you'll have a purr-fectly handcrafted toy in no time. Get ready to embark on this fun and rewarding crafting journey, and prepare for hours of happy playtime for both you and your beloved cat!
Preparation and Safety Guidelines
- Green yarn
- Brown yarn
- 4.5 mm crochet hook
- Needle with a large eye
- Catnip
- Stuffing
- Always supervise pets when playing with the toy to prevent ingestion of yarn or stuffing. Ingesting yarn can cause intestinal blockages.
- Use only organic, high-quality catnip that is free from pesticides and herbicides. Ensure the catnip is safely enclosed within the crocheted pumpkin to prevent your cat from directly accessing and consuming large amounts.
- Check the toy regularly for any damage or loose yarn and discard if damaged to prevent choking hazards.
Step-by-Step Instructions
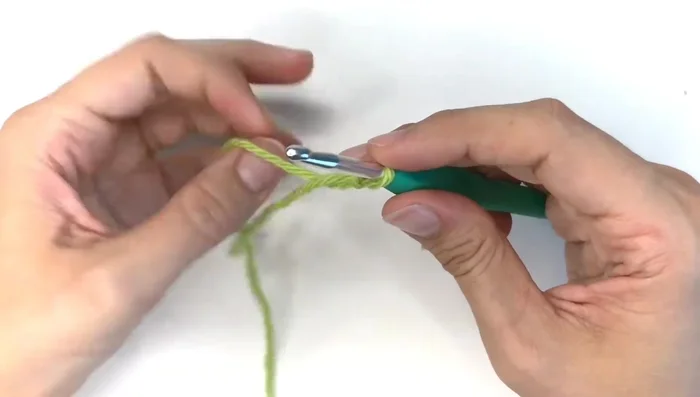
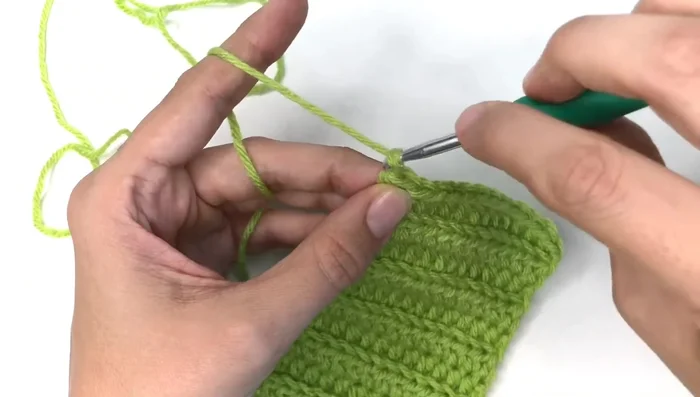
Foundation Chain
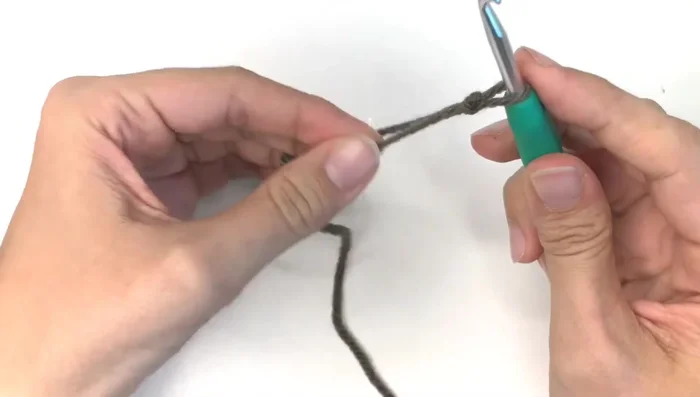
- Make a slip knot and chain 15.

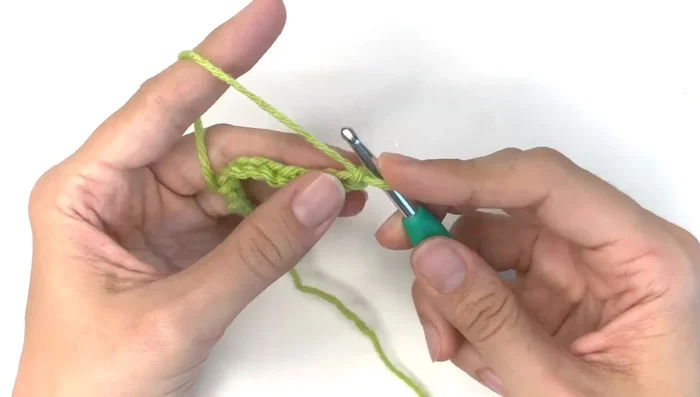
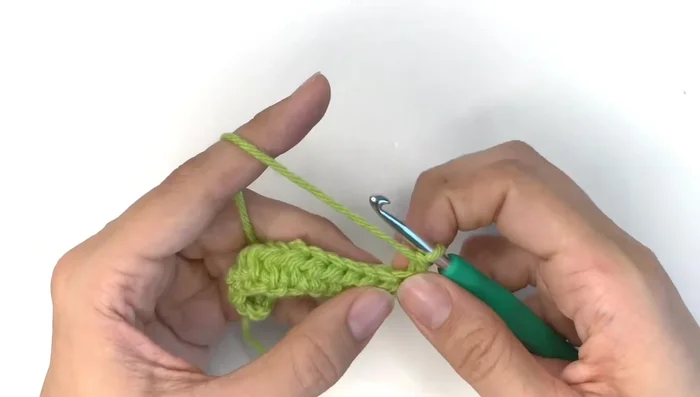
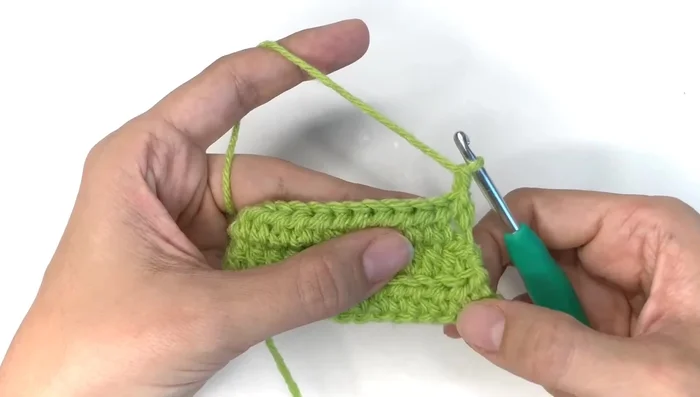
Foundation Chain Create Pumpkin Body
- Half double crochet (hdc) across the chain, working into the second chain from the hook. (Explanation of hdc provided)
- Turn your work and chain 1. Continue hdc in the back loop only for the remaining rows.
- Repeat step 3 until you have 15 rows (not counting the foundation chain).
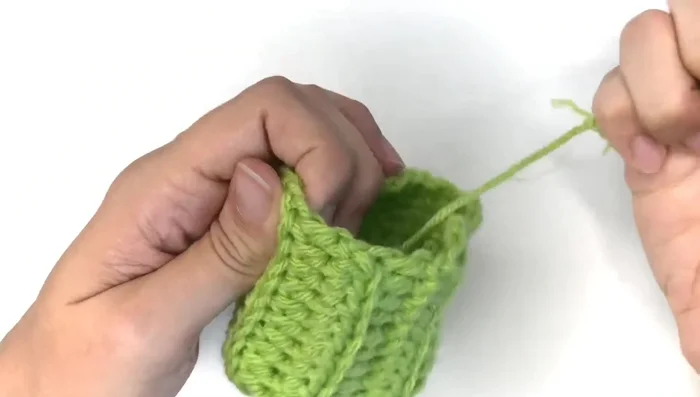
Create Pumpkin Body Close Pumpkin Base
- Fasten off, leaving a long tail for sewing. Fold the piece in half and use the tail to stitch the sides together using slip stitch.
- Turn the piece inside out. Use the tail to close the opening by sewing through both layers of fabric.
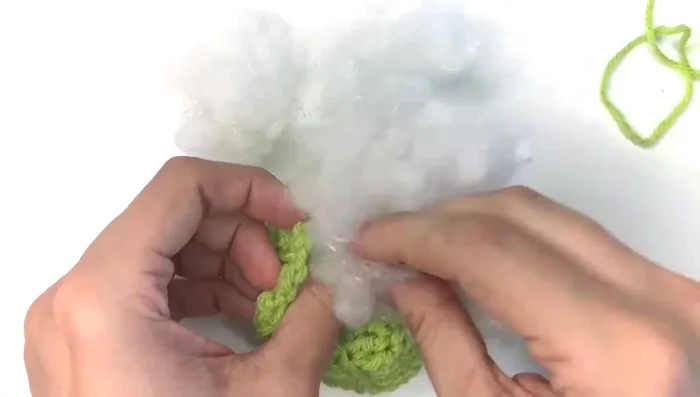
Close Pumpkin Base Stuff Pumpkin
- Stuff the pumpkin with poly-fiber fill, creating an indentation in the middle. Add catnip to the center.
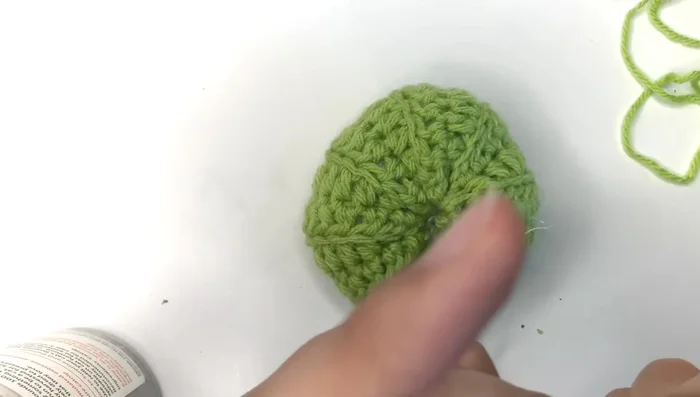
Stuff Pumpkin Close Pumpkin Top
- Close the top opening with the same sewing technique as step 6.
Close Pumpkin Top Create Stem
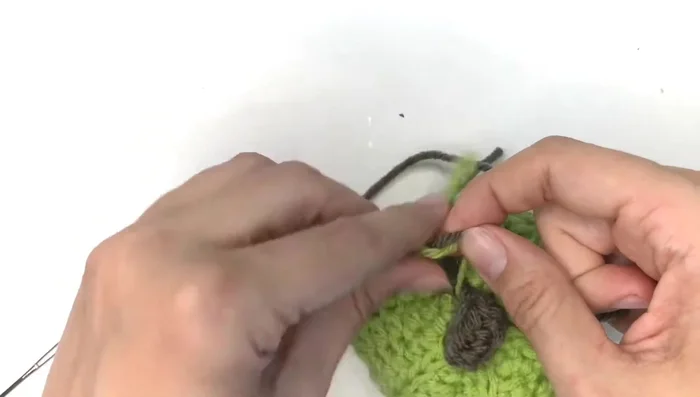
- Chain 6 using brown yarn, hdc in each stitch. Fasten off, leaving a long tail.
Create Stem Attach Stem
- Sew the stem to the top of the pumpkin.
Attach Stem Finish and Secure
- Weave in all loose ends and tie off securely.
Finish and Secure

Read more: Homemade Chicken Broth for Healthy Cats: Boost Immunity & Recovery
Tips
- Keep your crochet stitches a little loose, especially when starting.
- Leave longer tails than you think you'll need for sewing.