Give your furry friend a stylish and comfortable new collar with this easy crochet pattern! We'll be creating a charming, flower-adorned collar that's perfect for small to medium-sized pets. Forget boring, mass-produced collars; this tutorial will guide you through creating a unique accessory that reflects your pet's personality and your own crafting skills. Using simple stitches and readily available materials, you'll be surprised at how quickly you can whip up this adorable piece. The finished product is not only visually appealing but also durable and gentle on your pet's skin.
This delightful project is perfect for beginner crocheters, requiring only basic knowledge of chain, slip stitch, and double crochet. The step-by-step instructions, complete with clear photographs, will walk you through every stage of the process, from creating the flower motif to securing the collar's adjustable closure. Ready to get started and adorn your beloved pet with handmade charm? Let's dive into the step-by-step tutorial!
Preparation and Safety Guidelines
- Pink yarn
- White yarn
- Blue yarn
- Crochet hook
- Scissors
- Needle (optional)
- Glue gun (optional)
- Always supervise your pet while wearing the crocheted collar. Ensure the collar is not too tight and allows for comfortable movement and breathing. Remove the collar immediately if you notice any signs of discomfort or injury.
- Use pet-safe yarn and materials. Avoid using anything that could be toxic if chewed or ingested. Opt for strong, durable yarn that won't easily break or fray.
- Regularly check the collar for wear and tear. Replace the collar if it shows any signs of damage to prevent accidental choking hazards.
Step-by-Step Instructions
Create the Pink Flower
- Start with a magic ring and work 10 single crochets. Close the circle and join with a slip stitch.
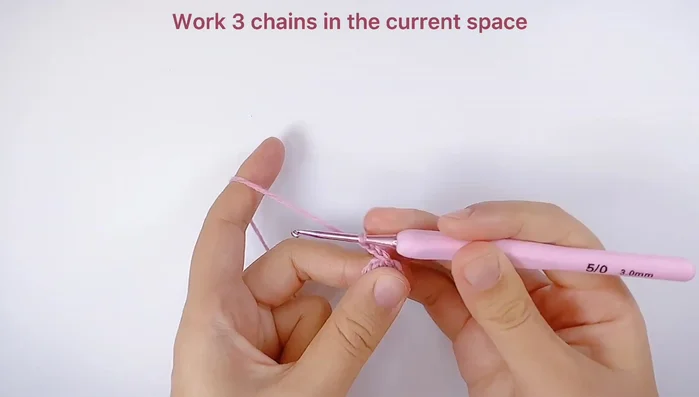
- Work 3 chains, then 3 unfinished double crochets in the same space. Repeat this sequence to create 5 petals. Pull through all loops to finish each petal.

Create the Pink Flower Create the White Flower Center
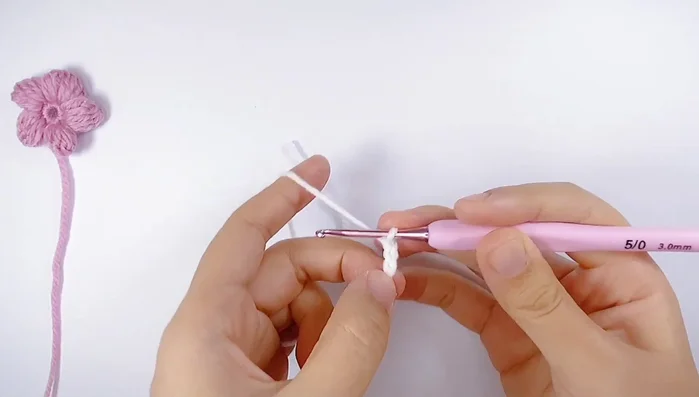
- Create a slip knot, chain 3, then work 4 unfinished double crochets in the first chain. Pull through all loops to finish.
Create the White Flower Center Assemble the Flower
- Attach the center to the flower.
Create the Collar Base
- Create a slip knot, chain 3, and work three unfinished double crochets. Repeat this sequence to create half a bow. Create another half bow and join together.
Create the Collar Base Create the Collar Straps
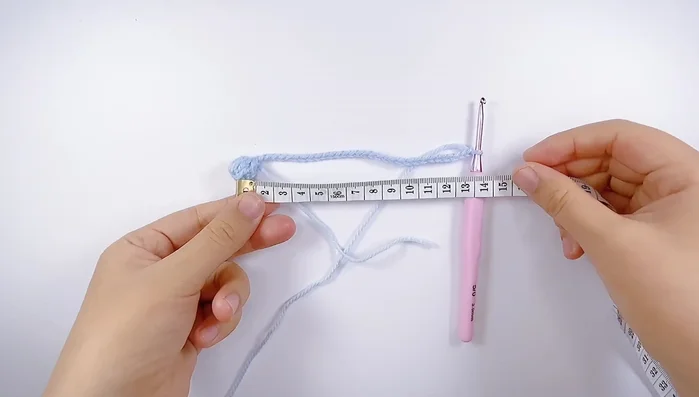
- Chain stitch to desired length (measure your pet's neck). Create another bow at the other end.
Create the Collar Straps Attach Base to Straps
- Single crochet to connect the collar base to the ends of the straps.
Attach Flowers to Collar
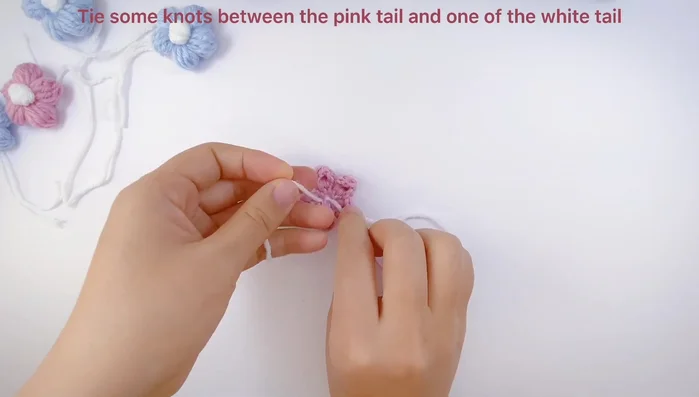
- Secure the flowers to the collar using either glue or by tying the flowers onto the base.
Attach Flowers to Collar


Read more: DIY Studded Dog Collar with Reflective Piping: A Comprehensive Guide
Tips
- Measure your pet's neck size before starting to determine the appropriate length for the collar.
- You can use a yarn scrap to measure your pet's neck if you don't have a ruler.
- Secure the ends of the yarn by chaining before cutting to prevent unraveling.