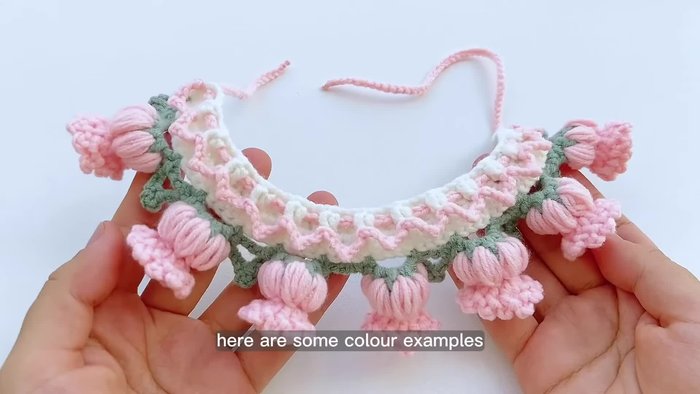
Spoil your furry friend with a handmade touch! This tutorial will guide you through creating an adorable and uniquely personalized crochet pet collar, perfect for adding a splash of style to your beloved companion's everyday look. Forget mass-produced, boring collars; with just a little yarn and some basic crochet knowledge, you can craft a stylish and comfortable collar that reflects your pet's personality. Whether you're a seasoned crocheter looking for a quick project or a beginner eager to try something new, this pattern is designed to be accessible and enjoyable.
Choosing the right yarn and hook size is key to achieving the perfect fit and adorable look. We'll cover selecting appropriate materials, understanding gauge, and creating a secure, adjustable closure. Ready to get started on this charming project and create a truly one-of-a-kind accessory for your pet? Let's dive into the easy step-by-step instructions below!
Preparation and Safety Guidelines
- Yarn (white and green)
- Crochet hook
- Needle
- Scissors
- Always supervise your pet while wearing the crocheted collar. Ensure the collar is not too tight and allows for comfortable movement and breathing. Remove the collar immediately if you notice any signs of discomfort or chafing.
- Use pet-safe yarn and avoid any materials that could be toxic if chewed or ingested. Opt for non-shed yarn and ensure all loose ends are securely fastened to prevent accidental swallowing.
- Regularly inspect the collar for wear and tear. Replace the collar if it shows signs of damage or weakening to prevent accidental strangulation or injury.
Step-by-Step Instructions
Create the White Base
- Start with a slip knot and chain 61. This creates a 9-inch (22cm) base for the collar.
- Work 61 double crochet stitches in the chain.
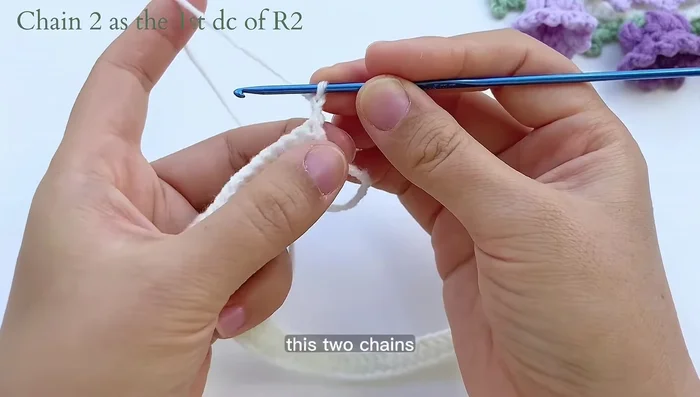
- Repeat row 2 until desired length. Chain two to turn, these chains act as the first double crochet.

Create the White Base Create the Green Base
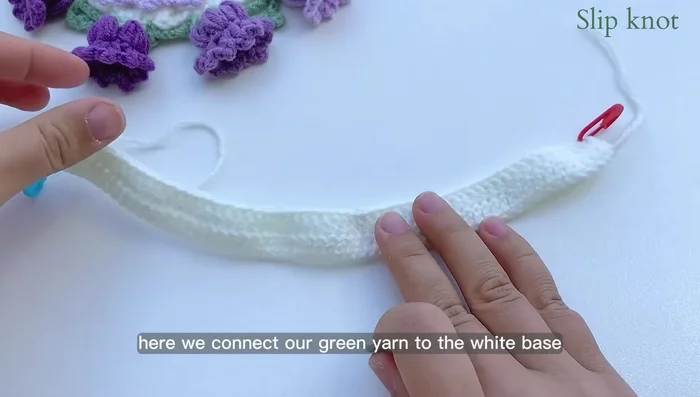
- Attach green yarn to the white base with a slip knot. Chain one (doesn't count as a stitch).
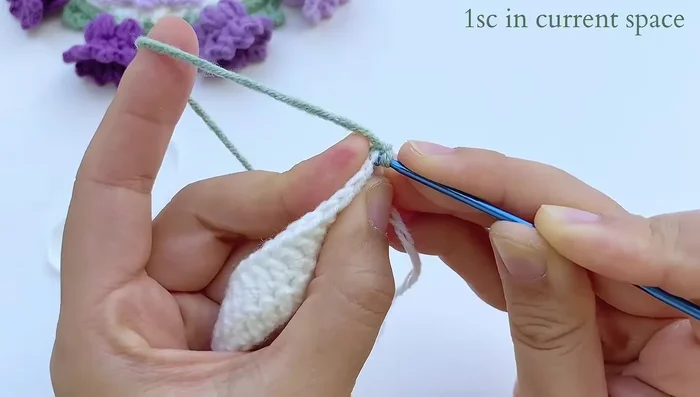
- Single crochet in the first stitch. Chain 5, skip 3 spaces, single crochet in the fourth space. Repeat until the end of the row.
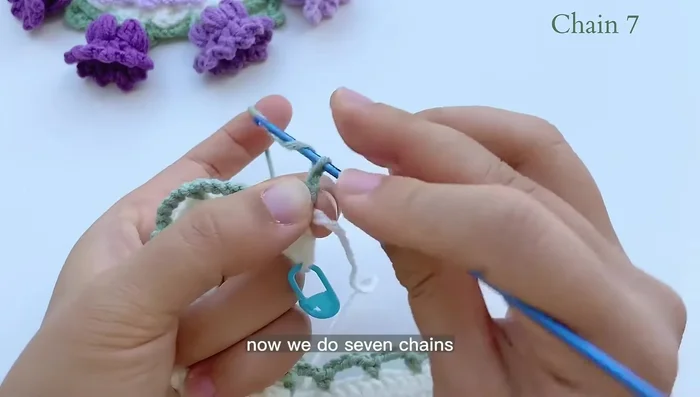
- Single crochet in the first stitch. Chain 7. Find the fourth space from the hook and slip stitch. Chain 3, single crochet through the large space (5 chains from previous row). Continue with the pattern.
Create the Green Base Create the Flowers
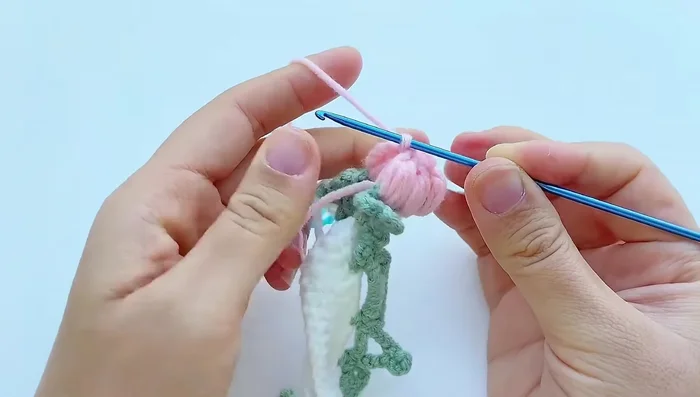
- Start with a slip knot and join through the space under the two chains from the previous row. Chain 3, yarn over and pull through the same space to create the first puff stitch. Repeat 4 more times to create 5 puff stitches per flower.
- Slip stitch to join the five puff stitches of each flower.
- Chain 3, double crochet in the same space, chain 3, slip stitch through the pillar of the double crochet. Repeat this pattern for each petal.
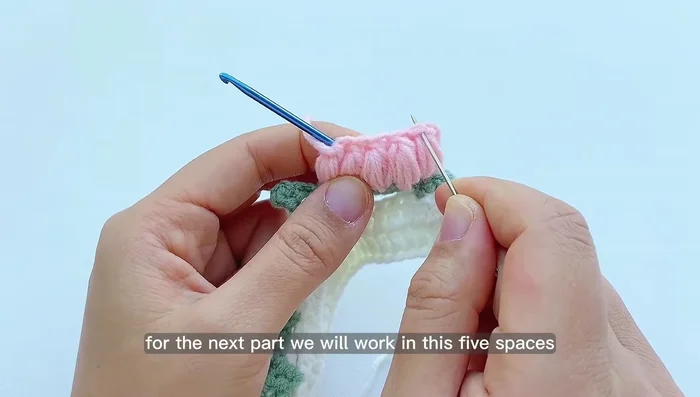
- Work two double crochets in each of the five stitches on top of the flower clusters. Join with a slip stitch and chain 1.
Create the Flowers Attach Decorative Strips
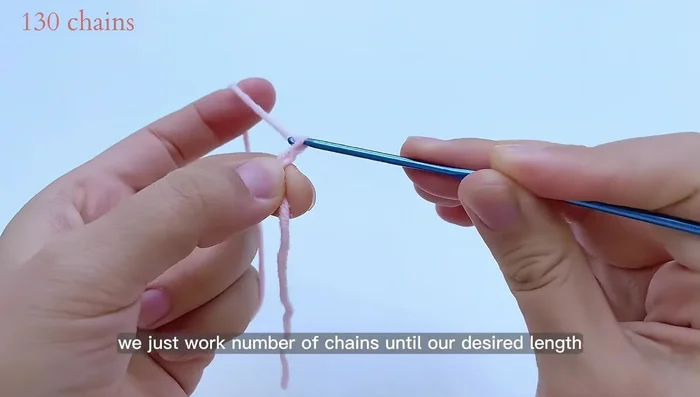
- Chain the desired length (130 chains in this example). Attach to the collar using a needle.
Attach Decorative Strips

Read more: DIY Studded Dog Collar with Reflective Piping: A Comprehensive Guide
Tips
- Adjust the chain count to fit your pet's neck.
- Use markers to keep track of your rows and stitches.
- Weave in loose ends to neaten the finished collar.