Give your furry friend a spooktacularly stylish makeover this Halloween with this adorable crocheted witch hat! Perfect for cats, small dogs, or even your favorite stuffed animal, this charming accessory is easier to make than you might think. Forget expensive pet costumes; with just a little yarn and some basic crochet skills, you can create a unique and comfy hat that will have everyone howling with delight. Imagine your pet strutting their stuff in this miniature, perfectly fitting headwear, ready for trick-or-treating (or at least some extra cuddles).
This charming crochet project is perfect for both beginner and experienced crocheters. Whether you're a seasoned yarn enthusiast or just starting your crochet journey, this pattern is designed to be easy to follow, offering clear instructions and helpful tips along the way. To begin crafting this bewitching headwear for your beloved pet, let's dive into the step-by-step guide below.
Preparation and Safety Guidelines
- 5 mm crochet hook
- 4 mm crochet hook
- Amethyst yarn
- Orange yarn
- Black yarn
- Yarn needle
- Scissors
- Always supervise your pet while wearing the hat to prevent them from chewing or ingesting yarn, which can be a choking hazard.
- Ensure the hat fits loosely and comfortably. A hat that's too tight can restrict your pet's movement and breathing.
- Use pet-safe yarn and avoid using any embellishments (buttons, beads, etc.) that could be easily detached and swallowed.
Step-by-Step Instructions
Foundation
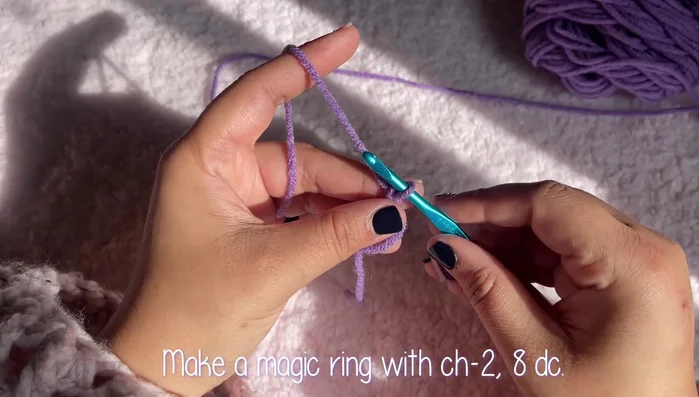
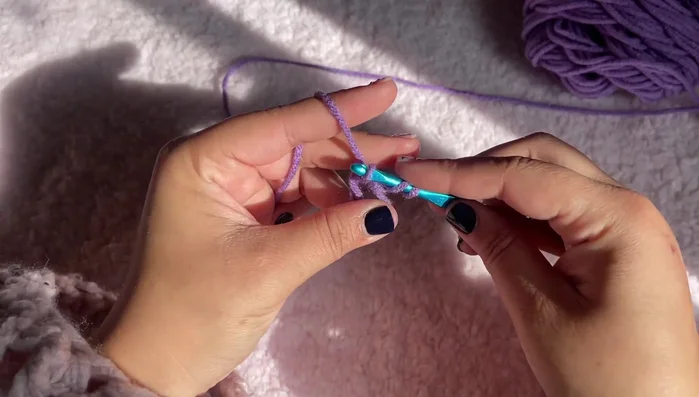
- Create a magic ring.
- 8 double crochets into the magic ring.

Foundation Hat Body (Rounds 1-5)
- 1 double crochet in each stitch (8 total).
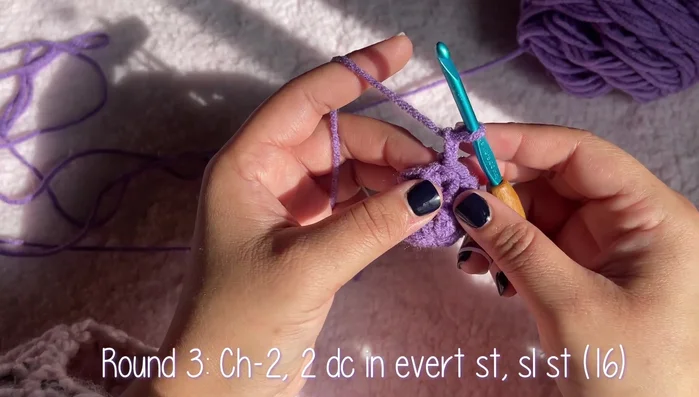
- 2 double crochets in each stitch (16 total).
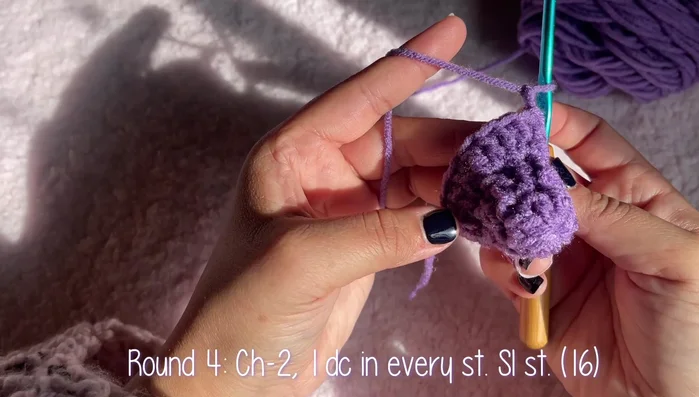
- 1 double crochet in each stitch (16 total).
- 1 double crochet in each stitch (24 total).
Hat Body (Rounds 1-5) - *(1 double crochet in next 2 stitches, 2 double crochets in next stitch)* repeat (32 total).
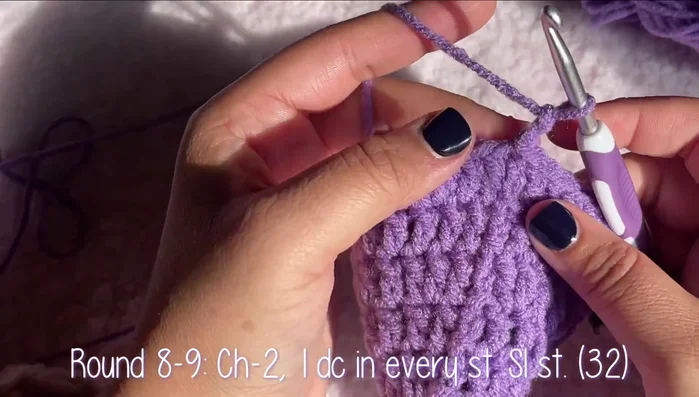
Hat Body (Rounds 1-5) Hat Body (Rounds 6-9)
- *(1 double crochet, 2 double crochets in next stitch)* repeat around (24 total).
- 1 double crochet in each stitch (32 total).
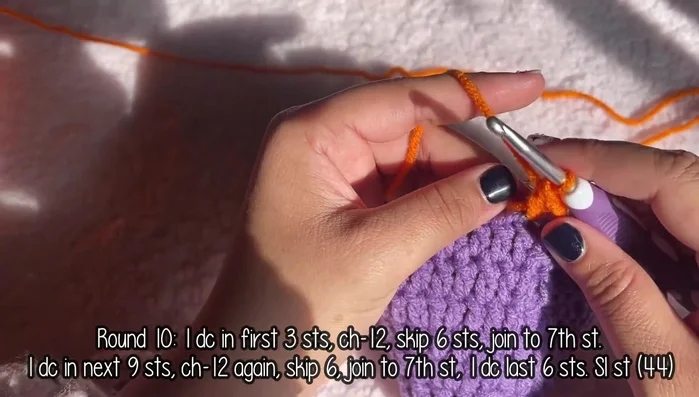
Hat Body (Rounds 6-9) Orange Stripe (Round 10)
- (1 double crochet in next 3 stitches, chain 12, skip 6 stitches, join with a single crochet to the 7th stitch, 1 double crochet in the next 9 stitches) repeat.
Orange Stripe (Round 10) Hat Body (Rounds 11-13)
- 1 double crochet in each stitch (44 total).
- 1 half double crochet in each stitch (44 total).
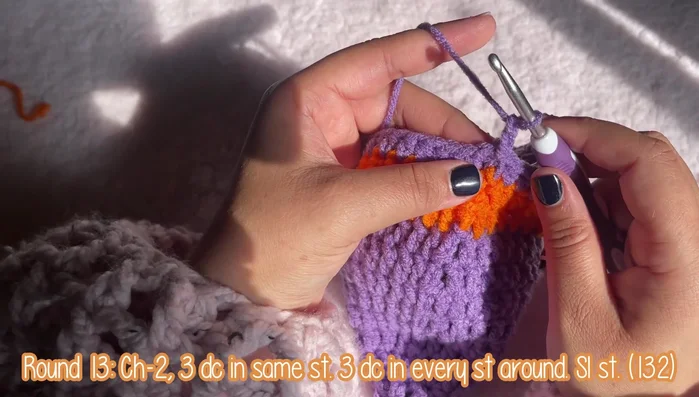
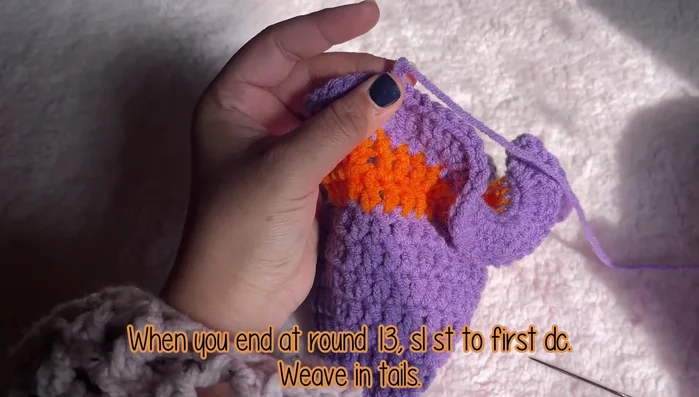
- 3 double crochets in each stitch (Ruffles).
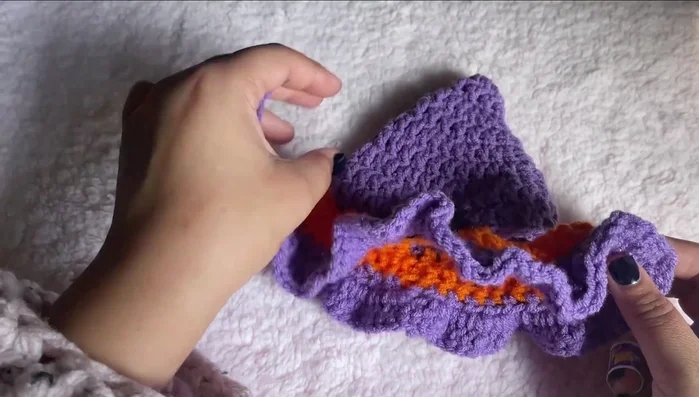
Hat Body (Rounds 11-13) Finishing Hat
- Fasten off.
Finishing Hat Create Buckle
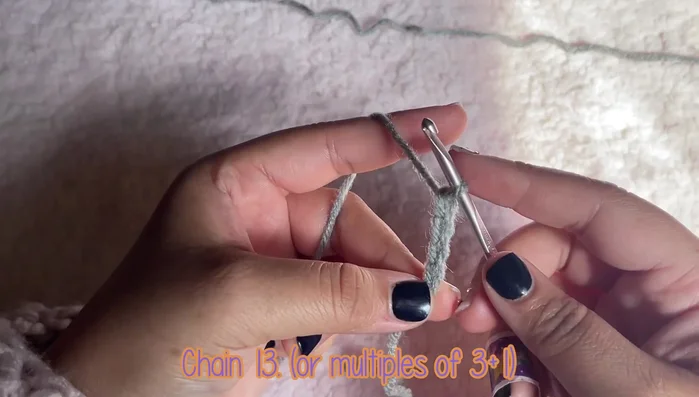
- Chain 13, *(1 single crochet in next 2 stitches, 3 single crochets in next stitch)* repeat.
Create Buckle Attach Buckle
- Sew together ends. Sew onto hat.
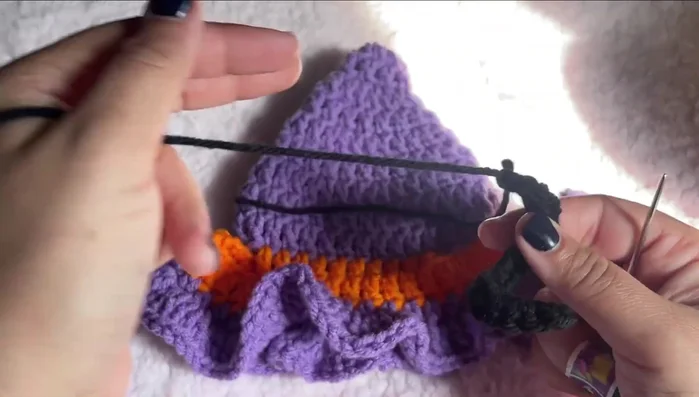
Attach Buckle Create Ear Flaps
- Find the 6th chain from the center back. Chain 35. Single crochet across chain, slip stitch to first chain. Repeat for other ear.
Create Ear Flaps


Read more: No-Sew DIY Pet Tank Top: Easy Leggings Upcycle!
Tips
- Use a thicker yarn needle for easier weaving.
- Count stitches carefully to ensure accuracy.
- Leave a long tail for sewing and weaving in.
- Ear flap length is customizable.