Are you tired of the ever-increasing cost of commercial cat food, yet concerned about the quality of ingredients? Many pet owners share this dilemma, constantly juggling budget constraints with their feline companion's nutritional needs. The good news is, you can reclaim control over your cat's diet and significantly reduce your spending by making your own delicious and nutritious cat food at home! DIY cat food offers a fantastic opportunity to tailor meals to your cat's specific dietary requirements, ensuring they receive the optimal balance of proteins, fats, and essential nutrients. You'll be surprised by how simple it is to create healthy and palatable meals your cat will adore.
Preparing homemade cat food not only saves you money but also allows you to avoid potentially harmful additives and fillers often found in processed commercial brands. This empowers you to choose fresh, high-quality ingredients, leading to a shinier coat, improved digestion, and a healthier, happier cat overall. Ready to embark on this rewarding journey? Let's dive into the step-by-step process of creating your own delicious and healthy DIY cat food recipe!
Preparation and Safety Guidelines
- Blender or Food Processor
- Manual Grinder (optional, but recommended)
- Pot
- Measuring Cups & Spoons
- Never feed your cat raw meat or bones without thoroughly researching safe handling and preparation to avoid bacterial contamination and choking hazards.
- Always consult your veterinarian before making significant changes to your cat's diet, especially if they have pre-existing health conditions. A sudden dietary shift can cause digestive upset.
- Ensure the recipe is nutritionally balanced for cats. Homemade cat food must contain the right proportions of protein, fat, carbohydrates, vitamins, and minerals to prevent deficiencies.
Step-by-Step Instructions
Prepare Protein Sources
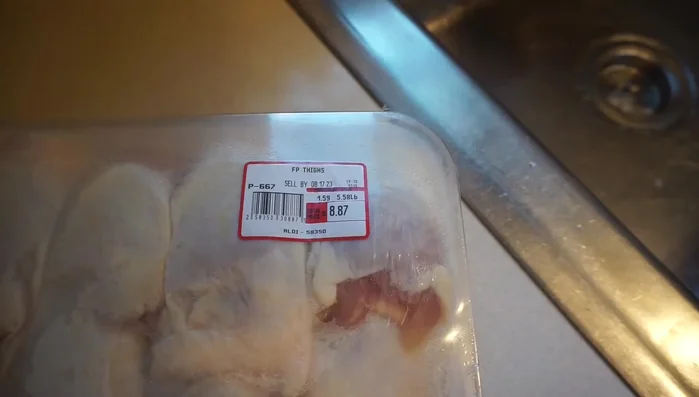
- Bake six pounds of chicken thighs for 10 minutes at 350 degrees.
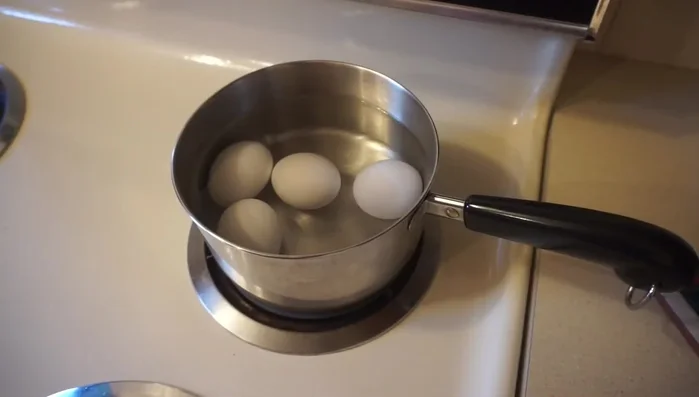
- Boil four eggs for three to four minutes.
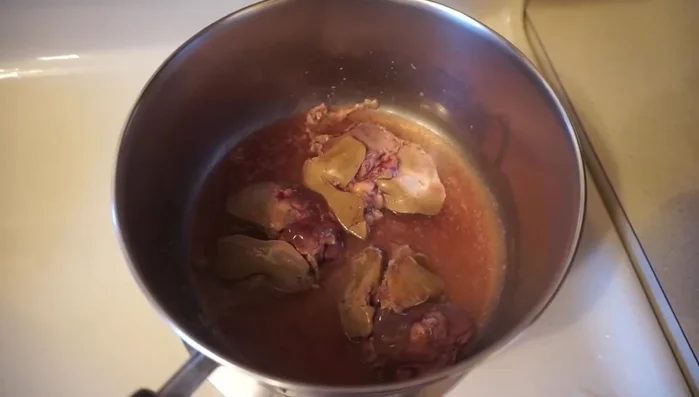
- Fully cook three and a half chicken livers (may need to add broth).
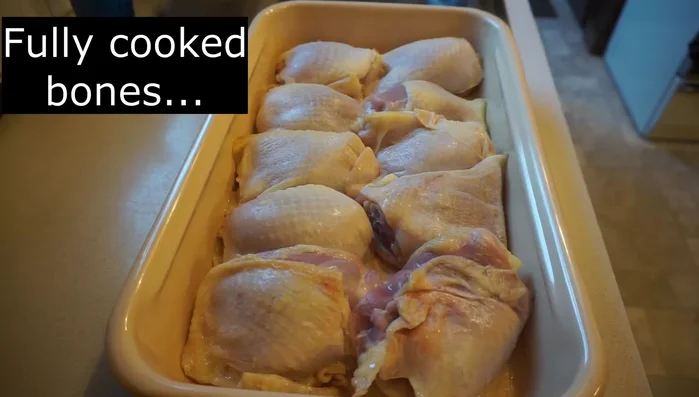
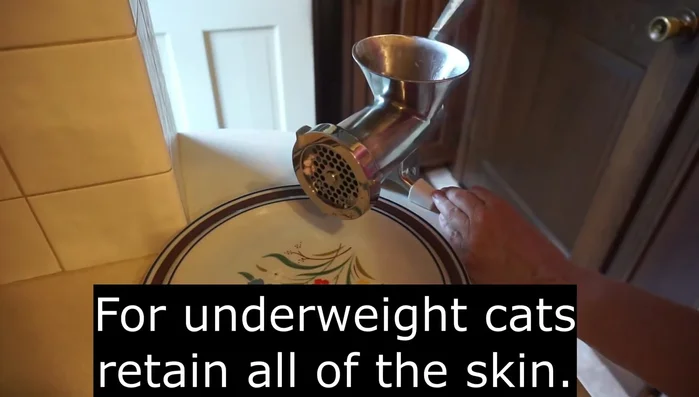
- Remove bones from 20% of the baked chicken thighs (2 out of 10 in this example).

Prepare Protein Sources Grind Meat
- Grind the cooked chicken meat and bones using a grinder.
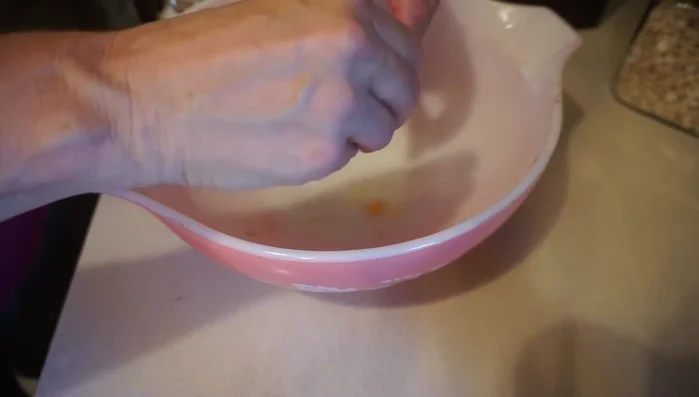
Grind Meat Add Supplements and Liquids
- Add 10,000-20,000 milligrams of fish oil (about 15,000 milligrams or 24 capsules used in this example). Refrigerate to prevent rancidity.
- Add 2 capsules of vitamin B, 4 capsules of taurine, 2 capsules of vitamin E, and 2 teaspoons of Morton light salt.
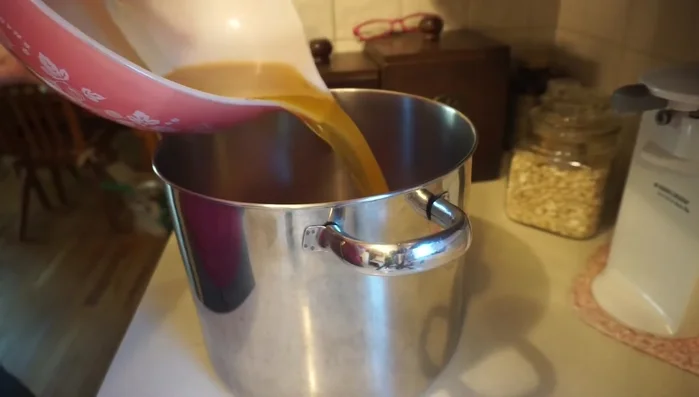
- Add chicken liver broth and water for a total of 2 cups of liquid.
Add Supplements and Liquids Combine and Freeze
- Thoroughly combine the ground chicken mixture with the other ingredients.
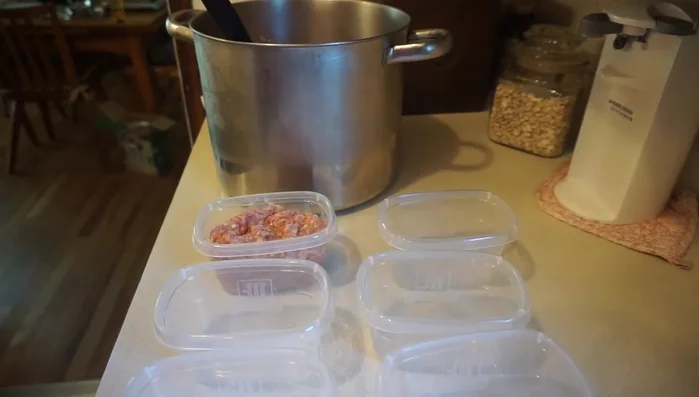
- Transfer the mixture into containers and freeze.
Combine and Freeze


Read more: Homemade Chicken Broth for Healthy Cats: Boost Immunity & Recovery
Tips
- If your cat resists the new food, mix in chopped cat treats.
- Keep the food cold using ice packs to maintain freshness.