Tired of the same old, mass-produced dog collars and leashes? Do you dream of a perfectly coordinated set that reflects your dog's unique personality and your own style? Then you're in the right place! This tutorial will guide you through the exciting process of creating a custom dog collar and leash, tailored to your furry friend's size and your creative vision. Forget bland, generic options; unleash your inner artisan and craft a truly one-of-a-kind accessory. You'll discover how easy it is to transform simple materials into stylish and durable items your dog will love.
This DIY project offers a fantastic opportunity to personalize your dog's walking gear, choosing fabrics, colors, and embellishments that perfectly match your pet's temperament and your own aesthetic preferences. From selecting the right materials to securing the hardware, we'll cover every step of the creation process. Ready to get started? Let's dive into the step-by-step instructions!
Preparation and Safety Guidelines
- Fabric
- Interfacing
- Webbing
- D-rings
- Buckle
- Slider
- Sewing machine
- Matches or lighter
- Measuring tape
- Water-soluble marker
- Scissors
- Pins
- Always supervise your dog while wearing the DIY collar and leash. Regularly check for wear and tear and replace immediately if damaged to prevent injury.
- Ensure all hardware, such as buckles and rings, are strong and securely attached. Weak points can lead to your dog escaping or getting injured.
- Use materials specifically designed for dog collars and leashes. Avoid materials that could fray, break easily, or be toxic if chewed.
Step-by-Step Instructions
Prepare the Fabric
- Add interfacing for sturdiness, fold in half (wrong sides together), and steam to create a crease.

Prepare the Fabric Finish Fabric Edges
- Fold and press a quarter-inch hem on both raw edges.
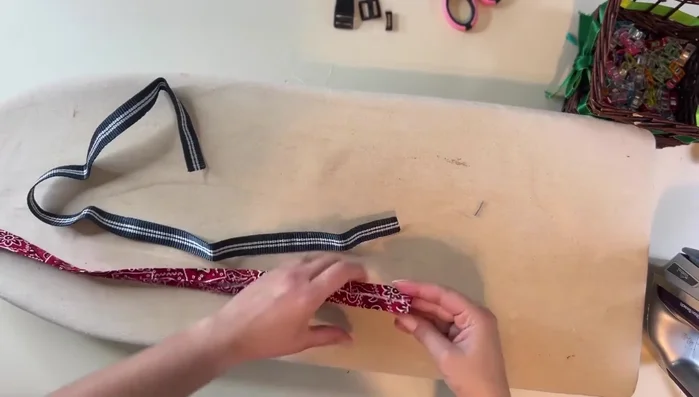
Finish Fabric Edges Prepare Webbing
- Seal the cut edges with a heat source (matches or lighter) to prevent fraying.
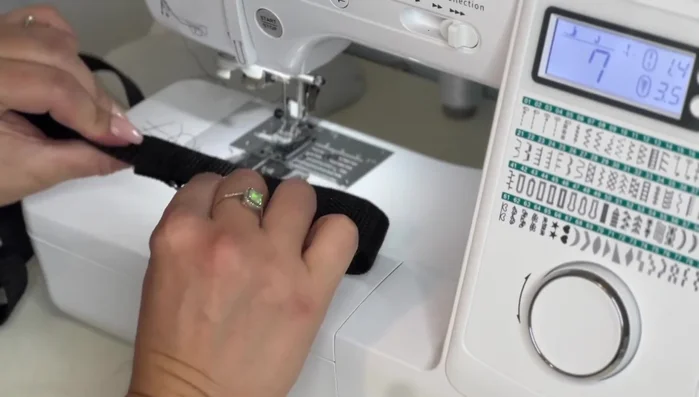
Prepare Webbing Attach Webbing to Fabric
- Place the fabric on top of the webbing and edgestitch all the way around.
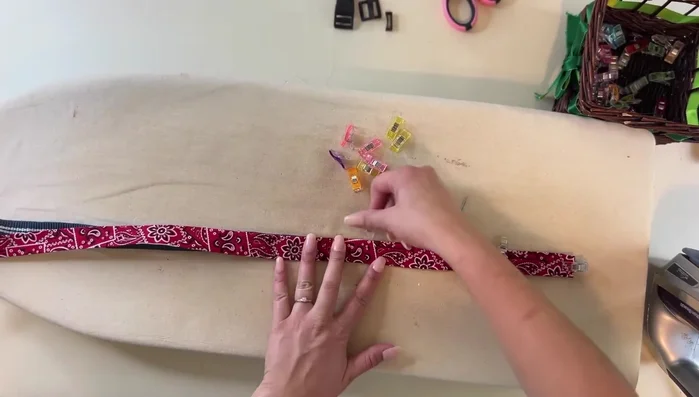
Attach Webbing to Fabric Personalize (Optional)
- Add monograms, designs, or embellishments.
Personalize (Optional) Trim Excess Webbing
- Cut and seal any extra webbing.
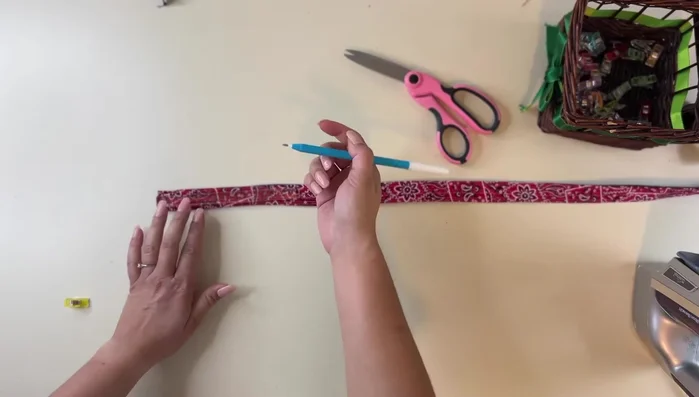
Trim Excess Webbing Attach D-ring and Buckle to Collar
- Measure and mark 3 inches from the edge. Place the D-ring and buckle at the marked point, fold the fabric over, and sew securely using multiple rows of stitching.
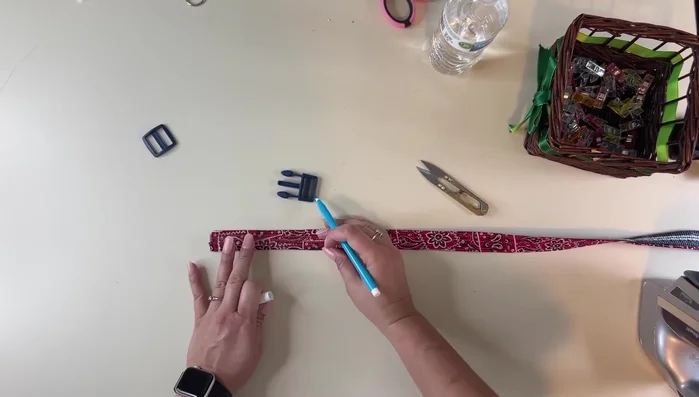
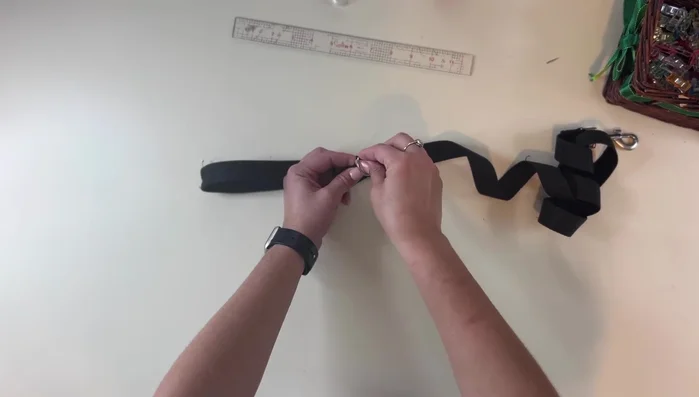
Attach D-ring and Buckle to Collar Prepare Leash Webbing
- Measure and mark 10.5 inches from the edge. Attach the slider and buckle, ensuring a secure connection.
Prepare Leash Webbing Attach D-ring to Leash
- Attach a D-ring to the leash handle for attaching accessories.
Attach D-ring to Leash Reinforce Seams
- Sew multiple rows of stitching to reinforce all attachment points.
Reinforce Seams


Read more: DIY Studded Dog Collar with Reflective Piping: A Comprehensive Guide
Tips
- Use interfacing to make the collar sturdier.
- Seal webbing edges to prevent fraying.
- Personalize your dog collar with monograms or designs.
- Use a longer needle or a specialized sewing foot for thicker fabrics.
- Reinforce attachment points with multiple rows of stitching.