Tired of generic dog collars that lack personality and don't quite fit your furry friend perfectly? Wouldn't it be amazing to create a custom collar that reflects your dog's unique style and ensures a comfortable, secure fit? This step-by-step guide empowers you to do just that! Forget overpriced, mass-produced options and embrace the satisfaction of crafting a one-of-a-kind accessory for your beloved canine companion. You'll be surprised at how easy it is to create a durable and stylish collar tailored to your dog's exact measurements.
From choosing the right materials to mastering simple sewing techniques, we'll walk you through each stage of the process, providing clear instructions and helpful tips along the way. This DIY project allows for complete customization, enabling you to select fabrics, embellishments, and hardware that perfectly complement your dog’s personality and your own aesthetic. So, grab your sewing supplies and get ready to embark on this fun and rewarding journey; let's dive into the step-by-step instructions to create your own custom-fit dog collar.
Preparation and Safety Guidelines
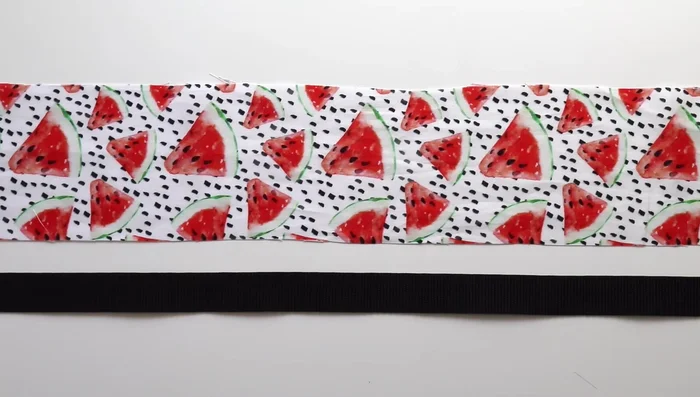
- Nylon webbing strap
- Buckle
- Tri-glide
- D-ring
- Cotton fabric
- Lighter
- Sewing machine
- Binder clips (optional)
- Heavy-duty thread (optional)
- Always supervise your dog while wearing a new collar. Check regularly for wear and tear and replace if damaged to prevent choking or injury.
- Ensure the collar fits snugly but not too tight. You should be able to fit two fingers comfortably between the collar and your dog's neck.
- Use strong, durable materials that are resistant to chewing and tearing. Avoid using materials that could pose a choking hazard if ingested.
Step-by-Step Instructions
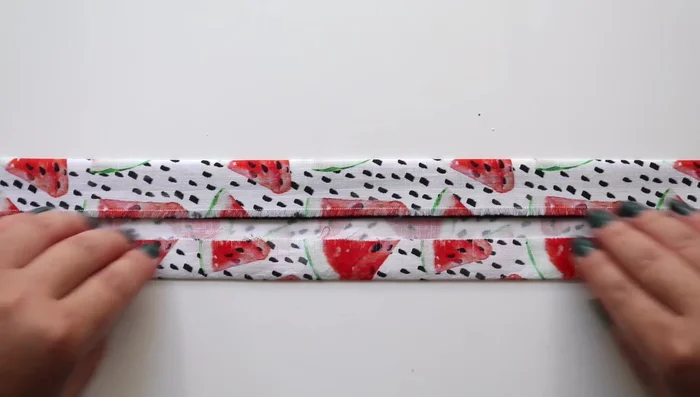
Prepare the Strap and Fabric
- Cut the nylon webbing strap to the desired length (approximately double your dog's neck size). Burn the ends with a lighter to prevent fraying.
- use an iron to create the guides).

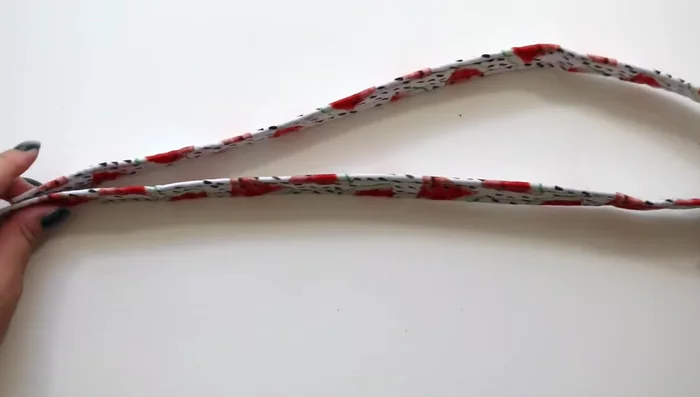
Prepare the Strap and Fabric Attach Fabric to Strap
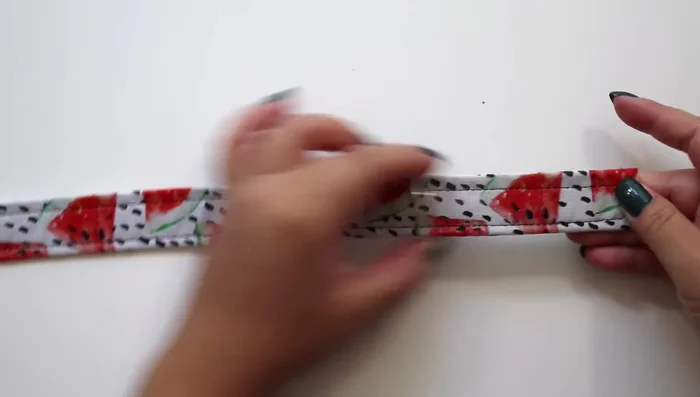
- Sew the fabric onto the strap. Tuck the strap under the 1-inch fold, fold the other side of the fabric over to cover the strap completely, and sew around the entire piece, ensuring the edges are tucked in at the ends. Use binder clips to hold the fabric in place while sewing.
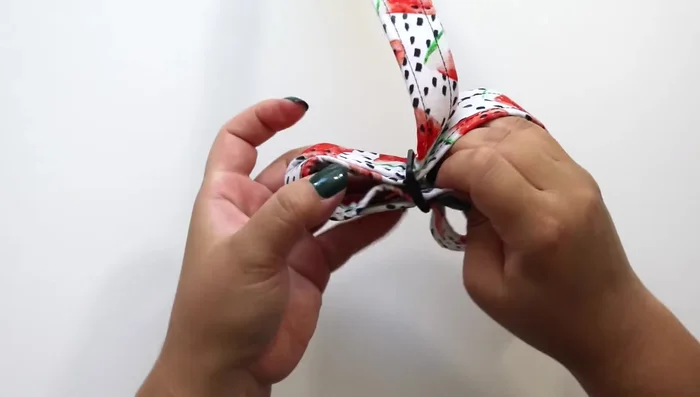
Attach Fabric to Strap Attach Tri-Glide and Buckle
- Attach the tri-glide to the middle of the strap. Pull the strap through the tri-glide, then under and over the pronged side of the buckle.
Attach Tri-Glide and Buckle Secure the Adjustable End
- Double the strap under and over the first strap, then sew the end to the inside of the loop, securing it in place with a strong stitch (e.g., a rectangle with an X).
Secure the Adjustable End Attach D-Ring and Buckle
- Attach the D-ring to the other end of the strap by sliding it through and pulling the strap through the buckle. Sew the strap to the sides of the D-ring to secure it.
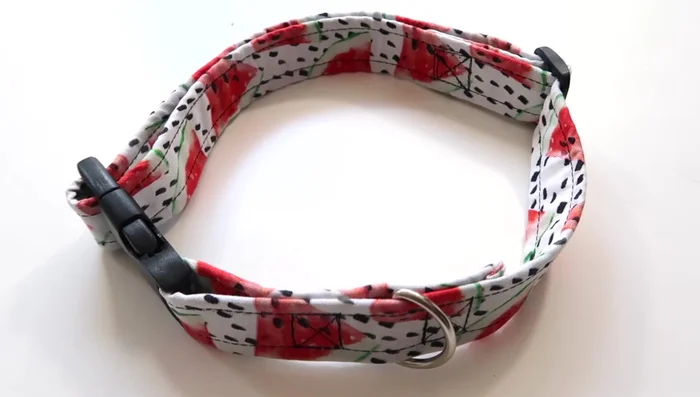
Attach D-Ring and Buckle Final Adjustments
- Adjust the collar to fit your dog.
Final Adjustments

Read more: DIY Studded Dog Collar with Reflective Piping: A Comprehensive Guide
Tips
- Use heavy-duty thread and multiple seams for added security.
- Binder clips can be used instead of pins to hold the fabric and strap together during sewing.