Are you tired of overpriced, underwhelming dog leashes and treat bags? Do you crave a personalized touch for your furry friend's walking essentials? Then get ready to unleash your creativity and save some money with this comprehensive DIY project! We'll guide you through creating a stylish and functional leash and coordinating treat bag, perfectly tailored to your dog's needs and your own aesthetic preferences. Choosing your materials will be half the fun, allowing you to express your unique style.
Forget flimsy store-bought options prone to breaking or losing their shape. This tutorial will equip you with the knowledge and confidence to craft durable, long-lasting accessories that will stand up to even the most enthusiastic of walks. From selecting the perfect fabrics and hardware to mastering the simple sewing techniques, we'll walk you through every step of the process. Let's get started with our step-by-step guide to making your own dog leash and treat bag!
Preparation and Safety Guidelines
- Nylon strapping (1 inch width, 2 1/4 yards)
- Ribbon (7/8 inch width, 2 1/2 yards)
- Sewing scissors
- Top Stitch all-purpose thread
- Sewing gauge
- Fabric marker
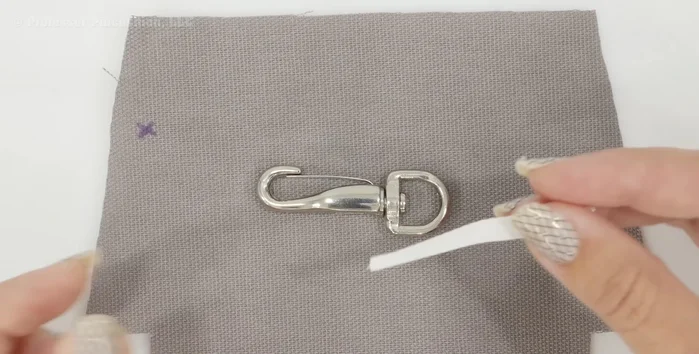
- Swivel quick snap
- Swivel hook
- D-ring
- Fabric (lining and canvas type, about 1/8 yard each)
- Hook and loop fastener (3 inches)
- 1/4 inch twill tape or ribbon (3 inches)
- Fabric sealant
- Pattern (downloadable)
- Always supervise your dog closely while using the DIY leash and treat bag to prevent accidental ingestion of the bag's materials or choking hazards.
- Ensure all stitching and hardware are securely fastened to prevent the leash or bag from breaking and causing injury or escape. Regularly inspect for wear and tear.
- Choose materials appropriate for your dog's strength and chewing habits. Avoid using materials that could be toxic if ingested.
Step-by-Step Instructions
Prepare the Leash
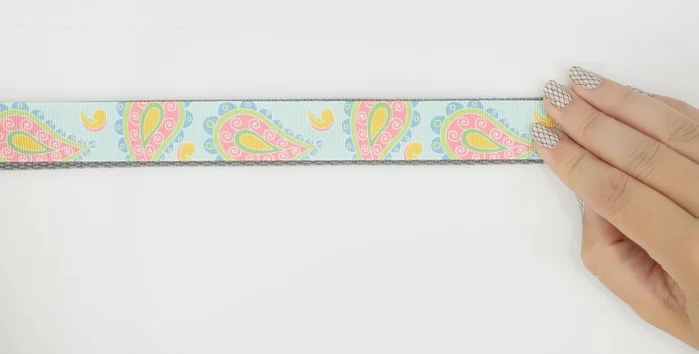
- Attach ribbon to nylon strapping. Place ribbon on top of strapping, right side up. Pin and baste stitch along the full length (two and a quarter yards). Repeat for the other side if desired, using a regular stitch instead of basting.
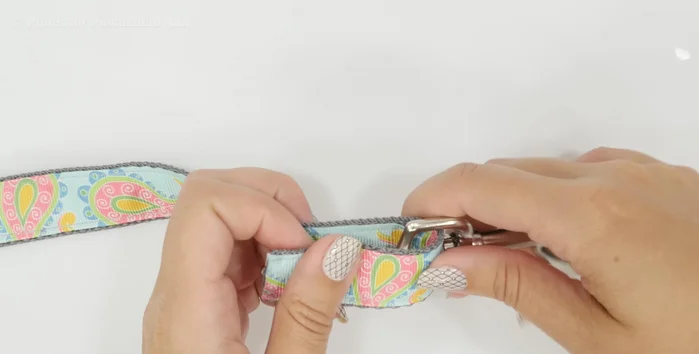
- Attach swivel hook. Fold one end of the strapping over (2 3/8 inches). You can either fold under and stitch, or use fabric sealant and stitch a box with an X for added security. Repeat multiple times to ensure strength.
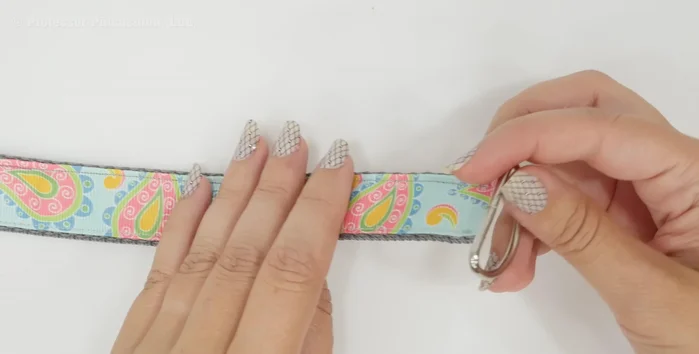
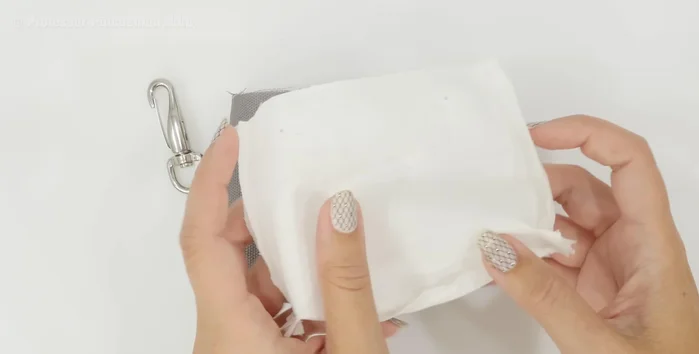
- Attach handle. At the other end, slip on a D-ring (optional, skip if not making treat bag). Fold over 7 1/2 inches, ensuring raw edges align with the swivel hook. Fold under a quarter inch and stitch across multiple times. Stitch the D-ring securely into its own pocket.

Prepare the Leash Cut and Prepare Treat Bag Fabric
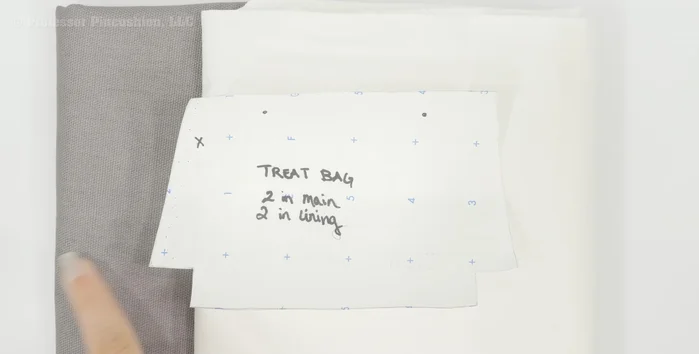
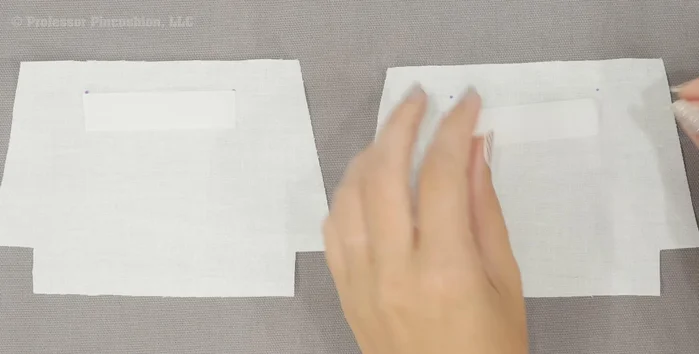
- Cut treat bag pieces. Cut two pieces from main fabric and two from lining fabric using the pattern. Transfer markings from the pattern to your fabric pieces. Cut hook and loop closure to 2 1/2 inches.
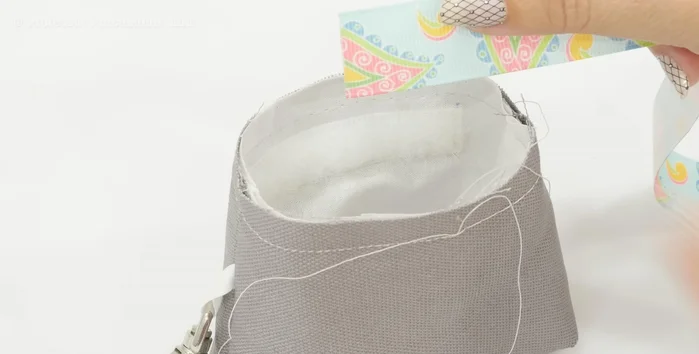
- Prepare main fabric. Place twill tape on the X marking of one main fabric piece and baste stitch to secure.
Cut and Prepare Treat Bag Fabric Attach Hook and Loop to Lining
- Attach hook and loop. Place hook and loop on the right side of the lining pieces at the marked dots. Sew around the perimeter.
Attach Hook and Loop to Lining Sew Treat Bag Pieces
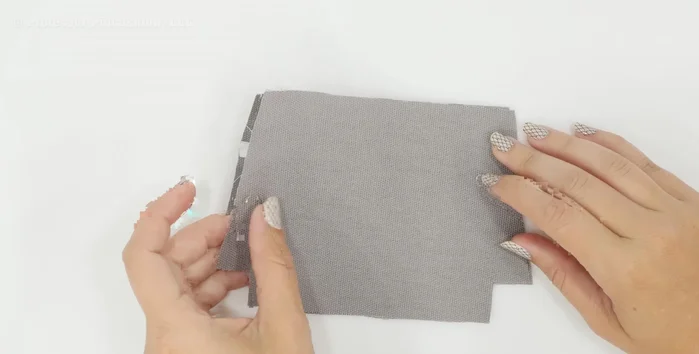
- Sew treat bag pieces. Place main fabric pieces right side together, ensuring snap is towards the middle. Sew a 1/4 inch seam allowance on three sides (excluding top and corners). Repeat for lining pieces.
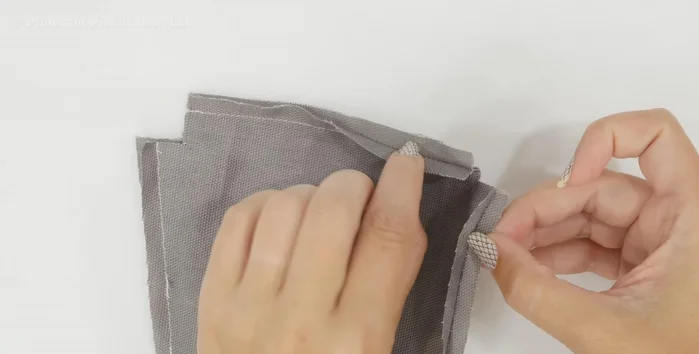
- Finish corners. Press seam allowances open. Bring corners together, insert thumb to help separate seam allowances, and stitch across. Repeat for lining and main fabric pieces.
Sew Treat Bag Pieces Assemble and Finish Treat Bag
- Assemble treat bag. Turn main fabric right side out. Insert lining (wrong side out). Pin around the top edge and baste stitch to secure.
- Attach ribbon. Pin ribbon to the inside of the treat bag, 3/8 inch down from the top edge. Baste stitch to secure. Fold one ribbon end under and layer on top of the other. Fold the top of the overlapping ribbon over to the right side and pin/top stitch.
Assemble and Finish Treat Bag
Read more: DIY Studded Dog Collar with Reflective Piping: A Comprehensive Guide
Tips
- Use a walking foot for easier stitching, especially when attaching the swivel hook.
- Use top stitch or heavy duty thread for added security when attaching the swivel hook. Use all-purpose thread in the bobbin.
- Stitch multiple times to ensure durability, especially on high-stress areas like hook attachments.
- Take your time when top stitching the ribbon onto the treat bag to avoid accidentally sewing the bag closed.