Does your furry friend love a good tug-of-war? Tired of expensive, flimsy dog toys that fall apart after a single playtime? Then get ready to unleash your inner crafter and create a durable, cuddly, and completely customizable dog tug toy using nothing more than fleece fabric! This easy knotted fleece tug toy is not only incredibly simple to make, even for beginners, but it's also a fantastic way to recycle scraps of fabric you may already have lying around. The soft fleece is gentle on your dog's teeth and gums, making it a much safer alternative to some store-bought options. Plus, the knotted design adds extra durability and encourages playful chewing.
This tutorial will guide you through the process of creating this fun and engaging toy step-by-step, using clear instructions and helpful images. Get ready to embark on a fun crafting project that will benefit both you and your canine companion, resulting in hours of happy playtime and a strong bond. Let's get started with the step-by-step instructions below!
Preparation and Safety Guidelines
- Two strips of fleece
- Always supervise your dog while playing with any toy, including this tug toy. Remove the toy if it becomes damaged or frayed to prevent ingestion of small pieces.
- Choose fleece fabric specifically designed for pet toys, as some fabrics may contain dyes or chemicals that are harmful if ingested. Ensure the fleece is securely knotted to prevent unraveling.
- Never leave a knotted tug toy unattended with your dog. A securely knotted toy can still be a choking hazard if the dog manages to pull it apart and swallow the pieces.
Step-by-Step Instructions
Prepare Fleece Strips
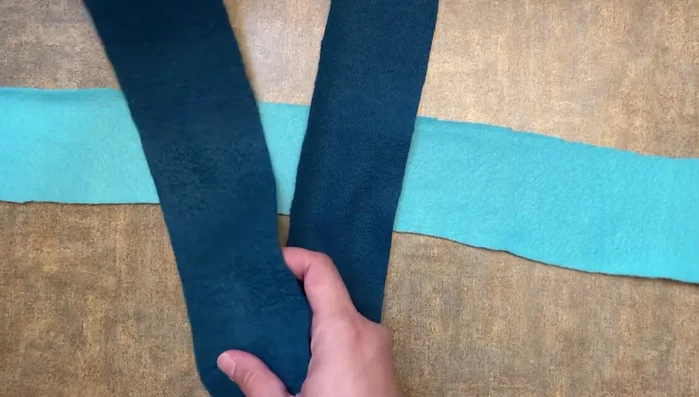
- Find the center of each fleece strip and lay them flat, one horizontal and one vertical.

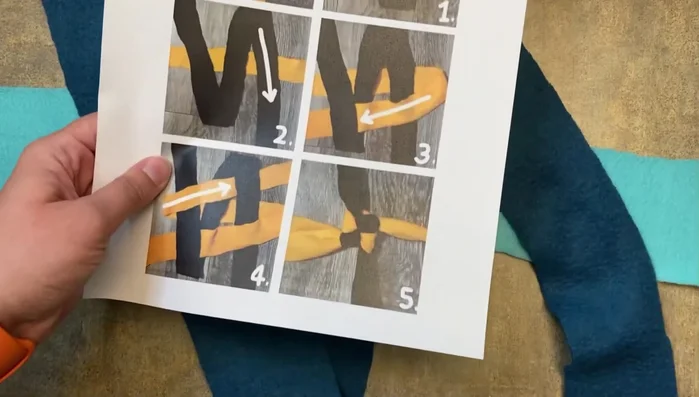
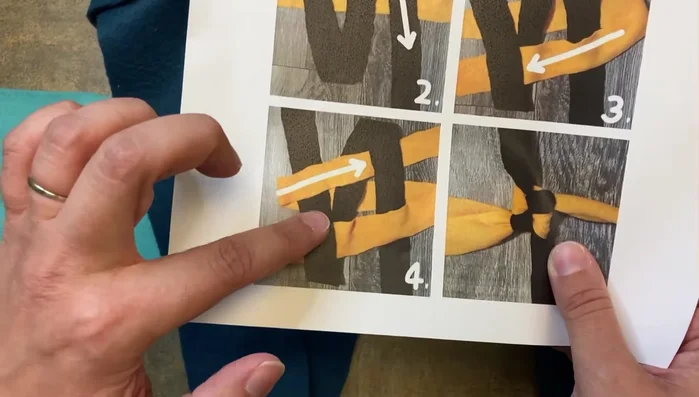
Prepare Fleece Strips Tie the First Square Knot
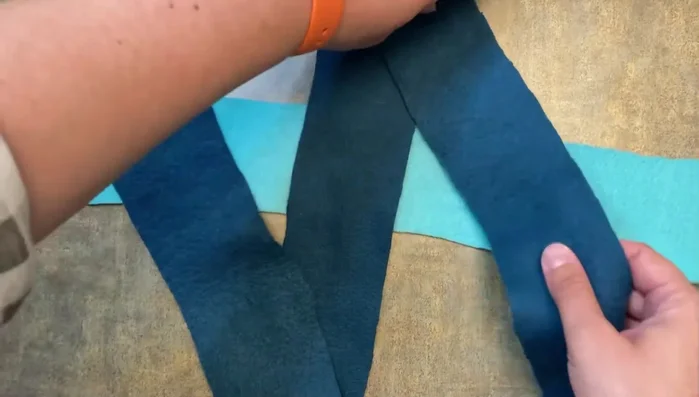
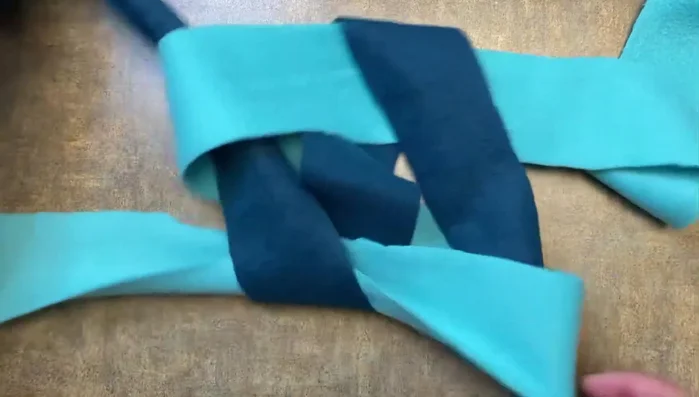
- Bring up the left side of the vertical fleece strip over the horizontal strip.
- Bring the right side of the vertical fleece strip down over the horizontal strip.
- Pull the horizontal fleece strip over the vertical piece, then under the leftmost piece of the vertical strip.
- Take the leftmost piece of the horizontal fleece strip, pull it over the middle vertical piece, and then through the rightmost vertical piece to create a square knot.
Tie the First Square Knot - Tighten the knot by pulling on the diagonal lines to form a square shape.
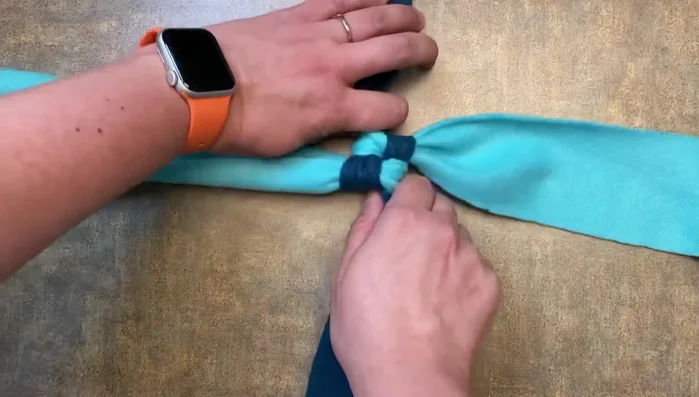
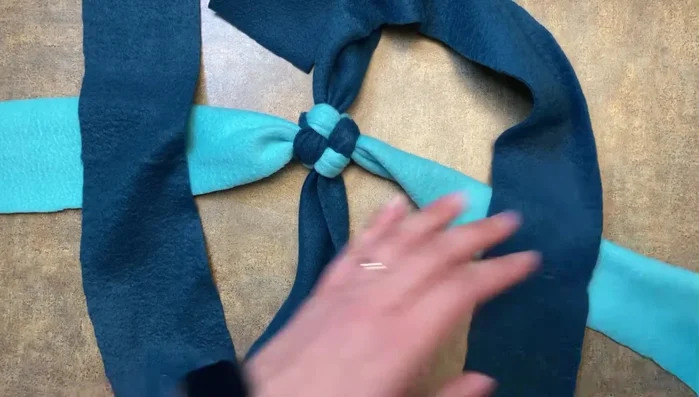
Tie the First Square Knot Repeat Knotting Process
- Repeat steps 2-6, maintaining the same color for the horizontal and vertical pieces.
- Continue repeating steps 2-6 until the desired length of the toy is achieved.
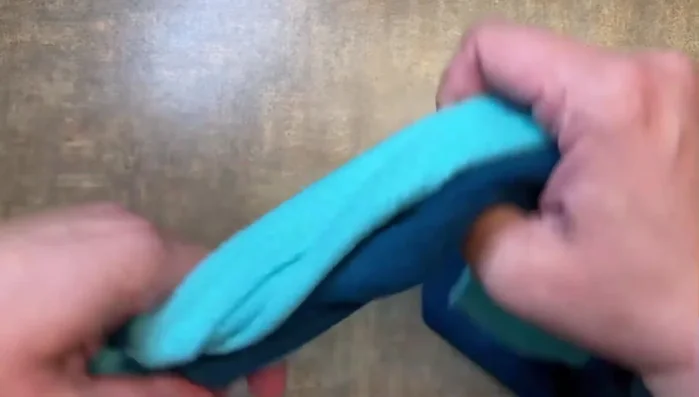
Repeat Knotting Process Secure the End
- To finish, tie a knot at the end of the fleece strips, leaving extra length to secure the knot.
Secure the End

Read more: How to Make a Tiny Loom Band Animal Toy (Rainbow Dog Tutorial)
Tips
- If you make a mistake, it's easy to unknot and correct.
- Leave more tail length than you think you need for the final knot.