Does your dog deserve a fun, durable, and eco-friendly toy without breaking the bank? Then look no further! This simple DIY project will teach you how to create a fantastic square knot tug toy using readily available recycled materials. Forget expensive store-bought options – with just a few old t-shirts or other scraps of sturdy fabric, you can craft a stimulating and engaging toy that your canine companion will adore. This project is perfect for beginners, requiring minimal sewing skills and readily accessible materials, ensuring a rewarding experience for both you and your furry friend.
We'll transform those unwanted clothes into a durable, exciting plaything that’s gentle on the environment and your wallet. This ingenious design utilizes the strength of the square knot to create a toy that's both tough and playful. Ready to get started and give your dog the gift of a handmade toy? Let's dive into the step-by-step instructions below to create your own recycled square knot tug toy!
Preparation and Safety Guidelines
- T-shirt yarn (or other sturdy material like fleece, old towels, or blue jeans)
- Scissors
- Tape measure
- Always supervise your dog with any new toy, especially homemade ones. Remove the toy if it shows signs of damage or fraying to prevent ingestion of small pieces.
- Avoid using materials that could be toxic if ingested, such as painted or treated wood, rubber bands, or anything containing small, detachable parts.
- Ensure knots are tightly secured to prevent them from coming undone and becoming choking hazards.
Step-by-Step Instructions
Prepare Materials
- Prepare four 110-inch strips of your chosen material.

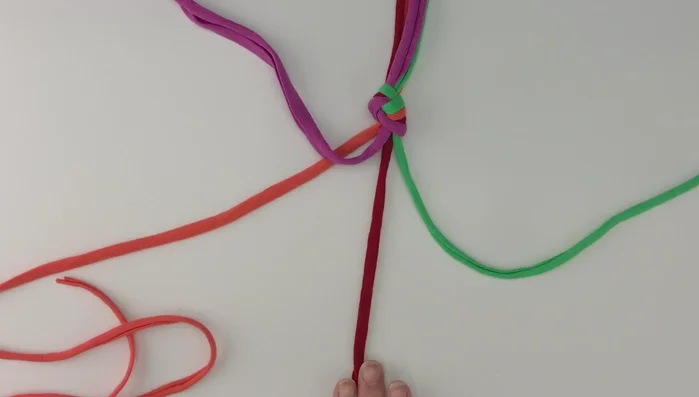
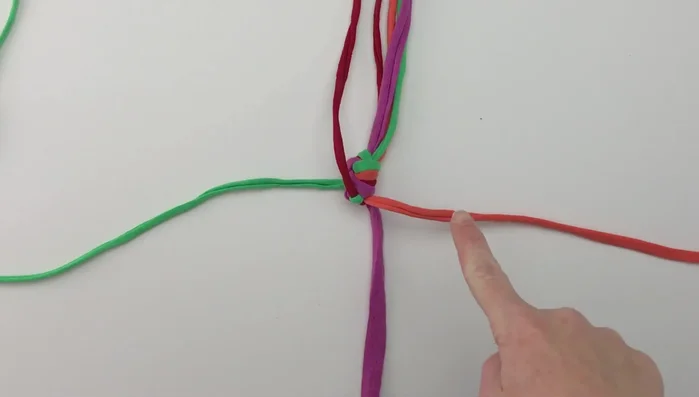
Prepare Materials Create Initial Knot
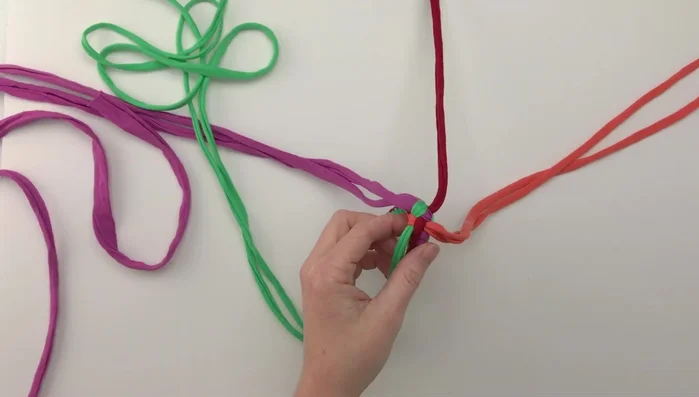
- Tie a temporary knot in the center of the four strips.
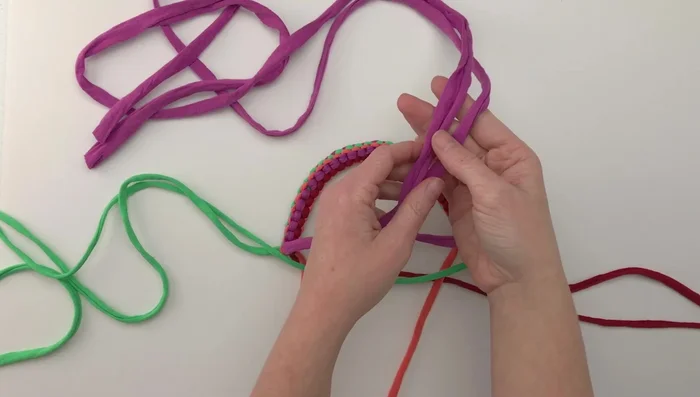
- Arrange the strips in a ‘T’ formation. Start with one color (e.g., red) over the next (e.g., green), then the next color (e.g., green) over the first and the third color, and so on. This creates the initial layering.
- Tighten the knot by pulling all four strings simultaneously. This is the first knot of your rope.
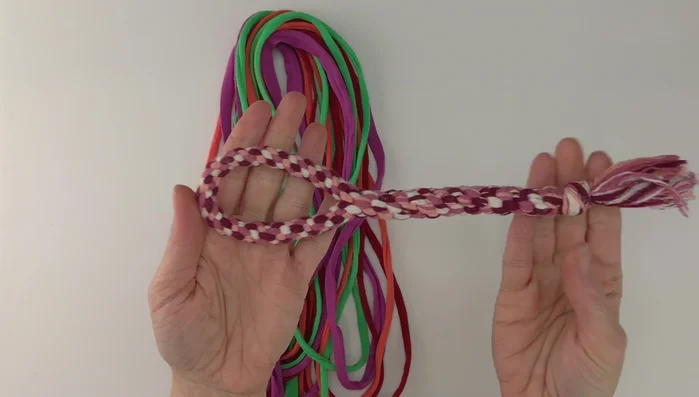
Create Initial Knot Make the Loop
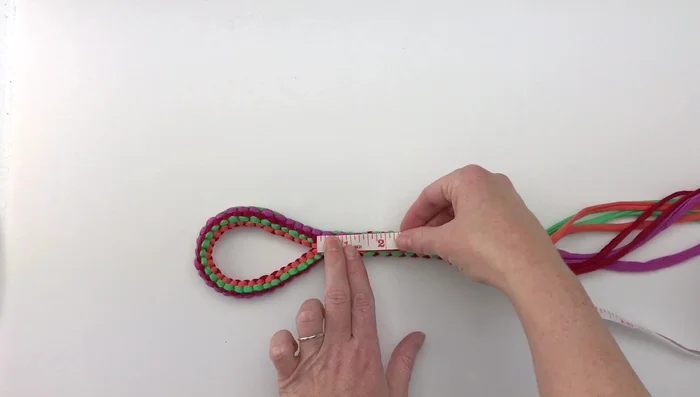
- Repeat step 3, alternating the over/under pattern in each row to create a square knot. Continue until you have enough length for the loop (approximately 8.5 inches, as shown in the video).
Make the Loop Prepare for Body
- Once the loop is created, fold it in half and pair up the colors on either side.
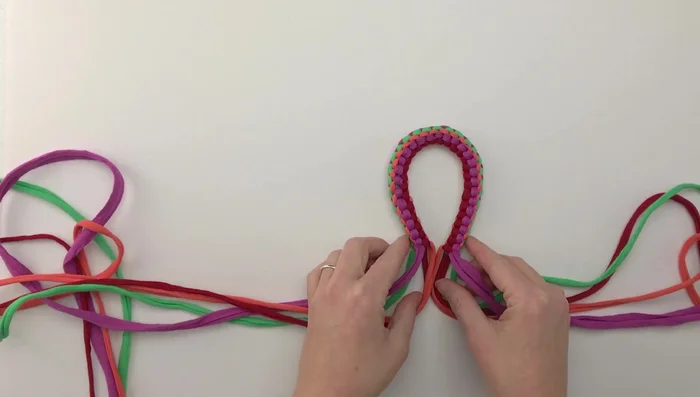
Prepare for Body Create the Body
- Continue creating the square knot, but now treat pairs of strands as one, maintaining the color pairings.
- Continue knotting until you reach the desired length for the toy's body (around 6.25 inches).
Create the Body Finish the Toy
- Tie off the end with a secure knot, trim excess material.
Finish the Toy
Read more: How to Make a Tiny Loom Band Animal Toy (Rainbow Dog Tutorial)
Tips
- Use sturdy materials that can withstand a puppy's chewing.
- If you make a mistake, undo the knots and start again.
- For faster knotting, use your legs to hold the loop, freeing up both hands.
- Always supervise your puppy when playing with the toy to prevent choking hazards.