Floral crowns have captivated hearts for centuries, symbolizing beauty, freedom, and a touch of bohemian charm. Whether you're preparing for a festival, a whimsical wedding, or simply want to add a touch of floral magic to your everyday style, a DIY floral crown is the perfect accessory. Crafting your own allows for complete personalization, letting you choose your favorite blooms and colors to create a truly unique piece that reflects your individual style. Forget expensive, mass-produced headpieces; embracing a simple DIY project is both rewarding and surprisingly easy.
This tutorial will guide you through the creation of a beautiful, asymmetrical side crown, perfect for adding a touch of elegance or playful whimsy to your look. We'll walk you through each step, from gathering your supplies to securing the final flourish, ensuring you create a stunning headpiece you'll be proud to wear. Ready to transform simple flowers into a breathtaking accessory? Let's dive into the step-by-step process!
Preparation and Safety Guidelines
- Pipe cleaners
- Ribbon (wide and thin)
- Twine or wire
- Greenery
- Flowers
- Hot glue or E6000
- Always use sharp floral shears or wire cutters. Improper tools can lead to injury.
- Be mindful of any allergies to flowers or foliage. If you experience any reactions, stop work immediately and seek medical advice.
- Avoid using thorns or overly prickly materials near your face and eyes. Secure sharp elements firmly to avoid scratching.
Step-by-Step Instructions
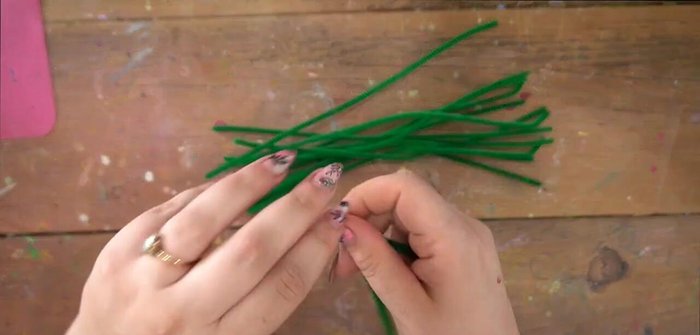
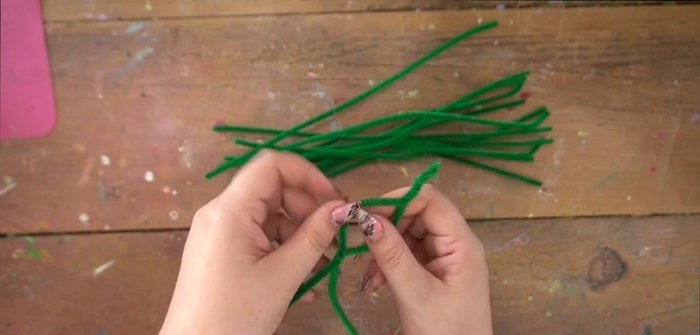
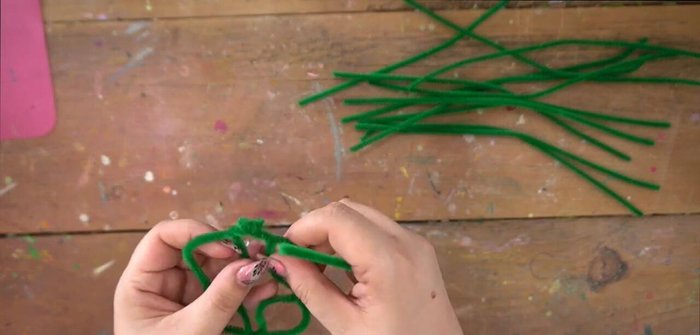
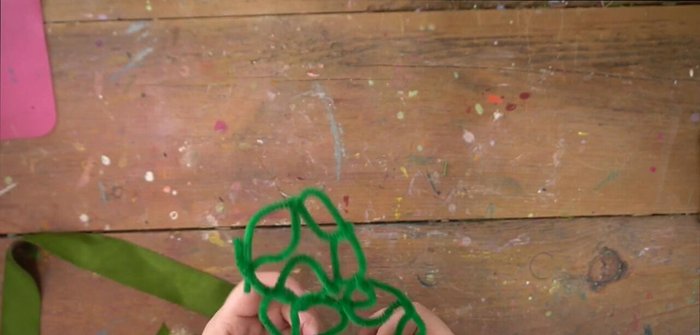
Create the Base Framework
- Create the base structure using pipe cleaners. Twist pipe cleaners to form loops and connect them to create a wider, side-oriented framework.
- Weave the wide ribbon through the pipe cleaner loops to create spaces for the flowers and greenery. Secure the ribbon ends.
- Add more pipe cleaner loops and ribbon weaving to create additional depth and secure the structure. Ensure enough space for flower placement.

Create the Base Framework Add Greenery Base
- Glue the greenery onto the ribbon-covered framework, starting with larger pieces to fill in gaps and provide a base for smaller details.
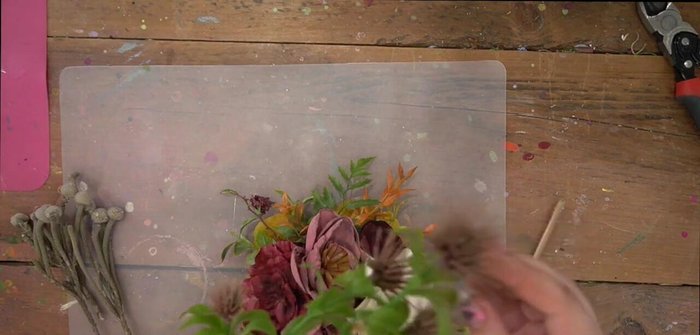
Add Greenery Base Arrange and Glue Flowers
- Arrange and glue the flowers onto the headpiece, strategically positioning them to create a visually appealing side crown effect. Consider color and texture variations.
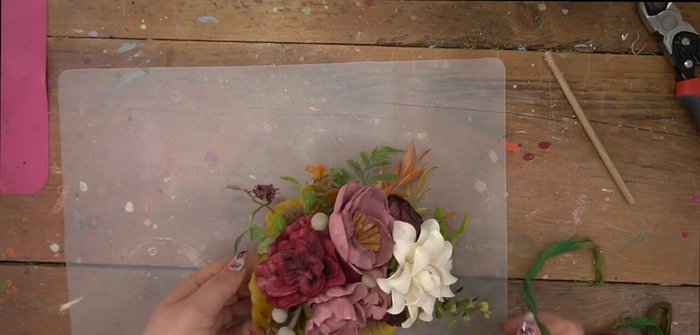
Add Finishing Touches
- Add smaller greenery and floral details to fill in any remaining gaps and enhance the overall design. Ensure even distribution and visual balance.
Add Finishing Touches Add Tie Ribbon
- Attach thin ribbon or wire to both ends of the crown for tying and adjustability.
Add Tie Ribbon
Read more: DIY Studded Dog Collar with Reflective Piping: A Comprehensive Guide
Tips
- Use a variety of textures and colors for the greenery and flowers to create visual interest.
- Don't overthink the flower placement; experiment and see what works best.
- Use glycerin to dye flowers for added flexibility.
- Secure flowers with glue to ensure a strong hold.