Tired of generic pet collars and leashes? Want to add a personal touch to your furry friend's accessories, but intimidated by the embroidery process? Then get ready to unleash your creativity with the Melco Fast Clamp Pro! This revolutionary tool makes adding customized embroidery to pet collars and leashes incredibly fast and easy, even for beginners. Imagine the possibilities: personalized names, playful designs, even your pet's favorite paw print, all beautifully stitched onto durable, high-quality materials. No more searching for that perfect, unique collar – you'll be crafting them yourself in minutes!
The Melco Fast Clamp Pro's intuitive design and secure clamping system simplifies the often-daunting task of embroidering small, curved surfaces. This guide will walk you through a simple, step-by-step process, showing you exactly how to create stunning, personalized pet accessories using your Melco Fast Clamp Pro. Let's get started and transform plain collars and leashes into one-of-a-kind masterpieces!
Preparation and Safety Guidelines
- Melco Fast Clamp Pro
- Always unplug the Melco Fast Clamp Pro before changing hoops or making any adjustments to the machine. Electricity and water don't mix, and this is especially important when working with pet items that might get wet.
- Ensure the pet collar or leash material is securely clamped and properly tensioned in the hoop to prevent shifting or damage during embroidery. Loose fabric can cause needle breakage or poor stitch quality.
- Avoid embroidering over metal hardware (buckles, rings) directly. This can damage your machine needle and potentially create safety hazards. Embroider around these elements or remove them before embroidering.
Step-by-Step Instructions
Prepare the Melco Fast Clamp Pro
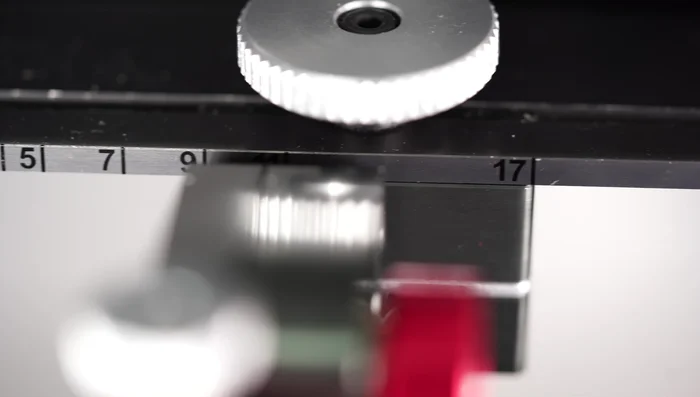
- Set up the Melco Fast Clamp Pro with the smallest arms and a 17cm width.

Prepare the Melco Fast Clamp Pro Design Setup and Parameter Selection
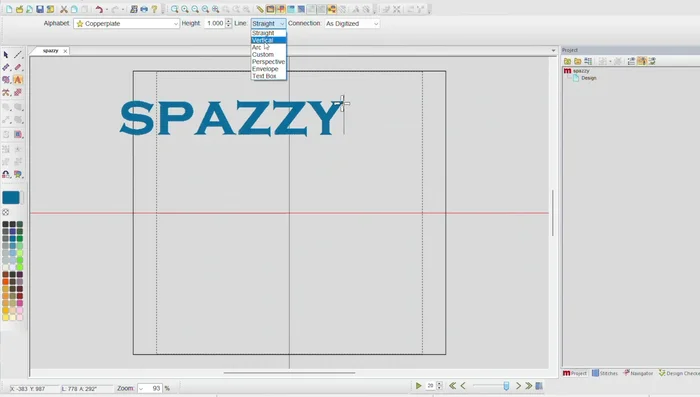
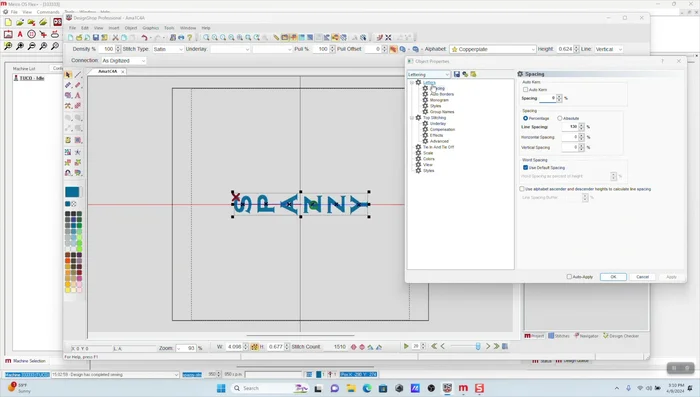
- Choose a font (e.g., Copperplate) and set up the design vertically, adjusting letter spacing as needed.
- Select embroidery settings for center-out stitching and a suitable color.
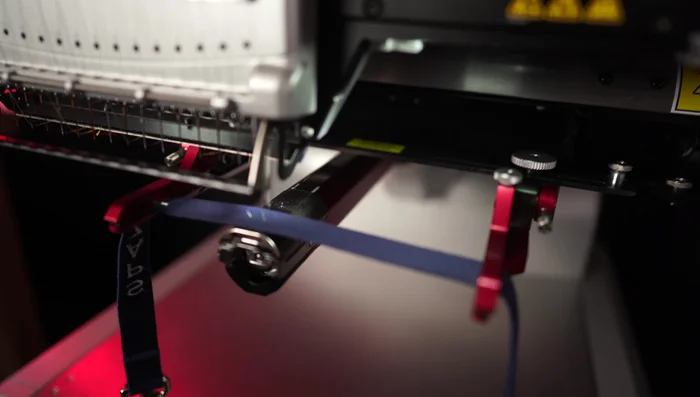
Design Setup and Parameter Selection Leash Embroidery
- Clamp one end of the leash securely on the fast clamp, pull tight, and clamp the other end. Use grid lines and the laser to ensure proper placement.
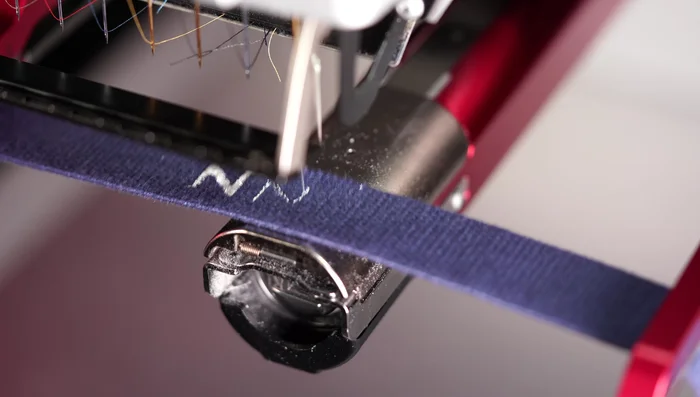
- Embroider the leash.
Leash Embroidery Collar Embroidery
- For the collar, set up the design horizontally. Double-check placement before embroidering.
Collar Embroidery
Read more: DIY Studded Dog Collar with Reflective Piping: A Comprehensive Guide
Tips
- The Melco Fast Clamp Pro is versatile and suitable for various thin materials.
- Use the grid lines and laser for accurate placement.
- The fast clamp makes hooping and centering notoriously difficult items like collars and leashes much easier.