For dog owners who value both functionality and durability, a sturdy and reliable leash is essential. A standard leash, however, may lack the strength and versatility needed for rigorous walks or unexpected situations. This is where a DIY tactical paracord dog lead shines. Paracord, known for its incredible strength-to-weight ratio and knot-holding capabilities, offers a fantastic alternative to traditional leashes, allowing you to create a customized lead that perfectly suits your dog and your needs. You can tailor the length, handle style, and even incorporate extra features like a built-in waste bag dispenser, all while enjoying the satisfaction of a hand-crafted project.
This guide provides a detailed, step-by-step approach to crafting your own tactical paracord dog lead. Whether you're a seasoned paracord enthusiast or a complete beginner, we'll walk you through each stage, from selecting the right materials to securing the finished product, ensuring you end up with a reliable and stylish leash for your canine companion. Let's get started!
Preparation and Safety Guidelines
- 100ft of 550 paracord
- Plastic buckle
- 2in stainless steel spring clip
- Scissors
- Lighter
- Rope
- Bungee cord
- Peg
- Always supervise your dog while using any DIY lead. Paracord, while strong, can break under extreme stress. Regularly inspect for wear and tear.
- Ensure the finished lead is securely fastened and free of loose ends or knots that your dog could chew or get tangled in. A properly secured clasp is essential.
- This DIY lead is not suitable for all dogs or situations. Dogs with strong pulling habits or escape artist tendencies may require a more robust commercially manufactured lead.
Step-by-Step Instructions
Prepare Materials and Secure Paracord
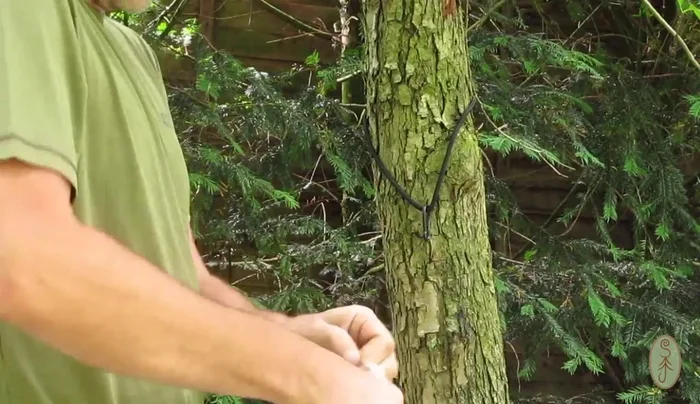
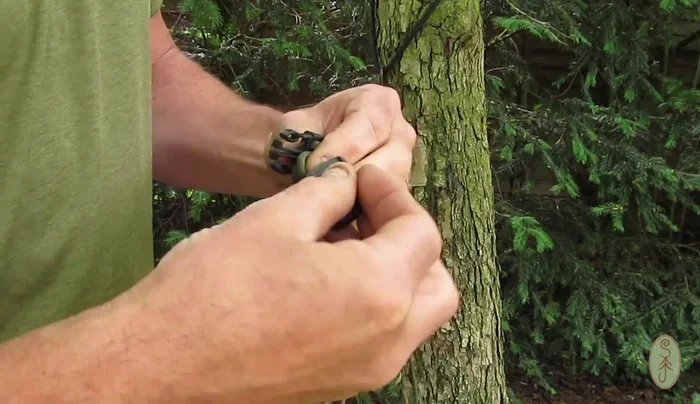
- Prepare your materials and tools. Secure one end of the paracord to a fixed point (tree) using a rope.

Prepare Materials and Secure Paracord Measure and Prepare Lead Length
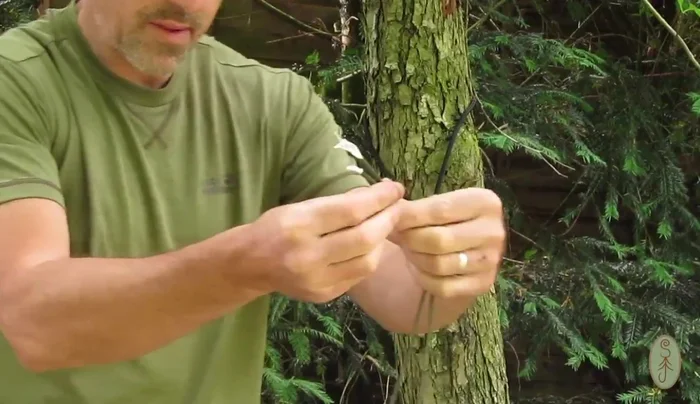
- Find the center of your paracord and measure out the desired length of your dog lead (approx. 1.5 meters).
- Pass the measured length of paracord through the stainless steel clip. Tie off the two ends securely using a simple overhand knot.
Measure and Prepare Lead Length Attach Buckle and Handle
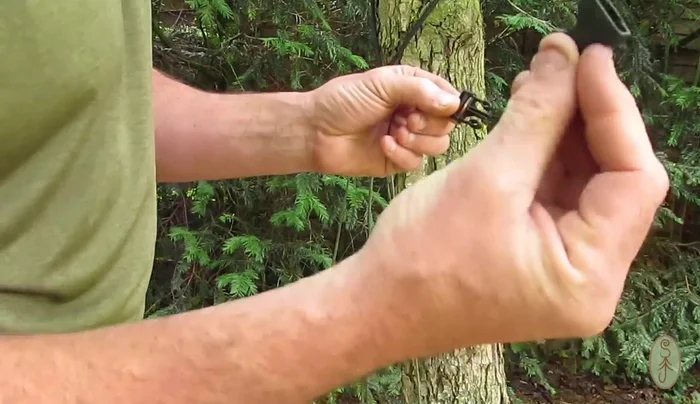
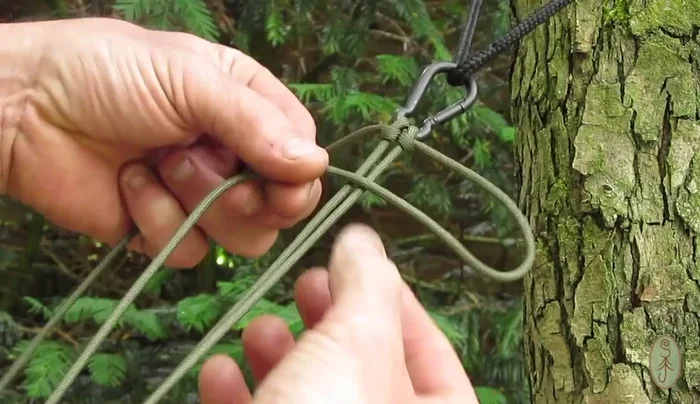
- Attach the male part of the plastic buckle to the paracord loop.
- Thread the female part of the plastic buckle through the loop and over the clip to create a secure handle.
Attach Buckle and Handle Secure Bungee and Begin Weave
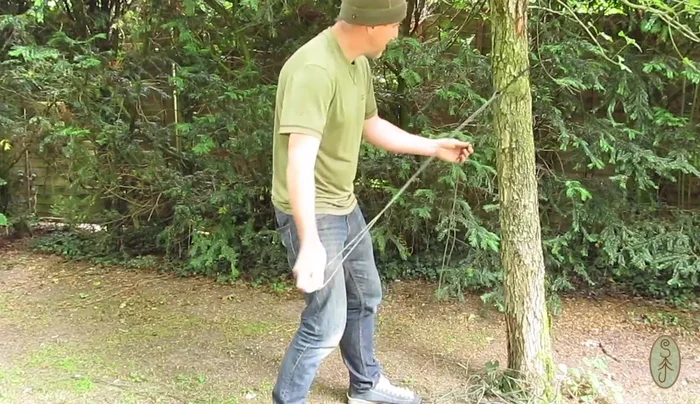
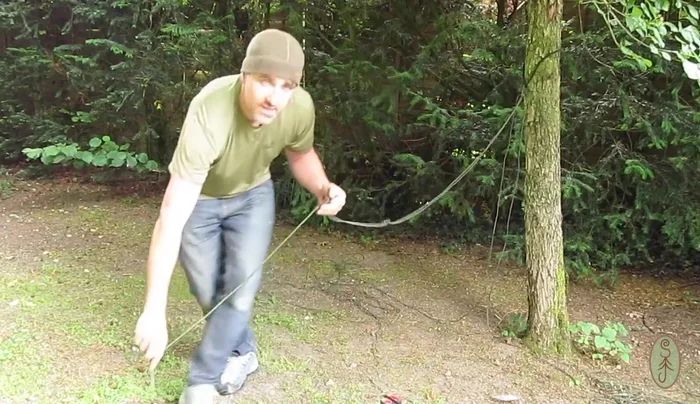
- Secure the bungee cord to the clip at the other end of the lead and temporarily peg it to the ground to maintain tension on the paracord.
- create a loop with one working end, pass it over the top of the two main strands, and then thread the other working end through the loop. Repeat this process, alternating sides, until you reach the male clip.
Secure Bungee and Begin Weave Secure Male Clip and Continue Weave
- To secure the male clip, weave the paracord behind it to lock it in place, then continue the Solomon weave.
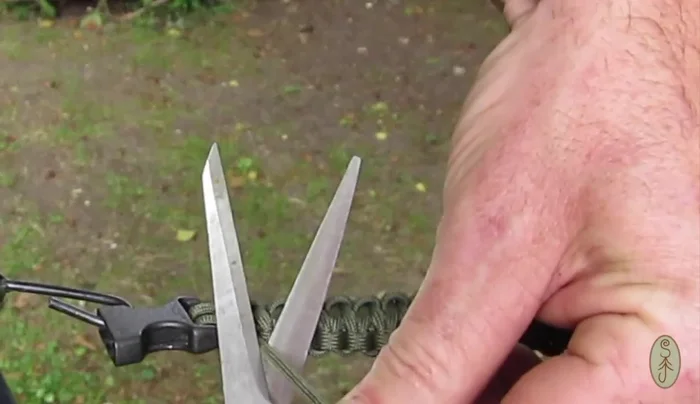
Secure Male Clip and Continue Weave Finish Weave and Seal Ends
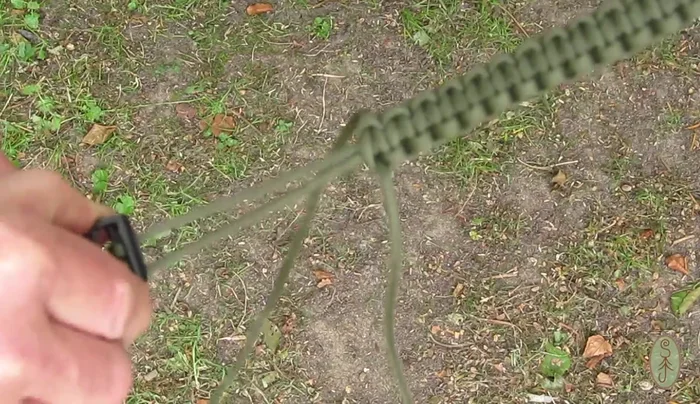
- Once the desired length is reached, cut off the excess paracord, leaving about 5mm. Use a lighter to melt and seal the ends to prevent fraying.
Finish Weave and Seal Ends
Read more: DIY Studded Dog Collar with Reflective Piping: A Comprehensive Guide
Tips
- Keep the two strands that form the loop at the end untwisted while weaving to maintain a flat, even appearance.
- For the final section of weaving, consider bringing the paracord up to waist height for easier manipulation.