Spoil your feline friend with the ultimate in luxurious comfort – a DIY super chunky cat bed, crocheted with the opulent texture of Chanel-inspired yarn! Forget flimsy, store-bought beds; this project is surprisingly simple, even for beginner crocheters, and the result is a stunning, incredibly cozy haven your cat will adore. Imagine the soft, plush feel under your kitty's paws, a striking contrast to the sleek elegance of the yarn itself. The chunky nature of the yarn means this project comes together quickly, making it a perfect weekend crafting project.
This luxurious cat bed is crafted using a straightforward design that emphasizes simplicity and speed. We’ll be using a super bulky yarn to create a remarkably quick and satisfying project, perfect for those with limited crochet experience or a busy schedule. Ready to transform some yarn into a purrfectly stylish sleeping spot? Let's dive into the step-by-step instructions!
Preparation and Safety Guidelines
- Super chunky Chanel yarn (1 inch wide)
- Crochet hook
- Scissors
- Measuring tape
- Clip
- Always supervise your cat around the finished cat bed, especially initially. Remove any loose yarn or stuffing that could become a choking hazard.
- Use non-toxic, pet-safe materials for stuffing and yarn. Chanel yarn, while luxurious, may contain dyes that could be harmful if ingested. Ensure it's suitable for pets.
- Ensure the cat bed is large enough for your cat to comfortably stretch out and turn around without feeling restricted. A too-small bed could cause stress or injury.
Step-by-Step Instructions
Prepare the Yarn
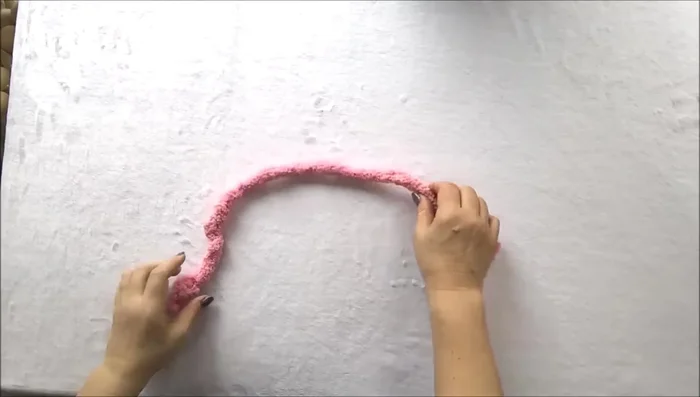
- Make a knot at the end of the yarn and start with a slip knot.

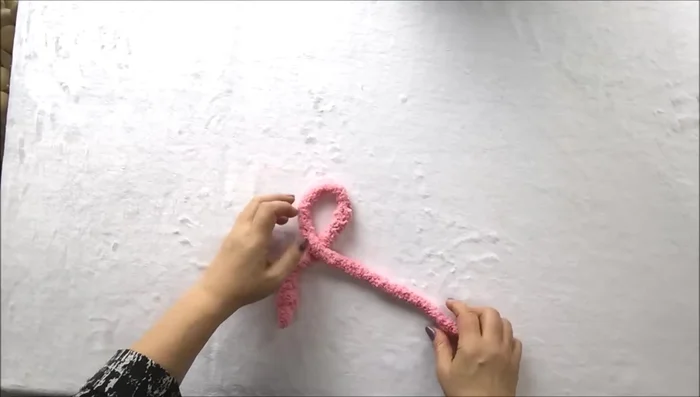
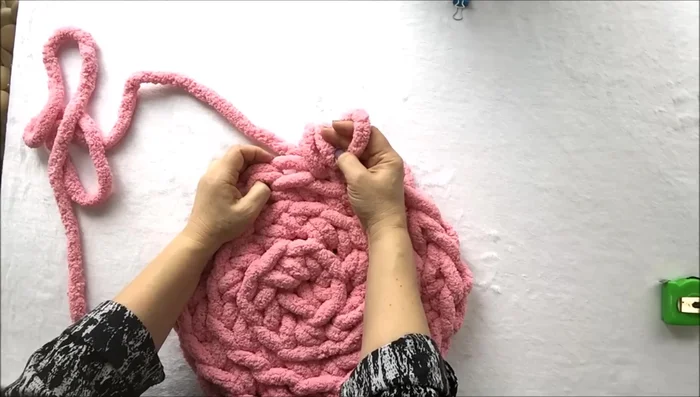
Prepare the Yarn Create the Base Flower
- Make 6 single crochets in a circle, forming a flower shape. This is your first row. Use a clip to mark the end of the row.
Create the Base Flower Increase Base Size
- Double the size of the flower by making two single crochets in each stitch of the previous row (resulting in 12 stitches). Use the back loop of the stitches.
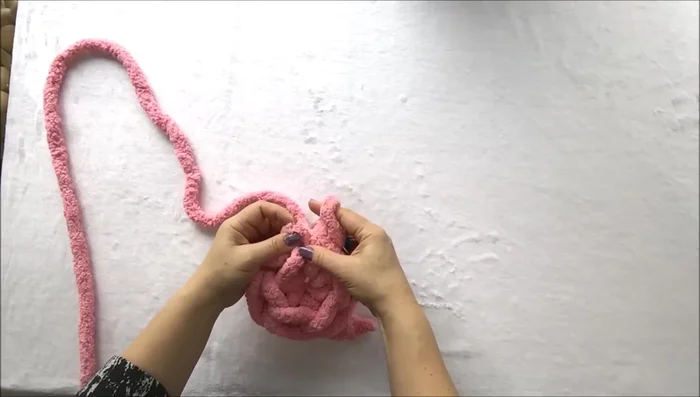
Increase Base Size Expand the Base
- Alternate between one and two single crochets in each stitch to increase the size gradually. This creates a spiral pattern. Continue until the diameter reaches approximately 14.5 inches.
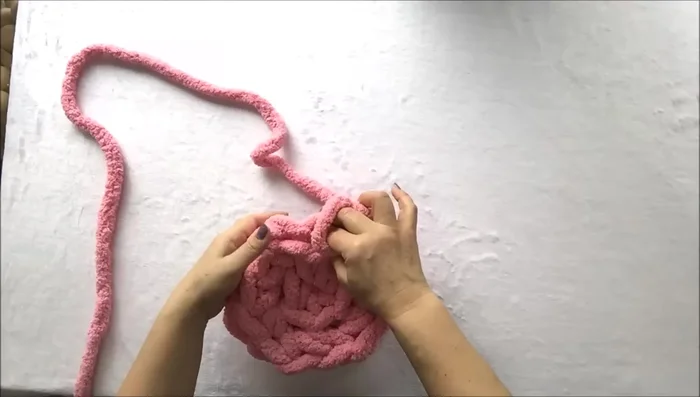
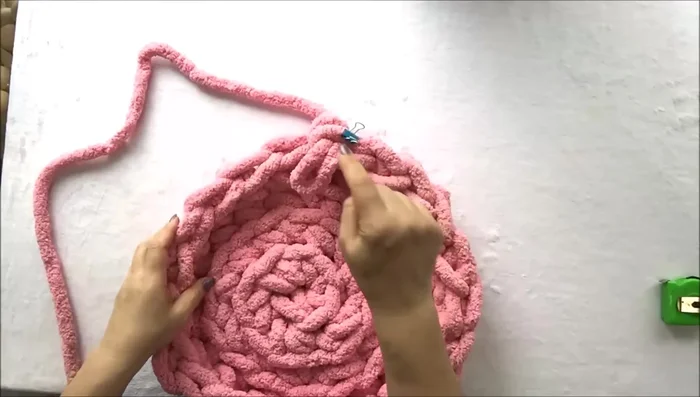
Expand the Base Create the First Wall Row
- Work single crochets around the edge of the base, working into both loops of each stitch to form the walls of the cat bed. Use a clip to mark the end of each row.
Create the First Wall Row Create Additional Wall Rows
- Repeat step 5 to create the desired wall height. Two rows are shown in the video. Two skeins of yarn can be used for higher walls.
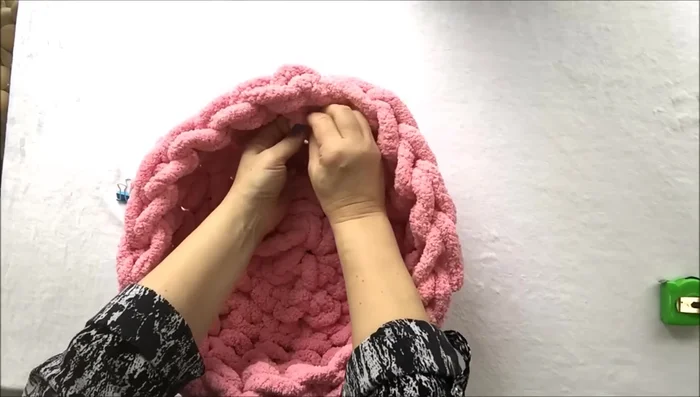
Create Additional Wall Rows Finish the Cat Bed
- Weave in the loose ends to finish the cat bed.
Finish the Cat Bed
Read more: DIY Cuddly Cat & Dog Bed: A Super-Warm, Easy Tutorial
Tips
- Take your time and don't rush, especially when practicing.
- Use clips to mark the end of each row to help with the construction process.
- For a larger cat bed, use more skeins of yarn.