Does your furry friend suffer from allergies, irritations, or other sensitive skin conditions? Finding comfortable clothing that doesn't exacerbate their discomfort can feel like a never-ending search. Harsh chemicals, scratchy fabrics, and ill-fitting designs are common culprits behind your dog's skin woes. But what if you could create perfectly tailored, soothing clothing yourself? This ultimate guide delves into the world of DIY dog shirts specifically designed for sensitive skin, providing you with the knowledge and techniques to craft comfortable and safe garments. We'll explore fabric choices, pattern selection, and essential sewing techniques to ensure a perfect fit and ultimate comfort for your beloved pet.
This guide will walk you through the entire process, from choosing the right materials to sewing the final stitch. Learn how to create custom-fit shirts that avoid irritating seams and tags, using breathable, hypoallergenic fabrics that will protect your dog's delicate skin. Get ready to embark on a rewarding journey of creating personalized apparel that prioritizes your dog's well-being while expressing your love and creativity. Let's get started on making your dog the most comfortable and stylish canine on the block!
Preparation and Safety Guidelines
- Sewing machine
- Fabric scissors
- Pins
- Washable marker
- Measuring tape
- Pre-owned children's shirts
- Always pre-wash fabrics before sewing to remove any potential irritants and to prevent shrinkage after your shirt is finished.
- Choose natural, breathable fabrics like cotton or linen. Avoid synthetic materials that can trap heat and moisture, potentially leading to skin irritation.
- Avoid using strong detergents, fabric softeners, or harsh chemicals when washing the finished shirt. Opt for gentle, hypoallergenic options.
Step-by-Step Instructions
Shirt Preparation
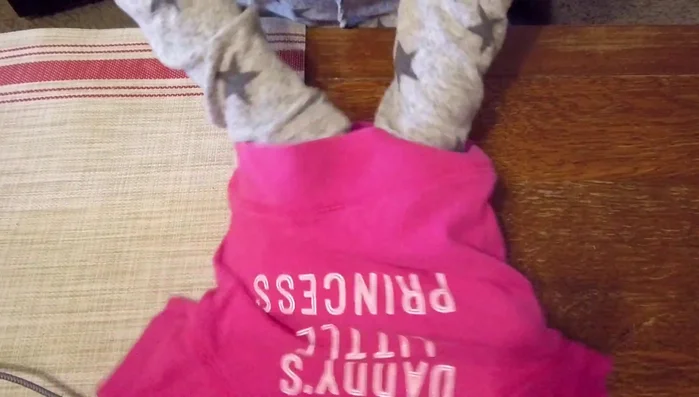
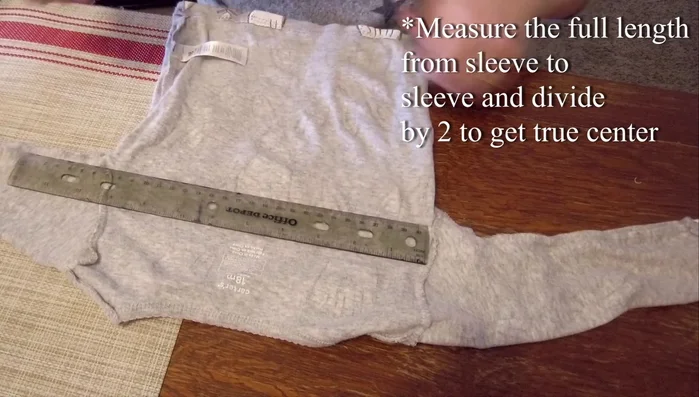
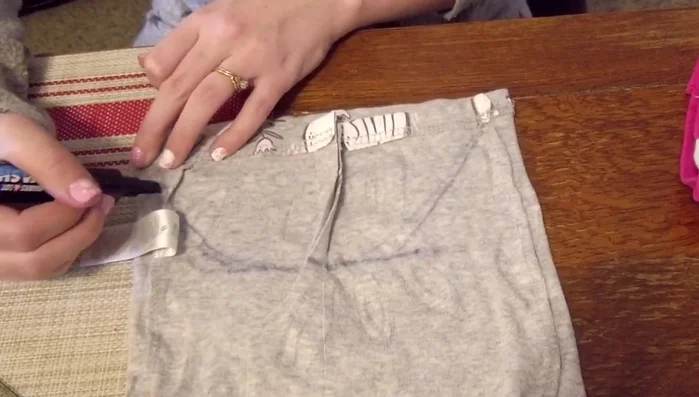
- Select a pre-owned child's shirt (12-18 months size suggested). Turn it inside out.

Shirt Preparation Chest Measurement and Center Seam
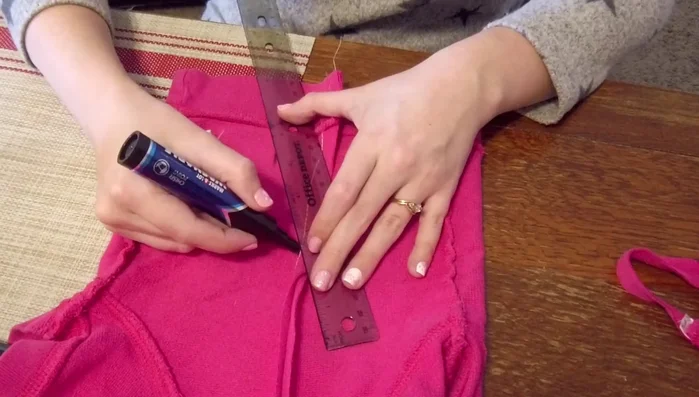
- Mark the front of the shirt (F). Measure between the arm seams to determine the chest measurement (4 inches in this example).
- Pinch the center of the shirt to achieve the desired chest width (4 inches). Pin and sew down the center.
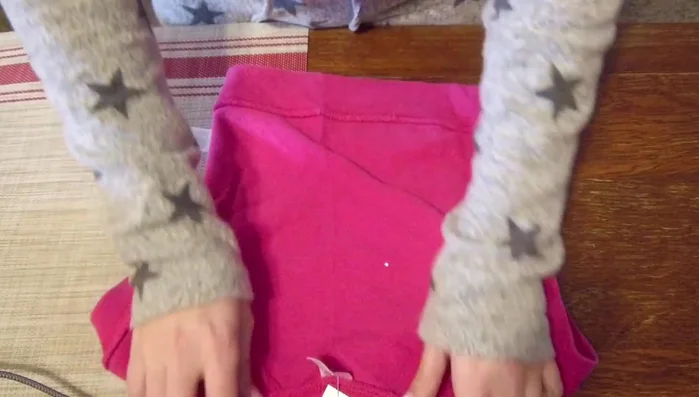
Chest Measurement and Center Seam Belly Adjustment
- Try the shirt on the dog to ensure the chest size is correct. Pin and measure to adjust the belly width, making it smaller to fit the dog's body.
- Connect the pinned points to the center seam with diagonal lines. Pin and sew along these lines to create a tapered belly.
- Cut off the excess fabric. Try the shirt on again and make any necessary adjustments.
Belly Adjustment Long Sleeve Adaptation (if applicable)
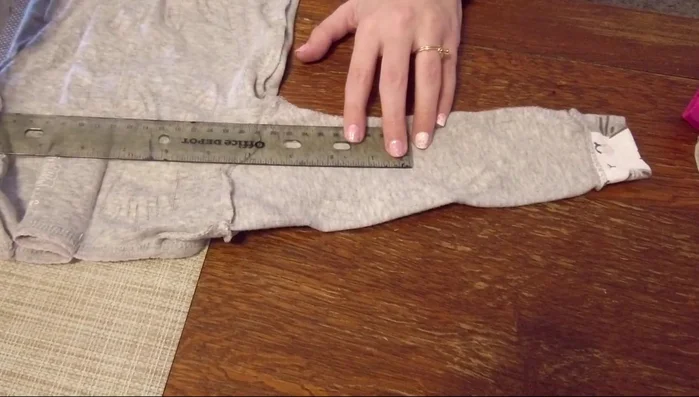
- For long-sleeve shirts, repeat steps 1-6, adjusting for sleeve length and cuff size.
Long Sleeve Adaptation (if applicable) Sleeve and Cuff Creation
- Measure and cut the sleeves, ensuring the cuffs fit snugly around the dog's legs. Re-attach cuffs if needed, creating a finished edge.
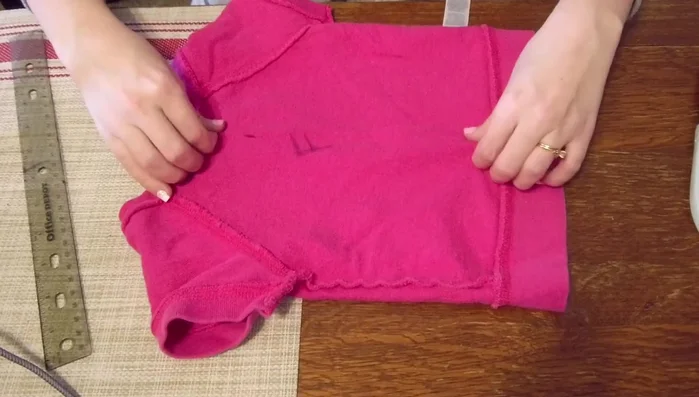
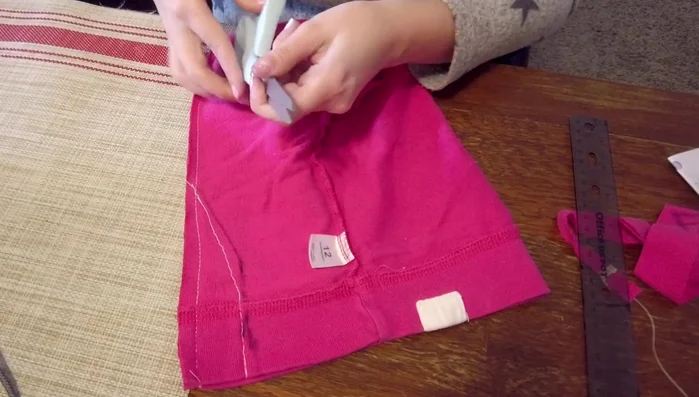
Sleeve and Cuff Creation Underbelly Cutout
- Make an underbelly cutout following previous markings, ensuring evenness. Fold and sew the raw edges to create a finished edge. Cut off any excess seam allowance.
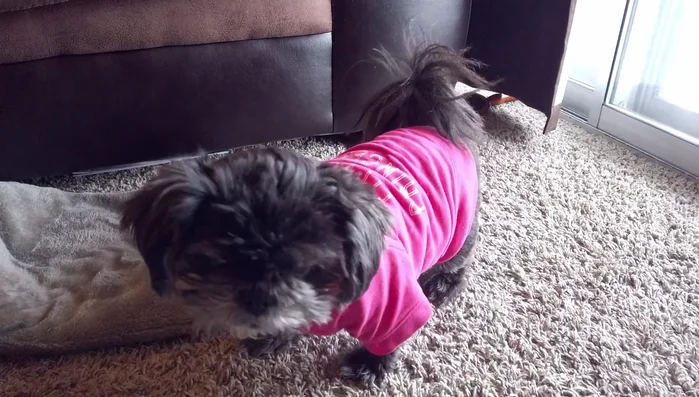
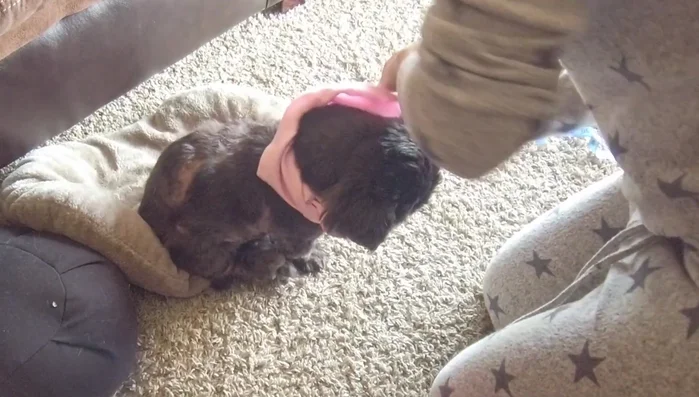
Underbelly Cutout Final Fitting
- Try the finished shirt on the dog.
Final Fitting
Read more: DIY Dog Sweater: Cozy Knit Creations for Your Pup
Tips
- Use a washable marker to label the front of the shirt.
- Try the shirt on the dog at various stages to ensure proper fit and make necessary adjustments.
- Leave enough seam allowance when cutting the fabric.