Want to create a unique and adorable outfit for your furry friend without breaking the bank? Then look no further! This ultimate guide will walk you through the simple and satisfying process of making a DIY dog t-shirt, perfectly tailored to your pup's personality and measurements. Forget expensive pet boutiques; unleash your creativity and craft a custom tee that reflects your dog's individual style, whether it's a bold graphic, a playful pattern, or a simple, comfortable design. You'll be amazed at how easy it is to transform a plain t-shirt into a paw-some piece of doggy apparel.
This guide is perfect for beginners and experienced crafters alike, offering clear instructions and helpful tips for every step of the way. From choosing the right fabric and taking accurate measurements to mastering the essential sewing techniques, we've got you covered. Ready to get started on this fun and rewarding project? Let's dive into our step-by-step guide to making the perfect DIY dog t-shirt!
Preparation and Safety Guidelines
- Old t-shirt or onesie
- Fabric scissors
- Chalk or fabric marker
- Sewing machine or needle and thread
- Iron (optional)
- Always supervise your dog while wearing the shirt, and remove it immediately if they show signs of distress (e.g., excessive chewing, scratching, or panting).
- Ensure the shirt is made from a soft, breathable fabric to prevent skin irritation. Avoid using materials that could be easily ingested or cause choking hazards.
- Double-check that the shirt fits comfortably and allows your dog full range of motion. A shirt that's too tight can restrict breathing and movement, while one that's too loose can be a tripping hazard.
Step-by-Step Instructions
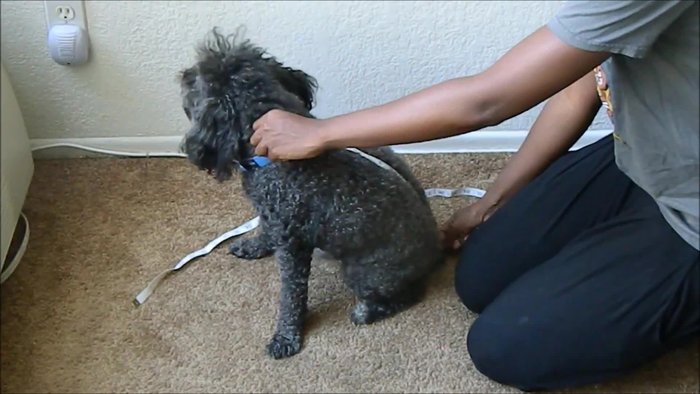
Take Measurements
- tail length, body width, and belly length from collar to desired shirt end.

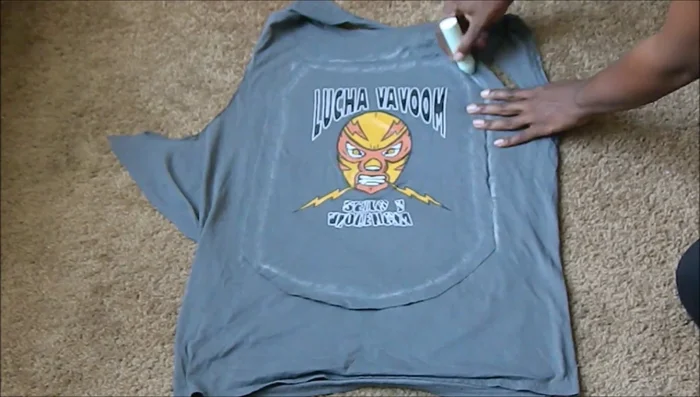
Take Measurements Create Pattern
- Use an old t-shirt or onesie as a template. Trace the outline onto your new fabric, or use your measurements to create your own pattern. Cut off the sleeves and collar.
Create Pattern Cut and Sew the Body
- Create the front piece using the back piece as a guideline. Chalk out the sides and top. Measure and mark the center for the belly measurement, adding ½ inch for seam allowance. Connect the lines to create a half-circle shape. Cut it out.
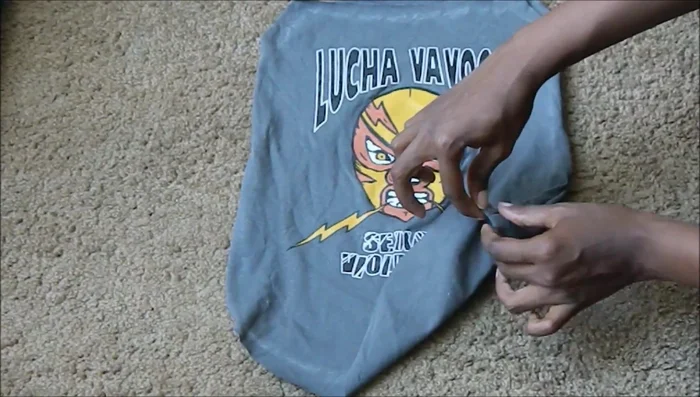
- Sew the sides of the front and back pieces together. Fold the bottom twice, press (or pin), and stitch to create a hem.
Cut and Sew the Body Attach Collar
- Reattach the collar. Place the collar pieces right sides together, pin, and stitch around the neckline. Adjust collar length if needed.
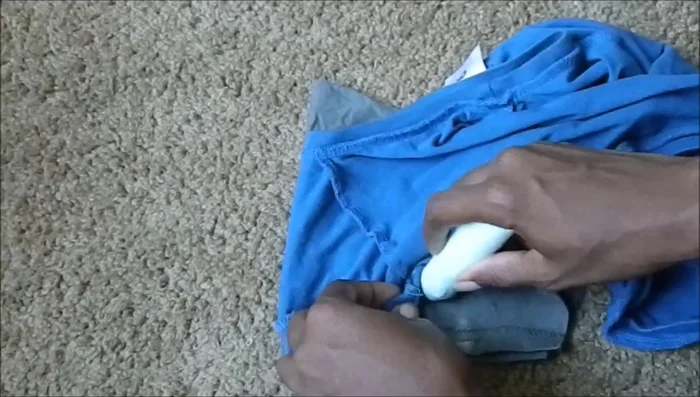
Attach Sleeves
- Create sleeves using an old t-shirt or onesie as a guideline, or by tracing the existing sleeve shape. Attach and pin sleeves to the armholes. Stitch completely around the armhole, then gather and stitch the side seams.
Attach Sleeves

Read more: DIY Dog Sweater: Cozy Knit Creations for Your Pup
Tips
- Adding extra half inch for seam allowance ensures a well-finished garment.
- Ensure the fabric stretches around the dog's body when attaching the collar.