Is your furry friend always shivering, even on mildly cool days? Do you dream of a convenient and adorable way to keep them warm and secure while on the go? Then look no further! This guide will show you how to craft a cozy and personalized hoodie pocket, transforming a simple garment into a unique and practical pet carrier. Imagine the comfort of your pet nestled safely in a soft, warm pocket, free from the anxieties of traditional carriers. This project is surprisingly simple, even for beginner sewists, requiring minimal materials and offering maximum cuteness.
Forget expensive pet carriers – this DIY project is cost-effective and allows for complete customization. You can tailor the size and style to perfectly fit your beloved companion, using their favorite fabrics and colours. From selecting the perfect hoodie to adding personalized touches, this guide will walk you through every step of the process, ensuring a successful and satisfying crafting experience. Let's get started with the step-by-step instructions below!
Preparation and Safety Guidelines
- Sweatshirt (Large)
- Fabric (Fleece, 14" x 17")
- Pins
- Sewing Machine
- Snap Buttons (optional)
- Always supervise your pet while they are in the hoodie pocket. The pocket isn't a replacement for a proper carrier, and your pet could potentially escape or get injured.
- Ensure the hoodie pocket is large enough for your pet to comfortably breathe and move their head. Avoid restrictive fabrics or designs that could cause overheating or suffocation.
- Never leave your pet unattended in the hoodie pocket, especially in hot cars or environments. Overheating is a serious risk.
Step-by-Step Instructions
Gather Supplies & Choose Sweatshirt
Prepare the Hoodie
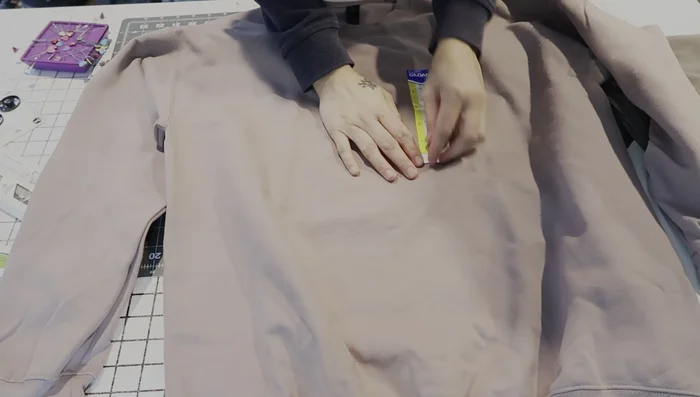
- Choose and mark the sweatshirt. Decide on the pocket's placement and size on the sweatshirt. Mark the desired location with pins.

Prepare the Hoodie Cut and Prepare the Fleece Pocket
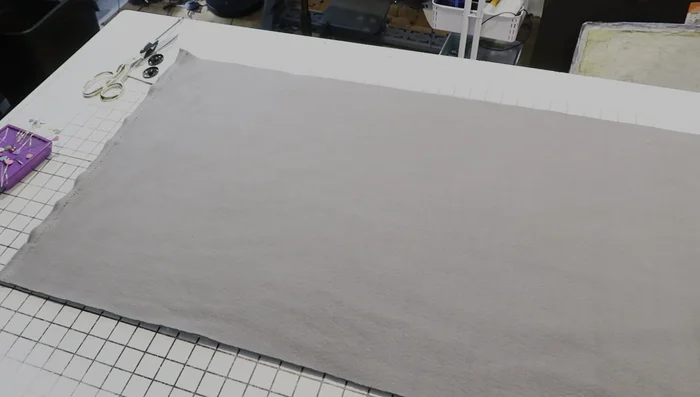
- Cut and prepare the fabric pocket. Cut a piece of fleece slightly larger than your desired pocket size (add seam allowance). Fold and press the edges inward (½ inch on sides and bottom, 1 inch on top).
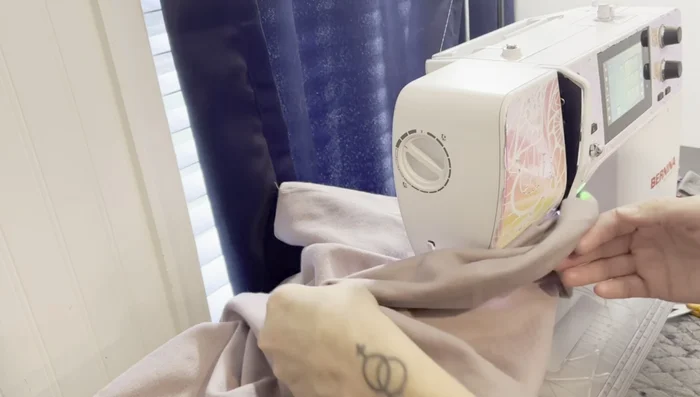
Cut and Prepare the Fleece Pocket Sew Fleece Pocket Edges
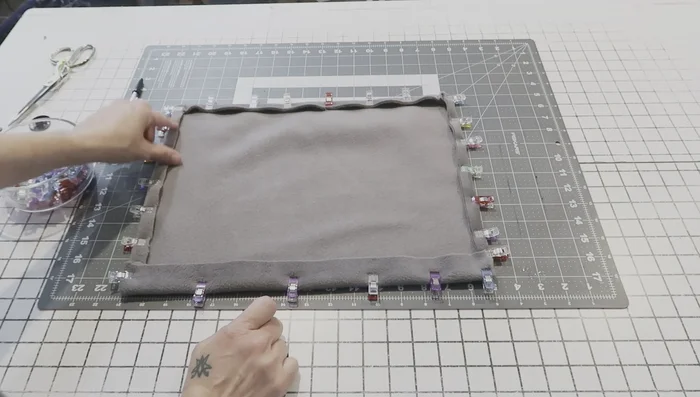
- Sew the fabric pocket edges. Stitch down the folded edges to secure them in place. Use a straight stitch for simplicity.
Sew Fleece Pocket Edges Attach Pocket to Hoodie
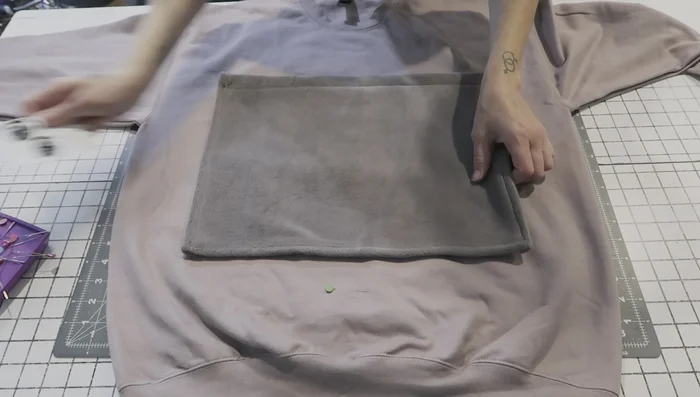
- Pin the pocket to the sweatshirt. Pin the finished pocket onto the marked area of the sweatshirt, ensuring even placement on both sides. Avoid pinning through the back of the sweatshirt.
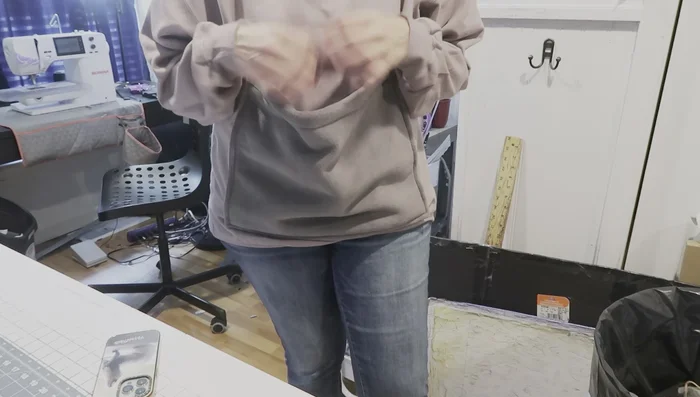
Attach Pocket to Hoodie Sew Pocket to Hoodie
- Sew the pocket onto the sweatshirt. Carefully sew the pocket onto the sweatshirt, making sure not to sew the back layer. Sew slowly and avoid bunching up the fabric.
Sew Pocket to Hoodie Add Closure (Optional)
- Add closure (optional). If desired, add velcro or snaps to the top edge of the pocket for a more secure closure.
Add Closure (Optional)
Read more: DIY Dog Sweater: Cozy Knit Creations for Your Pup
Tips
- Consider your pet's size. If working with larger animals like cats, make the pocket bigger to ensure a comfortable fit.
- Use a large sweatshirt. A large sweatshirt is a good starting point for a comfortable pet hoodie.
- Pre-sew additional pockets. If adding extra pockets, do so before sewing the main pet pocket to the sweatshirt.
- Avoid completely enclosing your pet. While closures are optional, avoid completely sealing the pet inside for safety and ventilation.