Give your furry friend the gift of style and sustainability with this DIY upcycled dog raincoat! Tired of expensive, disposable pet gear ending up in landfills? We're showcasing a fun and easy project that transforms unwanted materials into a chic, waterproof coat for your beloved canine companion. This guide proves that eco-conscious choices don't have to compromise on quality or aesthetics; in fact, they can lead to truly unique and personalized results. Think of the possibilities – repurposing old umbrellas, tarps, or even durable fabrics from discarded clothing!
Forget about expensive store-bought raincoats that lack personality. This project allows you to create a custom-fit, uniquely designed raincoat tailored perfectly to your dog's size and your own creative flair. Ready to get started on this rewarding and environmentally friendly endeavor? Let's dive into the step-by-step process to craft your upcycled dog raincoat.
Preparation and Safety Guidelines
- Sewing Machine
- Needle
- Thread
- Scissors
- Measuring Tape
- Buttons
- Elastic
- Ensure all seams are securely stitched and waterproofed to prevent leaks and discomfort. Test the finished raincoat's waterproofness before letting your dog wear it in heavy rain.
- Use only non-toxic, pet-safe materials and dyes. Avoid anything that could be ingested or irritate your dog's skin. Always check for loose threads or embellishments that could be a choking hazard.
- The raincoat should fit your dog comfortably without restricting movement or breathing. It should allow a full range of motion and be easy for your dog to take on and off.
Step-by-Step Instructions
Source Materials
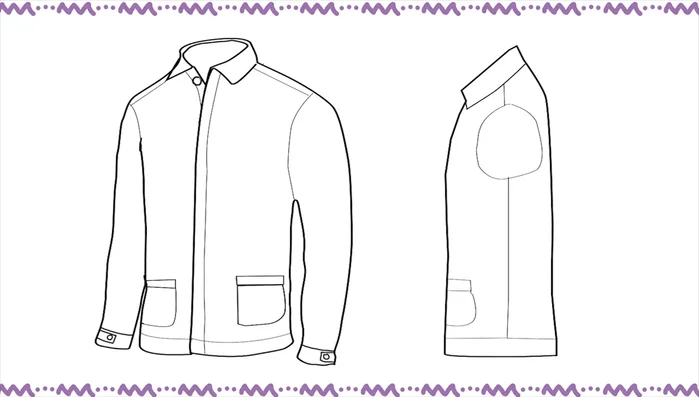
- Source a used raincoat.
Plan & Prep
- Assess the raincoat and plan adjustments for the dog's size and shape.

Plan & Prep Alter the Raincoat
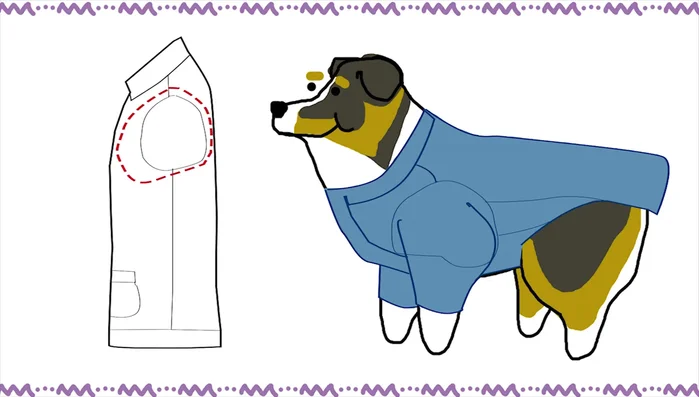
- Remove the existing armholes and side seams.
- Create new armholes and side seams to fit the dog.
Alter the Raincoat Create Sleeves & Cuffs
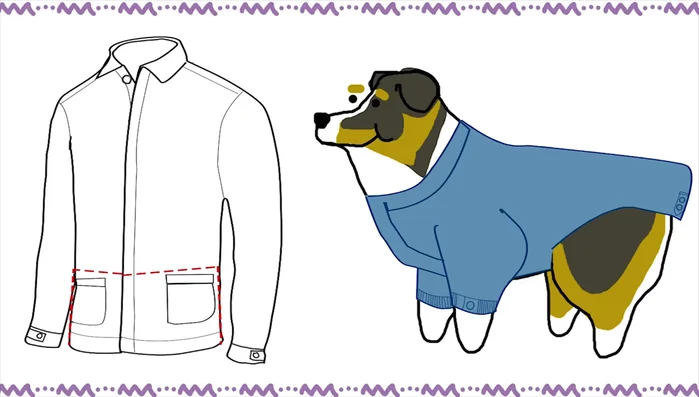
- Make ribbed cuffs for the sleeves using elastic and repurposed buttons.
Create Sleeves & Cuffs Add Leash Attachment
- Create a leash attachment flap using scrap fabric from the pockets.
Add Leash Attachment Assemble & Finish
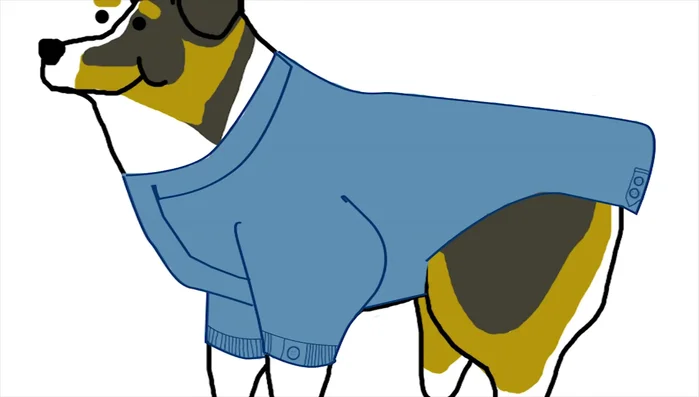
- Sew all pieces together, ensuring a snug and comfortable fit.
Assemble & Finish

Read more: DIY Dog Sweater: Cozy Knit Creations for Your Pup
Tips
- Use pre-existing details (like buttons) to reduce the need for new materials.
- Maximize the use of the existing fabric to minimize waste.