Does your beloved canine deserve a touch of sartorial elegance? Then prepare to be charmed by this delightful project: sewing a dog dress featuring adorable ruffled sleeves! This guide will equip you with the skills and confidence to create a truly unique and stylish garment for your furry friend, transforming your pup into the most fashionable creature on the block. Forget expensive, mass-produced pet clothing; you'll be amazed at how easy it is to create a custom-fit dress that reflects your dog's personality and your own creative flair. Choosing the right fabric and embellishments will allow you to personalize the design to perfectly match your dog’s unique style.
This step-by-step guide will walk you through each stage of the process, from selecting the perfect pattern and fabric to attaching the charming ruffled sleeves and finishing touches. Get ready to unleash your inner seamstress (or tailor!) and let's begin crafting the perfect ruffled-sleeved dress for your four-legged companion.
Preparation and Safety Guidelines
- Fabric
- Lace
- Sewing Machine
- Pins or Clips
- Velcro
- Iron
- Scissors
- Always supervise your dog while wearing the dress to prevent them from chewing or ingesting fabric. Remove the dress immediately if you notice any signs of distress or discomfort.
- Choose a breathable fabric, especially for warmer weather. Avoid fabrics that could irritate your dog's skin.
- Ensure the dress fits comfortably and doesn't restrict your dog's movement. It shouldn't be too tight or too loose.
Step-by-Step Instructions
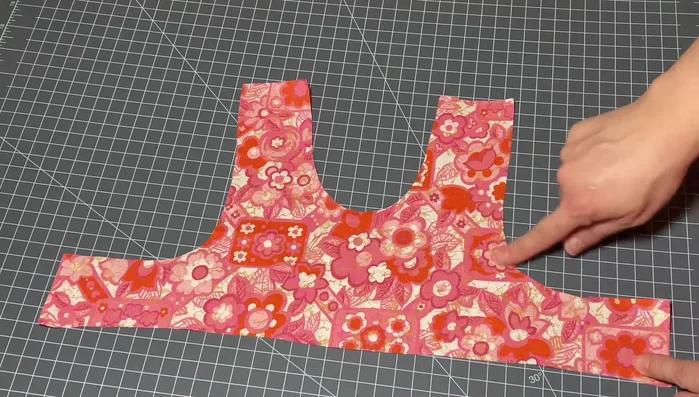
Prepare Bodice
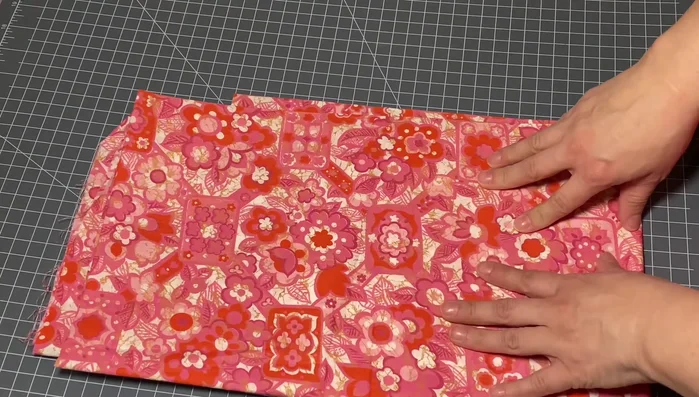
- Cut out two bodice pieces using a pattern.

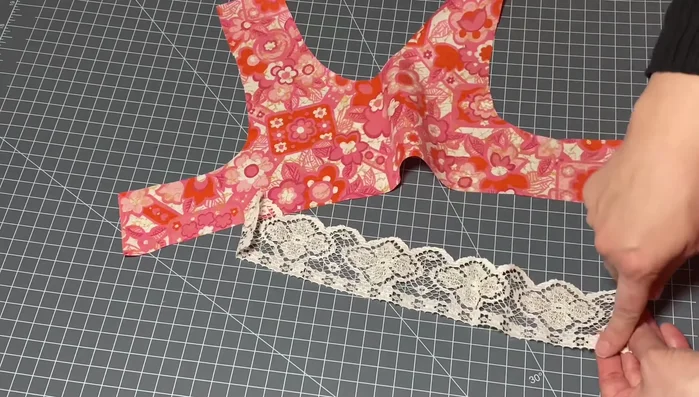
Prepare Bodice Prepare Ruffled Sleeves
- Measure and cut approximately 12 inches of lace (adjust for dog size). Add extra inches for gathering.
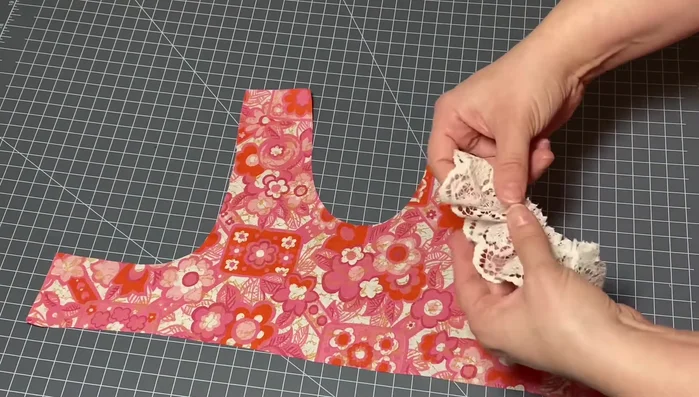
- Use a sewing machine with the largest stitch size and highest tension to create gathers. Alternatively, manually gather using the loose threads.
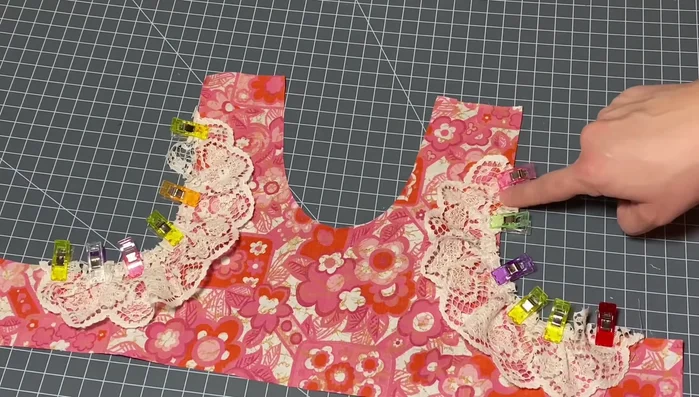
Prepare Ruffled Sleeves Attach Sleeves to Bodice
- Pin or clip the gathered lace to one bodice piece, ensuring the pretty side faces outwards. The raw edge of the lace should be caught in the seam.
- Stitch along the edge, securing both the lace and the bodice fabric. Trim excess lace.
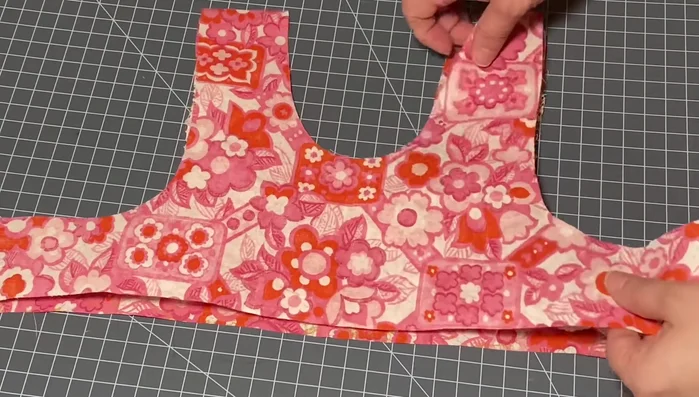
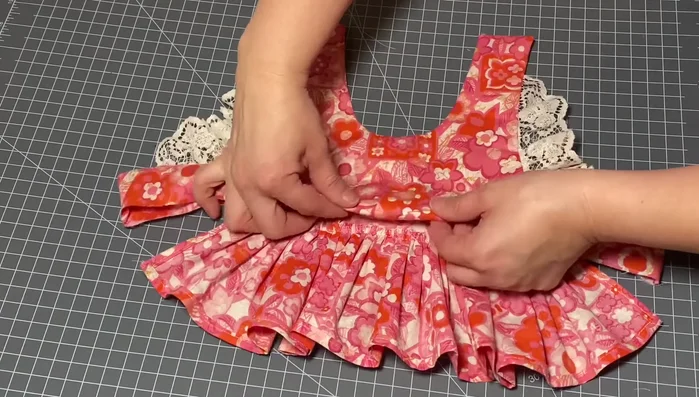
Attach Sleeves to Bodice Assemble Bodice
- Place the second bodice piece on top of the first (with lace), right sides together, and pin or clip. Sew around the edge, leaving the bottom open.
- Cut corners and notches to reduce bulk, turn right side out, and press.
Assemble Bodice Prepare Skirt
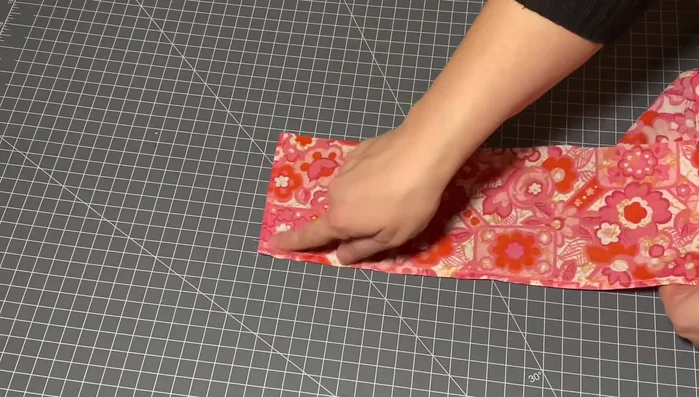
- Cut and hem the skirt fabric. Gather the top edge for attaching to the bodice.
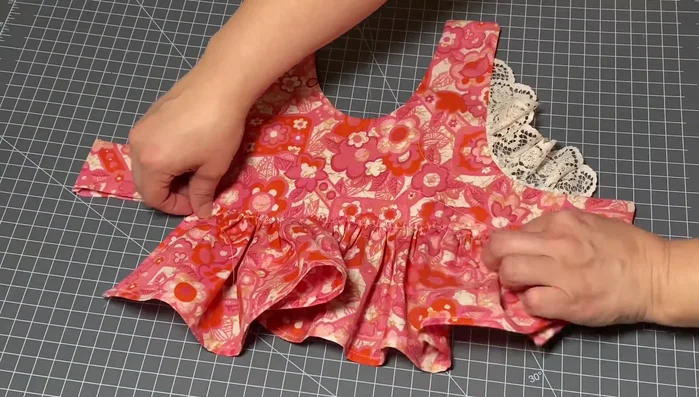
Prepare Skirt Attach Skirt to Bodice
- Gather two skirt pieces separately. Pin the gathered skirts to the bodice, starting from the center and working outwards. Sew the skirt to the bodice.
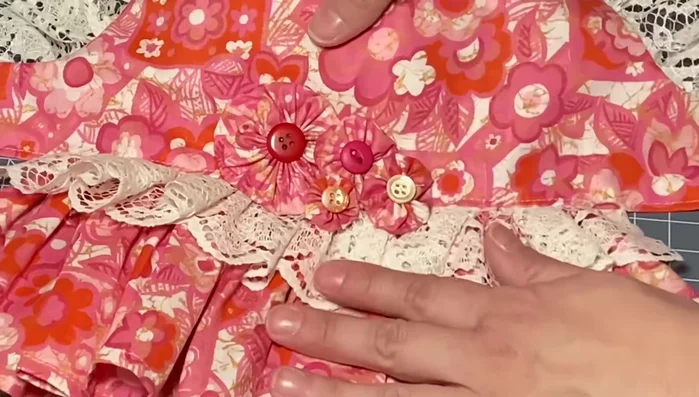
Attach Skirt to Bodice Close and Finish Dress
- Fold the back bodice piece over the raw edge, pin, and sew to close the opening.
- Attach velcro closures and decorative elements like fabric yo-yos.
Close and Finish Dress

Read more: DIY Dog Sweater: Cozy Knit Creations for Your Pup
Tips
- Add extra inches to your lace measurements for gathering.
- Use the largest stitch size and highest tension on your sewing machine for gathering lace, or manually gather using the loose threads.
- Pin or clip the gathered lace carefully to ensure it's evenly distributed and the pretty side faces outwards.
- Cut notches to reduce bulk around the arm and neck bends after sewing the bodice.
- Gather skirt pieces individually for a more unique and fluffy look.