Spoil your feline friend with a cozy and stylish new hangout! This easy macrame cat hammock tutorial is perfect for beginner crafters looking to add a touch of handmade charm to their homes and provide their cats with a delightful perch. Forget expensive store-bought cat beds – with just a few simple knots and some readily available materials, you can create a unique and comfortable resting spot your cat will adore. Imagine the purrs of contentment as your cat snuggles into their new handcrafted haven, a testament to your creativity and love.
This project is surprisingly simple and requires minimal tools, making it ideal for even the most inexperienced macrame enthusiasts. We'll guide you through each step, from choosing the right cord to securing the final knot, ensuring a successful and enjoyable crafting experience. Ready to get started? Let's dive into the step-by-step instructions and transform some simple cord into a purrfectly comfy cat hammock!
Preparation and Safety Guidelines
- 5mm cotton cord
- S-hook
- Wooden rings (7 inches and 12 inches diameter)
- Square pillow (optional)
- Always supervise your cat while they are using the hammock. Ensure the knots are secure and the hammock is properly supported to prevent falls or injury.
- Use strong, cat-safe materials. Avoid using anything that could be easily chewed or swallowed, causing choking hazards. Natural fibers like cotton are generally preferred.
- Regularly inspect the hammock for any signs of wear and tear. Replace or repair it immediately if you find any loose knots, frayed cords, or damaged areas to ensure your cat's safety.
Step-by-Step Instructions
Prepare the Foundation
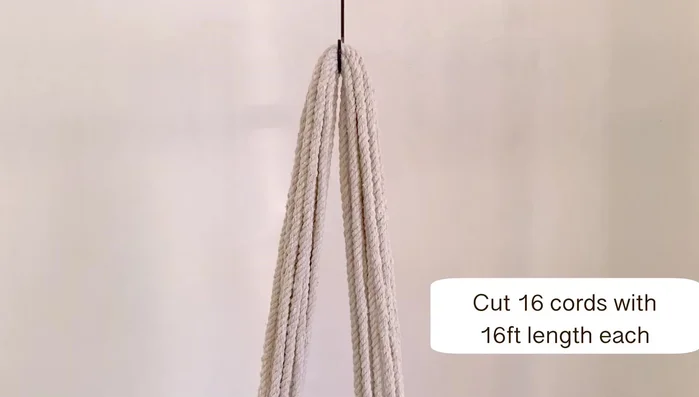
- Prepare 16 cords, each 16 feet long. Find the middle of the cords and attach them to the S-hook.
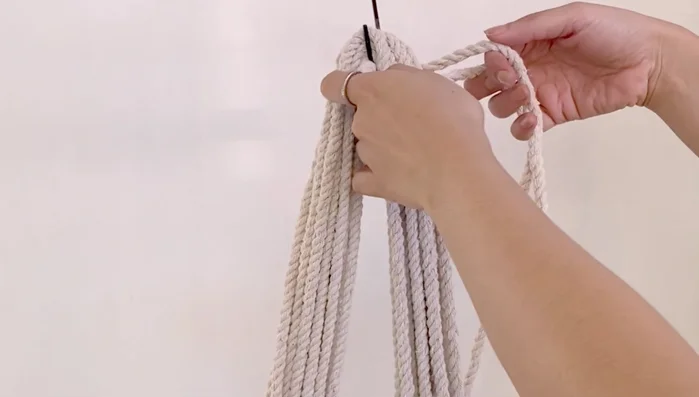
- Cut another cord (12 feet long) and wrap it around one side of the cords attached to the S-hook. Tie a square knot.
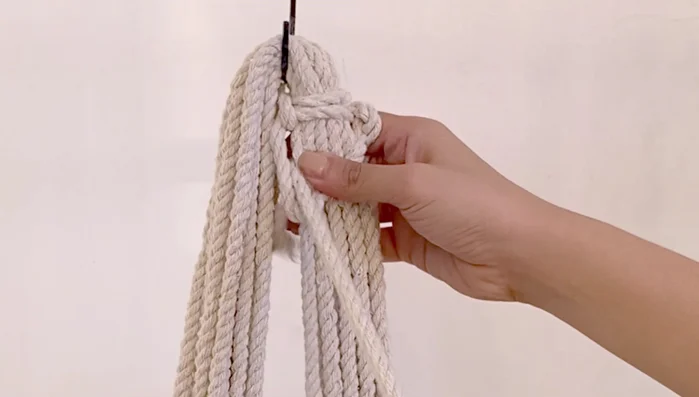
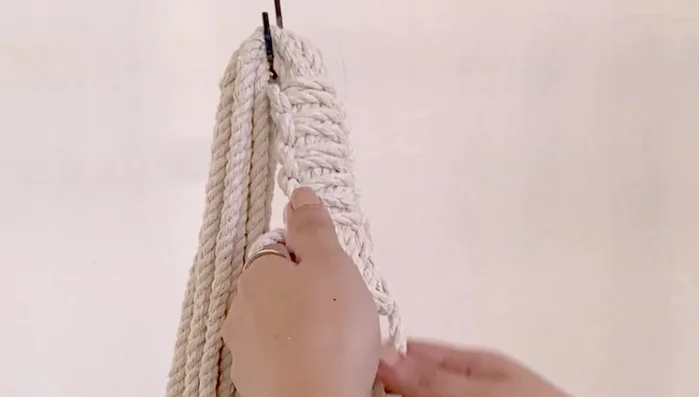
- Continue making square knots along the cords, leaving small spaces between them for aesthetic appeal. Make sure knots are tight.
- After approximately 8 inches of square knots, find the middle of the cords again and attach them to the S-hook.

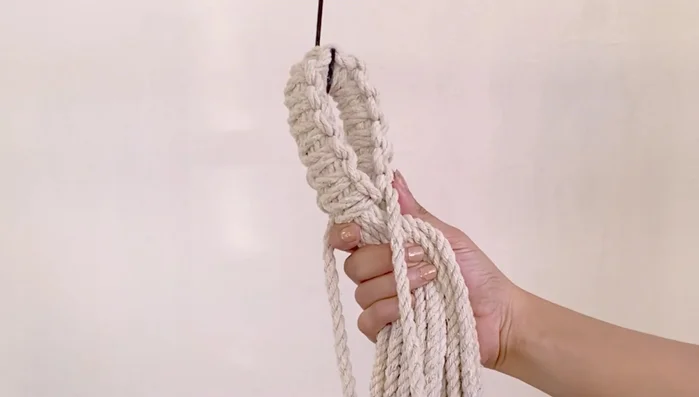
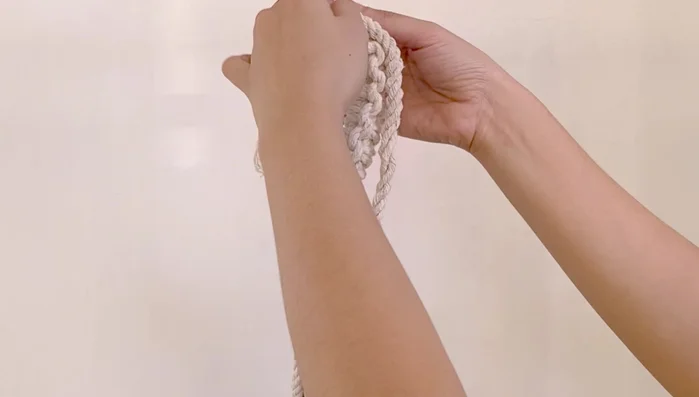
Prepare the Foundation Create the Top Spiral
- Tie another square knot, this time including cords from both sides. Ensure the knot is tight.
- Create a spiral design using a series of inverted four knots until reaching the desired height (2.5 inches in this example).
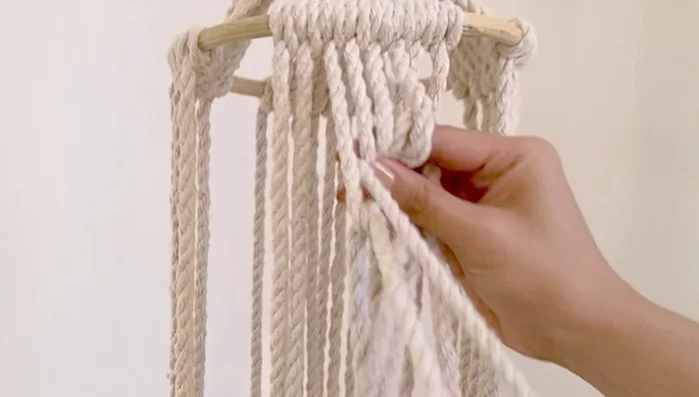
Create the Top Spiral Attach Top Ring & Create Fishbone Pattern
- Attach the 7-inch diameter wooden ring. Divide the 32 cords into four sections (8 cords each). Make a simple knot on each side to guide the even placement of the wooden ring. Attach the wooden ring using simple knots, then securely attach using double half-hitches on each cord.
- Make square knots with the four middle cords of each section, then use two cords on each side to create additional square knots, using the same middle cords as before. Repeat this process, creating what the presenter calls a 'fishbone' pattern.
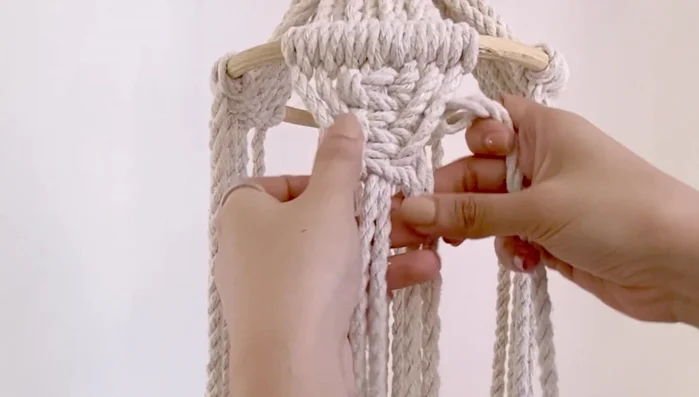
Attach Top Ring & Create Fishbone Pattern Complete the Hanging Section
- Repeat the square knot pattern until the desired length (18 inches) is achieved, then attach the 12-inch diameter wooden ring using double half-hitch knots.
Complete the Hanging Section Fill Bottom Gaps & Create Bottom Section
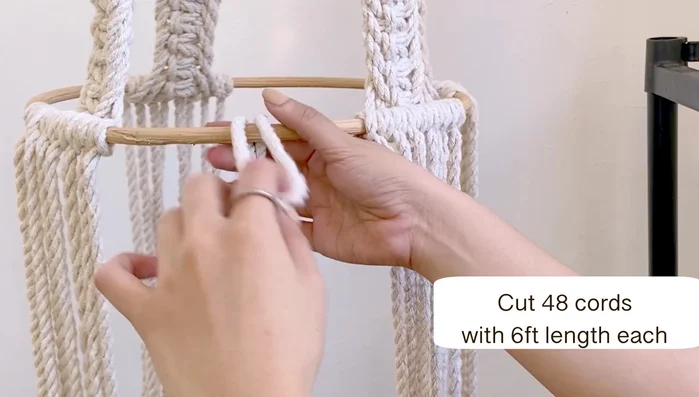
- Fill the gaps between the sections using 48 cords (6 feet long each), attaching them with reverse larks head knots.
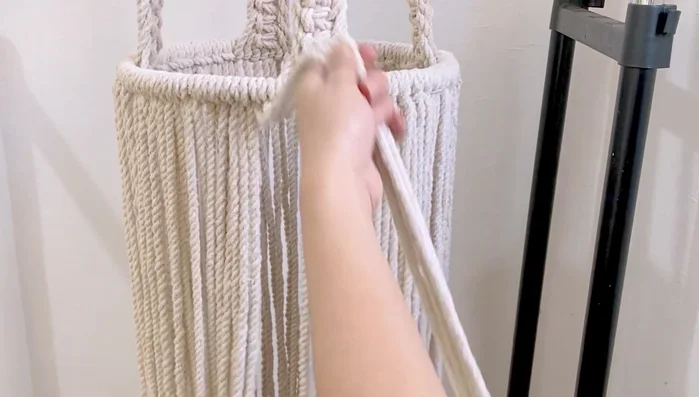
- Make nine rows of square knots between the bottom sections.
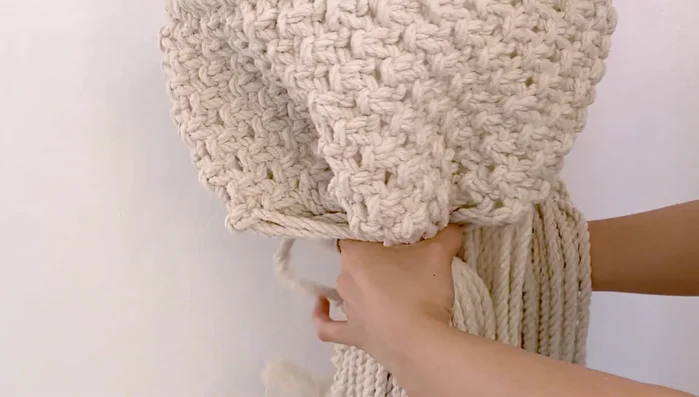
- Gather all the bottom cords and tie a simple knot to secure them. Place a square pillow (or similar object) inside the hammock to create shape. Tie a gathering knot at the bottom, using a separate 3-foot cord wrapped around 7 times to create a secure closure. Trim excess cord.
Fill Bottom Gaps & Create Bottom Section

Read more: DIY Cuddly Cat & Dog Bed: A Super-Warm, Easy Tutorial
Tips
- Ensure knots are tight throughout the process to create a sturdy and well-formed hammock.
- The number of square knots may vary, focus on achieving the correct height (18 inches for each section).
- Use a guide knot before making a gathering knot to ensure even distribution.