Is your feline friend feeling a little chilly, or perhaps just needs a stylish new accessory to complete their already impeccable look? Then look no further! This easy no-sew reversible cat cap DIY tutorial is perfect for crafters of all skill levels, even those who've never picked up a needle and thread. Forget complicated patterns and frustrating techniques; we're crafting a cozy and adorable cat cap using only fabric scraps and a few simple tools. This project is not only quick and budget-friendly but also allows for endless customization, letting you create a unique hat perfectly tailored to your cat's personality and your own creative flair.
Forget expensive pet boutiques! With this tutorial, you can whip up a stylish, reversible cat cap in minutes, making use of old t-shirts, fabric remnants, or even those beloved socks that have lost their mate. The best part? It's entirely no-sew, meaning no experience is necessary to create a warm and wonderfully whimsical hat for your furry companion. Ready to get started and create a purr-fectly adorable cat accessory? Let's dive into the step-by-step instructions!
Preparation and Safety Guidelines
- Fabric scraps or new material
- Scissors
- Iron
- Lighter (optional)
- Sewing machine or needle and thread
- Stuffing (old pillows, etc.)
- Measuring tape
- Always supervise your cat while wearing the cap. Remove immediately if they show signs of distress, such as excessive scratching, biting, or panting.
- Ensure the fabric used is soft, breathable, and non-toxic. Avoid using materials with small parts that could be ingested.
- The cap should fit loosely and comfortably. A too-tight cap can restrict breathing or blood flow.
Step-by-Step Instructions
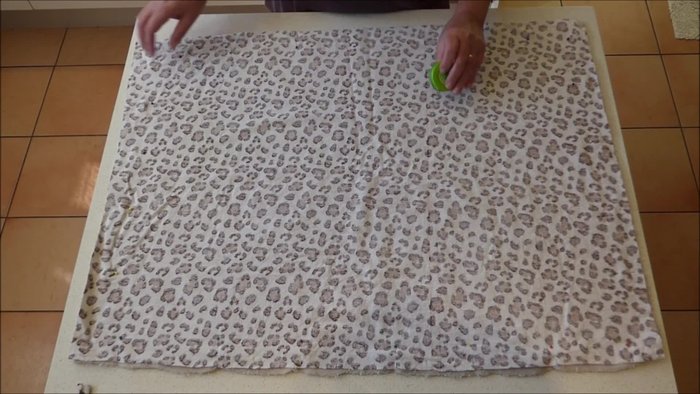
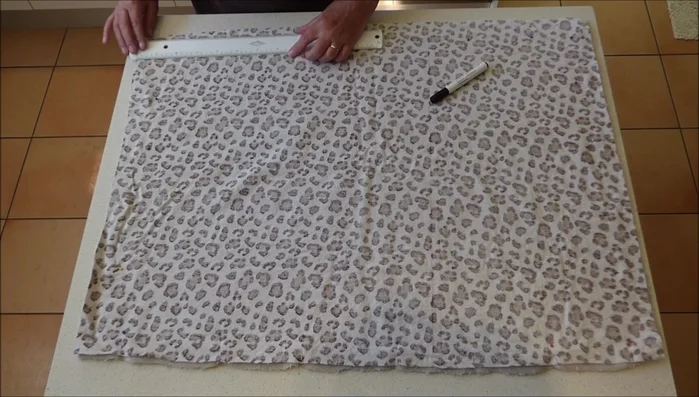
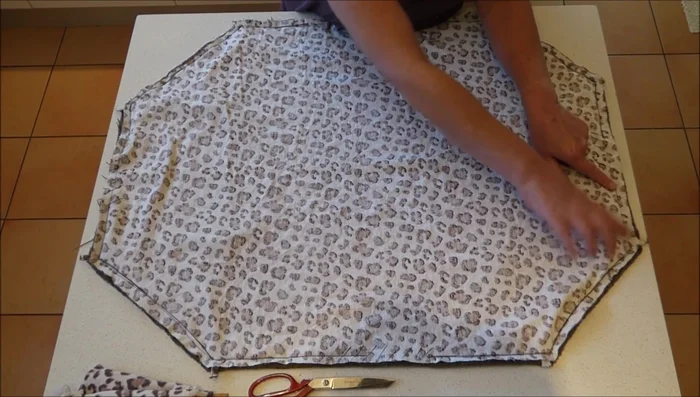
Cut Fabric Pieces
- Cut two rectangular pieces of fabric. The larger measurement is approximately 85 centimeters (33.5 inches), and the shorter side is 66 centimeters (26 inches).

Cut Fabric Pieces Prepare Ribbons
- Cut eight strips of fabric (or use ribbon) measuring 35 centimeters (14 inches) long and 4 centimeters (1.5 inches) wide. Iron and fold each strip in half lengthwise, then sew the edges together to create a 1-centimeter (0.5-inch) wide ribbon. Seal the raw edges with a lighter (optional) to prevent fraying.
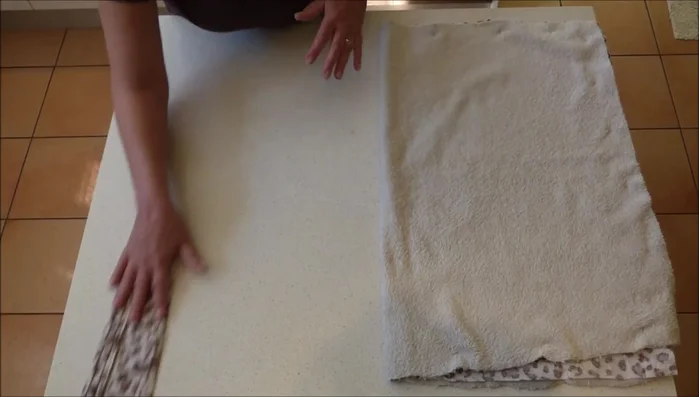
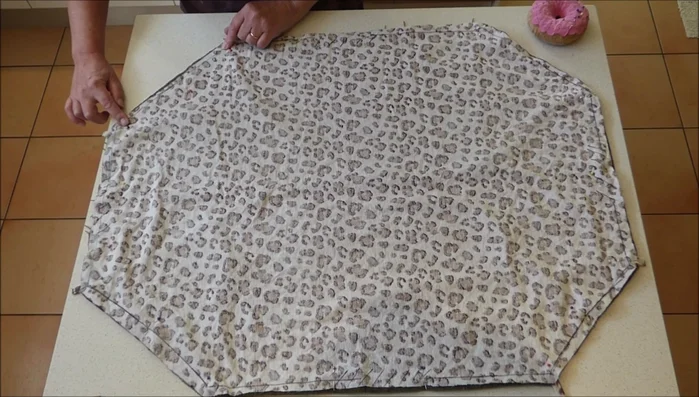
Prepare Ribbons Prepare Main Fabric
- Cut off 20 centimeters (8 inches) from the long edges of the main fabric pieces and 12 centimeters (5 inches) from the short edges, leaving one short edge for sewing.
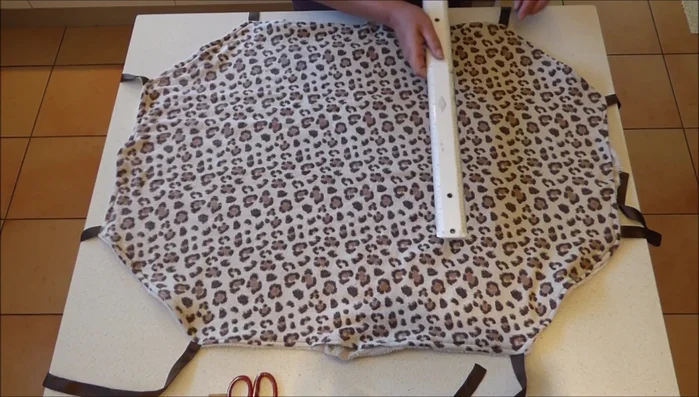
Prepare Main Fabric Attach Ribbons
- Place the ribbons along the edges of the fabric, with the longer end of each ribbon tucked inside the fabric. Pin the ribbons in place, ensuring that the short ends are tucked in at the corners.
Attach Ribbons Sew Main Fabric
- Sew around the edges of the fabric, leaving gaps for stuffing. The gaps should be along each side and a little square in the middle.
Sew Main Fabric Stuff the Cap
- Turn the fabric right side out and stuff it with filling material until it is firm and resembles the shape of a cat cap.
Stuff the Cap Sew Final Seams
- Sew closed the openings you left for stuffing.
Sew Final Seams Tie and Finish
- Tie the ribbons to complete the cat cap.
Tie and Finish


Read more: DIY Cuddly Cat & Dog Bed: A Super-Warm, Easy Tutorial
Tips
- Use a lighter to seal the edges of your ribbons to prevent fraying. This is optional but helps with durability.
- Use a ballpoint needle (90/14 Jersey needle) for sewing the fabric to prevent snagging.
- Have fun with colors and materials! Experiment with different fabrics and ribbons to create unique cat caps.