Spoil your furry friend with a cozy, custom-made dog bed, and save money in the process! This easy-to-follow tutorial will guide you through creating a comfortable and durable dog bed complete with a convenient zipper closure. Forget expensive pet store options – you can craft a perfect sleeping space tailored to your dog's size and your home's style, using materials readily available at fabric stores. A zippered bed offers the added advantage of easily removing and washing the cover, keeping it fresh and clean for your beloved pet. The best part? No advanced sewing skills are required!
This DIY project is surprisingly simple and rewarding, perfect for beginner sewers. We'll walk you through each step, from choosing the right fabric and measuring your dog to assembling the bed and inserting the zipper. Get ready to unleash your inner crafting genius and give your canine companion the ultimate gift of comfort. Let’s dive into the step-by-step instructions now!
Preparation and Safety Guidelines
- Foam (3 inches thick, or two thinner pieces)
- Fabric (cotton canvas, denim, or fleece)
- Sturdy zipper (non-separating preferred)
- Cord (1/4 inch thick)
- Scissors
- Large ruler
- Fabric marker
- Sewing machine
- Zipper foot
- Always supervise your dog when they are using their new bed, especially initially, to ensure they don't chew or swallow any loose fabric or zipper components.
- Choose fabrics that are durable, easy to clean (machine washable is ideal), and non-toxic. Avoid using fabrics with small, loose parts that could become choking hazards.
- Ensure the zipper is securely closed to prevent your dog from accessing the inner filling and potentially ingesting it.
Step-by-Step Instructions
Prepare Materials
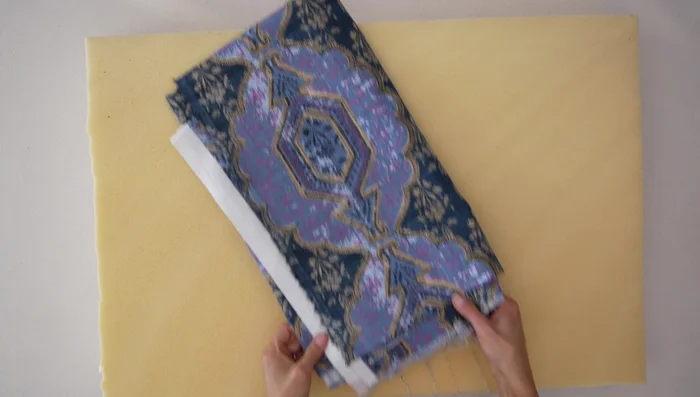
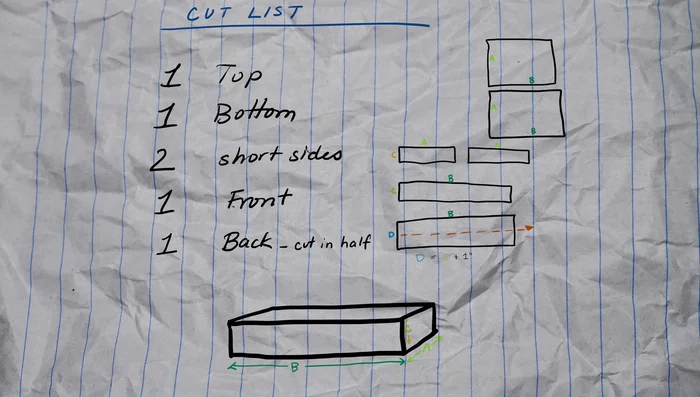
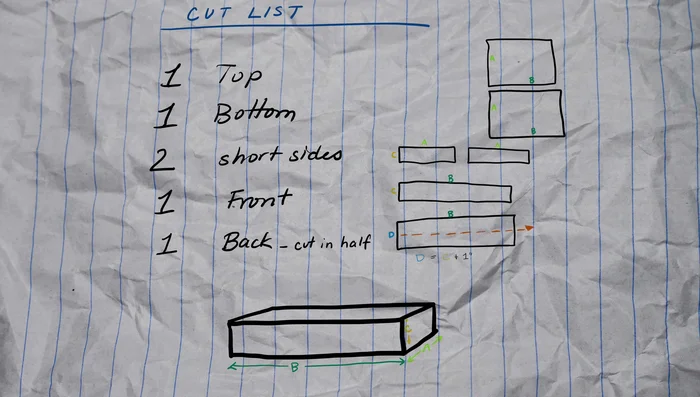
Cut Foam and Fabric
- Cut foam to desired size.
- add 1 inch to each side for seam allowance.
- height of foam + 1 inch seam allowance.
- length of side + 1 inch, height + 2 inches. Fold in half lengthwise and cut to create two narrow pieces.

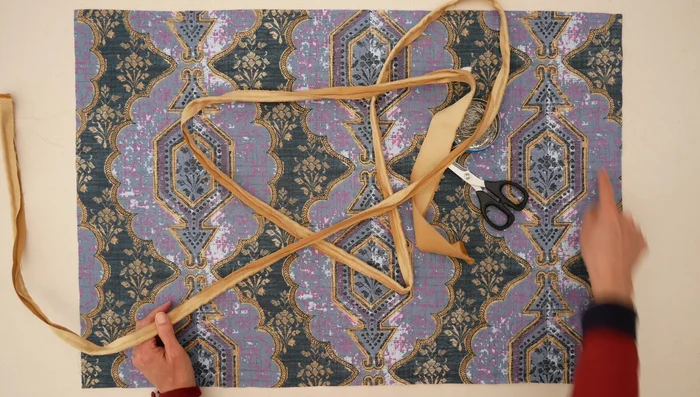
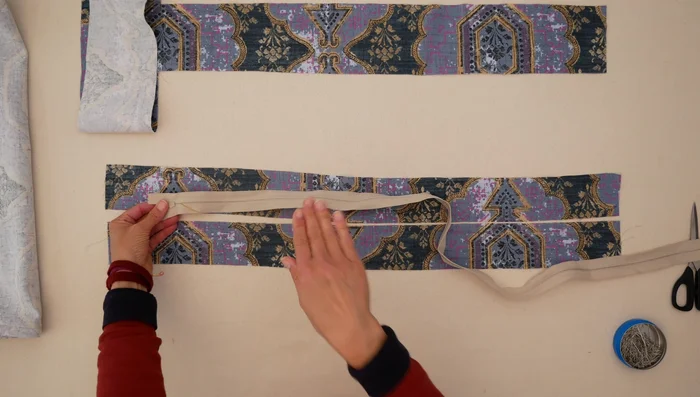
Cut Foam and Fabric Create Piping (Optional)
- Cut fabric strips 1 1/2 inches wide (adjust based on cord width). Sew strips together at a 45° angle to create long strips. Lay cord in center, sew close to cord using a zipper foot, leaving a couple of inches loose at each end.
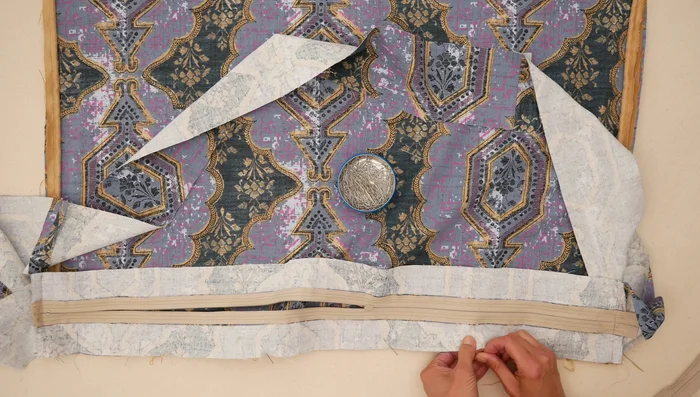
Attach Piping to Top
- Sew piping to the right side of the top piece, starting in a corner. Clip seam allowance at corners to allow for turning.
Attach Piping to Top Attach Zipper
- Place zipper face down on top back piece, aligning long edges. Sew zipper tape to the top back piece, then to the bottom back piece. Press fabric next to zipper teeth, then sew close to zipper teeth on both sides to reinforce.
Attach Zipper Sew Side Pieces
- Attach side pieces to the back pieces, right sides together. Ensure no pieces are twisted.
Sew Side Pieces Attach Top to Sides
- Sew the top piece to the side pieces, right sides together, sewing close to the piping cord.
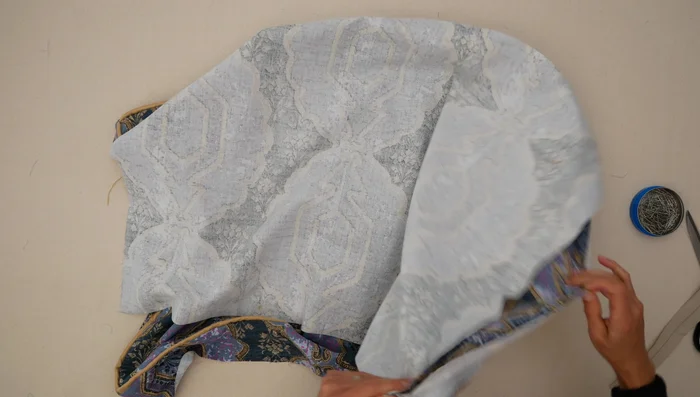
Attach Top to Sides Attach Bottom and Insert Foam
- Sew the bottom piece to the side pieces with 1/2 inch seam allowance, keeping zipper partially open. Turn right side out and insert foam.
Attach Bottom and Insert Foam


Read more: DIY Glamorous Pet Beds from Upcycled Furniture: A Step-by-Step Guide
Tips
- Pre-wash and dry fabric to avoid shrinkage.
- Use a non-separating zipper for easier sewing. If using a separating zipper, it might cost a little more.
- Sew piping strips together at a 45° angle to avoid bulk.
- Clip corners of piping to allow for smooth turning.
- Leave some fabric and cord loose at the ends of the piping for easier attachment and finishing.