Spoiling your furry friend doesn't have to break the bank! Creating a cozy and comfortable dog bed can be surprisingly easy and affordable, even if you've never touched a needle and thread. This simple guide will walk you through the process of building a delightful no-sew dog bed, perfect for beginner crafters and budget-conscious pet owners alike. Forget expensive store-bought options – with just a few readily available materials and a little bit of time, you can whip up a custom-made bed tailored to your dog's size and preferences.
This DIY project eliminates the need for any sewing, making it accessible to everyone, regardless of their crafting expertise. You'll be amazed at how quickly you can transform basic supplies into a snug haven for your beloved canine companion. Ready to get started on this rewarding and surprisingly simple project? Let's dive into the step-by-step instructions below!
Preparation and Safety Guidelines
- Felt (2, 3, or 4 yards depending on dog size)
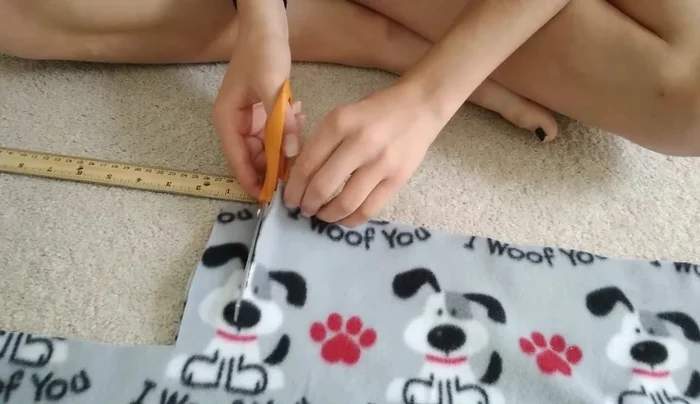
- Sharp sewing scissors
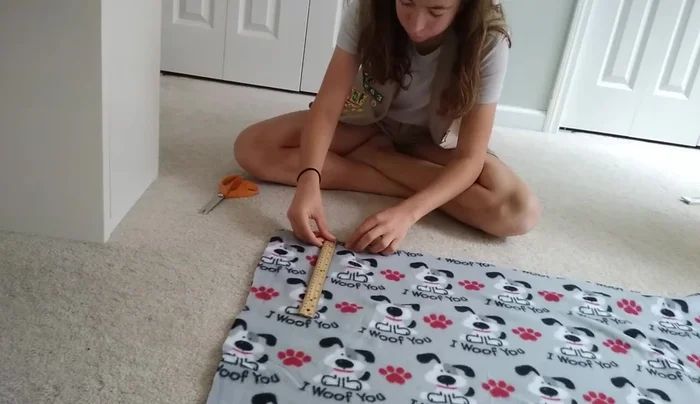
- Ruler or yardstick
- Filling (polyfill, stuffing, or memory foam - note: avoid for donation to humane societies)
- Adult supervision (if a child is making the bed)
- Always supervise your dog with any new bedding to ensure they don't ingest any stuffing or materials.
- Choose fabrics and stuffing materials that are non-toxic and safe for pets. Avoid anything that could be a choking hazard or cause an allergic reaction.
- Ensure the finished dog bed is sturdy enough to support your dog's weight and prevent sagging or collapse, which could be uncomfortable or cause injury.
Step-by-Step Instructions
Prepare the Felt
- Cut the felt in half to create two identical pieces.
- Cut off the border of both felt pieces for clean edges.
- Cut off the corners of both felt pieces (5 inches by 5 inches).

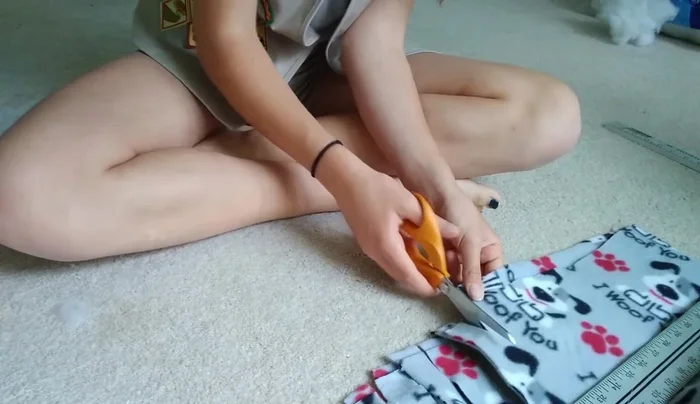
Prepare the Felt Create the Fringe
- Cut 5-inch high slits, 1 inch apart, along all four sides of the felt.
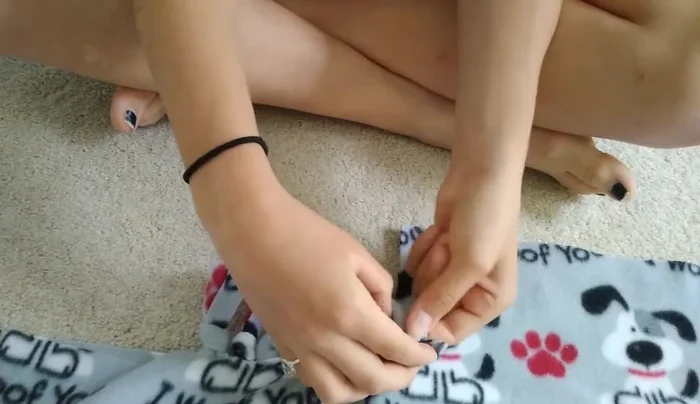
Create the Fringe Assemble the Bed (Sides 1-3)
- Tie three of the edges together, keeping the strips together and wrapping around your finger before pulling the end through.
Assemble the Bed (Sides 1-3) Stuff the Bed
- Fill the blanket with stuffing or foam (avoid for donation).
Stuff the Bed Assemble the Bed (Final Side)
- Tie the final side the same way as the others.
Assemble the Bed (Final Side)


Read more: DIY Glamorous Pet Beds from Upcycled Furniture: A Step-by-Step Guide
Tips
- If you're a kid, make sure you have adult supervision.
- For small dogs use 2 yards of felt, 3 yards for medium, and 4 yards for large dogs.
- If donating to the humane society, do not use filling that could be dangerous if ingested.